
CA Designs HID Kit Install (Photos)
#1
 12-24-2009, 08:35 PM

Join Date: Sep 2009
Location: Peninsula, Bay Area
Posts: 338
Rep Power: 55 

CA Designs HID Kit Install (Photos)
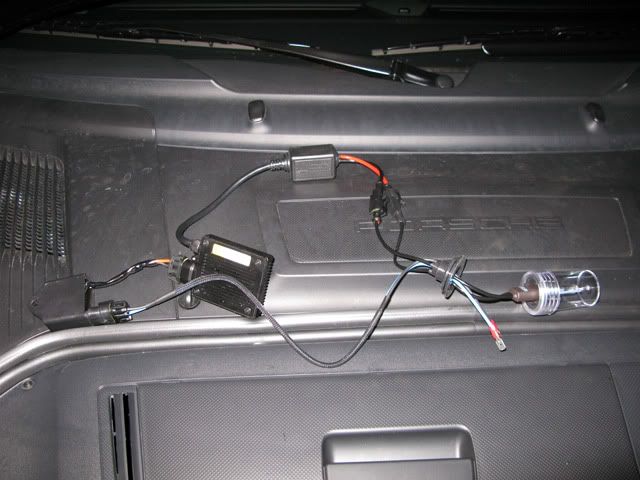
Hey guys, I'm updating this from my garage right now. I'm installing ACG San Diego's HID kit
execstudio.com/products_lighting_hid.html
The passenger side is done and I just wanted to post some quick shots. I was afraid of throwing codes, so I specifically ordered their error cancellation unit. First impressions: Wow that was easy. I still haven't taped the ballast / all that to the frame yet (shoved everything in and fired it up), but I see no issues at all with the kit aside from that thin line of darkness, which I assume would be shadow from the bulb. I paid ~120 for everything shipped.
Thoughts and comments welcome.
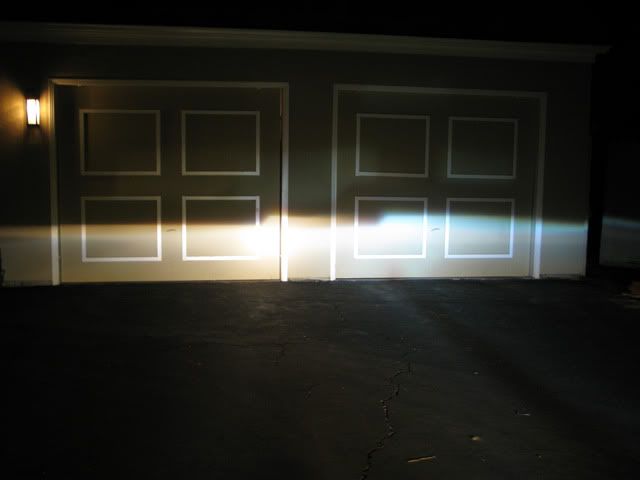

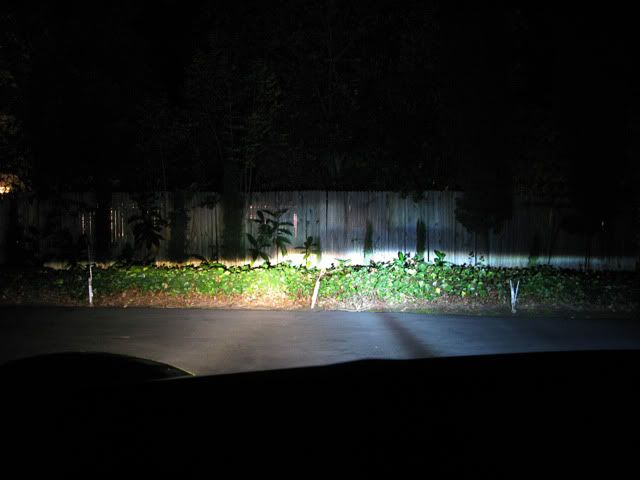
And here's how it looks with both in:
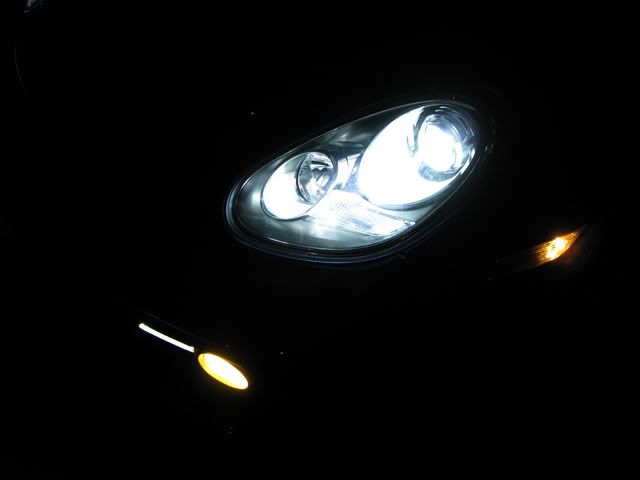
I ate dinner in between sides, but I'd say this is an easy 20-minute swap if you went full steam through.
Just for kicks I'm experimenting with another set of bulbs (few mods since the OP)
execstudio.com/products_lighting_hid.html
The passenger side is done and I just wanted to post some quick shots. I was afraid of throwing codes, so I specifically ordered their error cancellation unit. First impressions: Wow that was easy. I still haven't taped the ballast / all that to the frame yet (shoved everything in and fired it up), but I see no issues at all with the kit aside from that thin line of darkness, which I assume would be shadow from the bulb. I paid ~120 for everything shipped.
Thoughts and comments welcome.
And here's how it looks with both in:
I ate dinner in between sides, but I'd say this is an easy 20-minute swap if you went full steam through.
Just for kicks I'm experimenting with another set of bulbs (few mods since the OP)
Last edited by tradecraft; 09-07-2010 at 11:07 PM. Reason: embedded link

#3
12-25-2009, 02:55 AM
Join Date: Sep 2009
Location: Peninsula, Bay Area
Posts: 338
Rep Power: 55 
Hoen Endurances fogs. Damn my car looks like a 4x4 - I should have waited until after my JIC install.
Last edited by tradecraft; 12-25-2009 at 03:03 AM.
#4
12-26-2009, 01:10 PM

Thanks for the review. Glad that everything is working. I will make sure that the error canceller will be included with the kit when we ship it out. Strangely, some cars need it and some do not. We will just include it standard with a standard kit from now on.

#6
01-11-2010, 03:48 PM
nice! thanks for the pics.
where did you hide/tape/zip-tie all the components such as the ballast, igniter, etc.?
I'm looking to do this on my gf's car and I've done it before on other cars, but only for fogs, so I'm somewhat concerned about replacing the entire low beam with this... (plus I want her to be safe.)
also, in this picture, what is the bluish wire with the red tip with the ring-looking connector right below the bulb?
#7
01-11-2010, 05:40 PM
Join Date: Sep 2009
Location: Peninsula, Bay Area
Posts: 338
Rep Power: 55 nice! thanks for the pics.
where did you hide/tape/zip-tie all the components such as the ballast, igniter, etc.?
I'm looking to do this on my gf's car and I've done it before on other cars, but only for fogs, so I'm somewhat concerned about replacing the entire low beam with this... (plus I want her to be safe.)
also, in this picture, what is the bluish wire with the red tip with the ring-looking connector right below the bulb?
When you unplug your stock bulb, those two (the other one looks the same but is hidden in my pic) connectors go into your stock socket; if the bulb doesn't fire up the first time, reverse the order of the two connectors.
Last edited by tradecraft; 09-07-2010 at 11:06 PM.
Trending Topics
#10
03-28-2010, 09:31 PM
I just did this this weekend with a kit that one of my friends got me on my gf's 2007 Cayman S.
The car was fine for a day and the lights looked fantastic. However, today, the right side wouldn't turn on and the car threw a "Check Right Dipped Beam" error.
I guess I have to get error cancellers (although I was told it was a "digital" kit and wouldn't require any). Or, I may as well order this kit you got.
My question is, why did you leave the wires hanging out of the headlight housing and then tuck them into the body? We were able to fit the entire kit inside the headlight housing and had no wires sticking out (we double sided taped the ballast to the top cover of the headlight housing).
Is there a difference in headlight housings for the 987mk.2?
Thanks!
#11
03-28-2010, 10:24 PM
Join Date: Sep 2009
Location: Peninsula, Bay Area
Posts: 338
Rep Power: 55 I just did this this weekend with a kit that one of my friends got me on my gf's 2007 Cayman S.
The car was fine for a day and the lights looked fantastic. However, today, the right side wouldn't turn on and the car threw a "Check Right Dipped Beam" error.
I guess I have to get error cancellers (although I was told it was a "digital" kit and wouldn't require any). Or, I may as well order this kit you got.
My question is, why did you leave the wires hanging out of the headlight housing and then tuck them into the body? We were able to fit the entire kit inside the headlight housing and had no wires sticking out (we double sided taped the ballast to the top cover of the headlight housing).
Is there a difference in headlight housings for the 987mk.2?
Thanks!
I could have stuffed everything into the headlight housing but I did not want to worry about heat issues so I separated things during the install.
Last edited by tradecraft; 03-28-2010 at 10:30 PM.
#12
03-28-2010, 11:25 PM
I looked at a guide for the gen1 and everything looked nearly identical. I might have had one more or less screw, or maybe I'm mixing it up with the fogs. I assume the kit you used wasn't the one I reviewed?
I could have stuffed everything into the headlight housing but I did not want to worry about heat issues so I separated things during the install.
I could have stuffed everything into the headlight housing but I did not want to worry about heat issues so I separated things during the install.
have you noticed any changes in your radio reception with the lights on? we noticed that with the lights on, they somehow interfered with the radio reception (the reception was weaker).
#13
03-29-2010, 12:47 AM
Join Date: Sep 2009
Location: Peninsula, Bay Area
Posts: 338
Rep Power: 55
I rarely listen to the radio, but I didn't notice any changes to reception.
#14
03-31-2010, 01:50 AM
Thanks for the help, Scott.
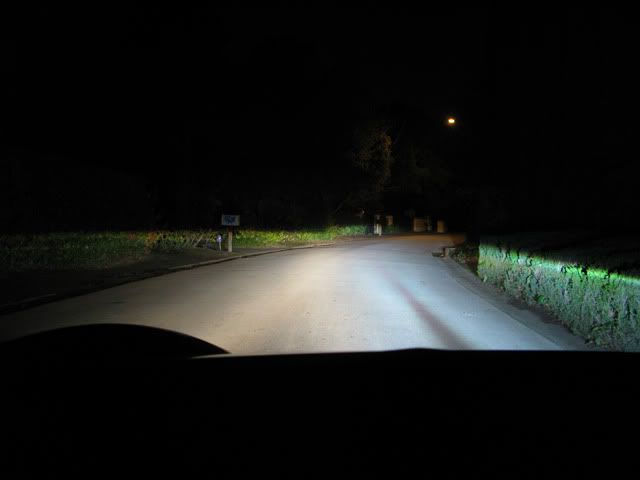
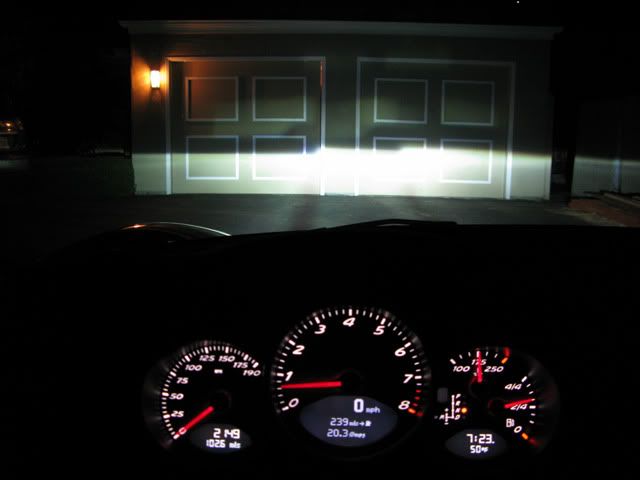
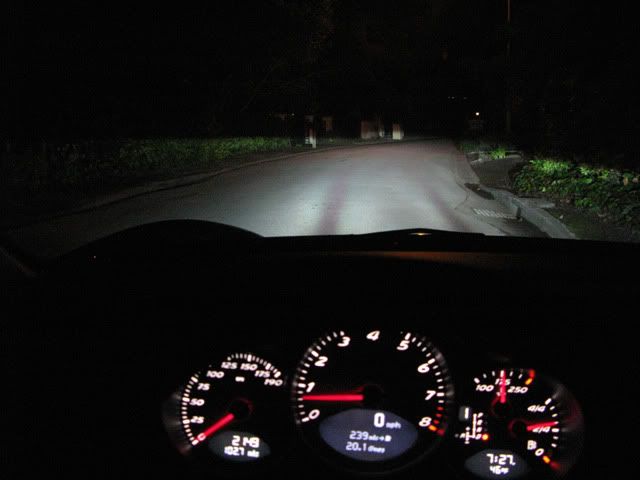
Here's how the car looked for the few hours when everything was working properly:

I opened it up tonight and it looks like the ballast went out on the O-Nex kit (I swapped the ballasts).
So, I just placed the order for a 5000k kit (I wanted 4300k, but it looks like they didn't have one. So, I'd rather have more blue than yellow for the high beams). I'm hoping that since they're only in San Diego that I can have the kit before the weekend.
I think I'm going place it inside the light housing as I did the first time. I think there's ample space to place it inside the housing.
BTW, what LED license plate lights are you using?
Thanks again.
Here's how the car looked for the few hours when everything was working properly:
I opened it up tonight and it looks like the ballast went out on the O-Nex kit (I swapped the ballasts).
So, I just placed the order for a 5000k kit (I wanted 4300k, but it looks like they didn't have one. So, I'd rather have more blue than yellow for the high beams). I'm hoping that since they're only in San Diego that I can have the kit before the weekend.
I think I'm going place it inside the light housing as I did the first time. I think there's ample space to place it inside the housing.
BTW, what LED license plate lights are you using?
Thanks again.
#15
03-31-2010, 07:49 AM
Join Date: Sep 2009
Location: Peninsula, Bay Area
Posts: 338
Rep Power: 55
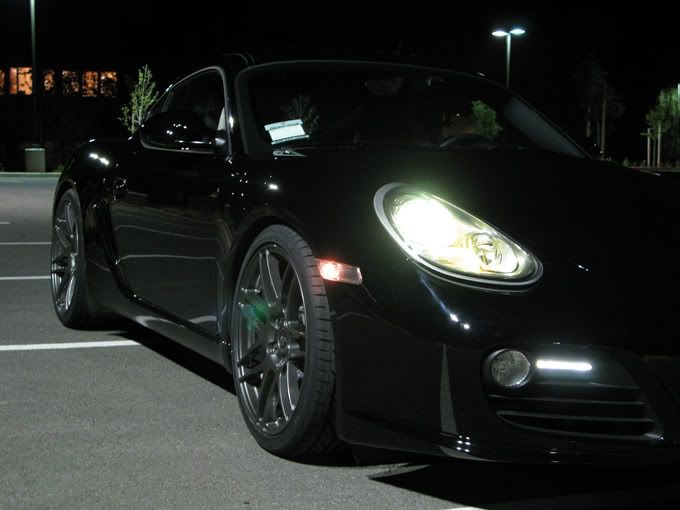
KrafTecknik V3's. I had Hoens but they kept burning out on me...no problem with these V3's so far. The top pic isn't too accurate color-wise.
http://www.planet-9.com/site-vendors...ght-bulbs.html
http://www.planet-9.com/site-vendors...ght-bulbs.html