New member, recent 924 owner...

#17
 10-11-2008, 03:20 PM
Join Date: Jul 2008
Location: Redmond, OR
Posts: 154
Rep Power: 23 
Here is all of the updates since september all thrown together. I hope you all enjoy.
\\Today I got pretty much all of the fuel system out except for the intake manifold and a few of the lines which I am very iffy about taking out until I'm ready to put the new one just to keep from having any contaminants in the lines and engine, etc....
The injectors are crap (at least the cold start injector) so i assume the rest look insanely dirty. After I took off the throttle pieces I noticed that it's in need of a dire cleaning. It functions, and needs a cleanup... but it's in perfectly fine working condition, just dirty.

I also took out a huge majority of brackets and rusted parts to add to the box of glassbeading that needs to be done. It'll feel nice to get it all glassbeaded and painted...
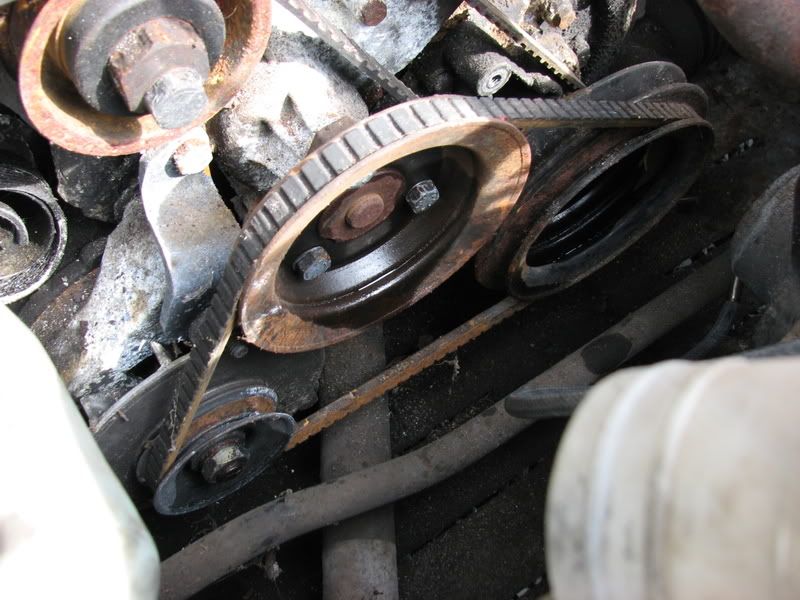
I need to get a repair manual to identify what is what. But here's some pictures of the timing belt and accessories. I found what appears to be A/C at the bottom left (I assume). Which needs to go if it is....
(edited note - i found out later that this car has no ac, i found out what happened to be pumps and alt, etc... and the top was the emissions)
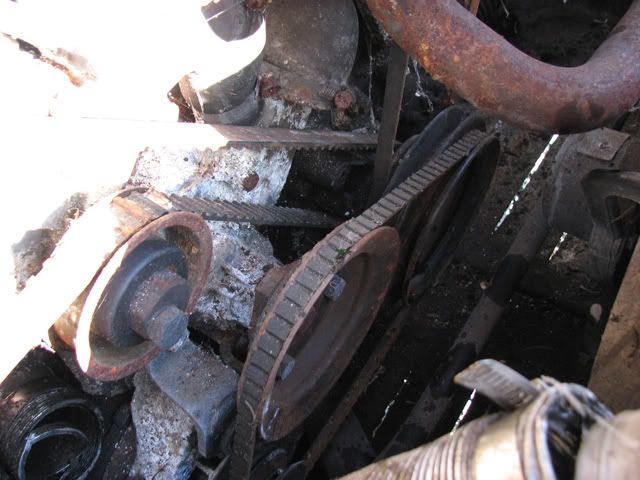
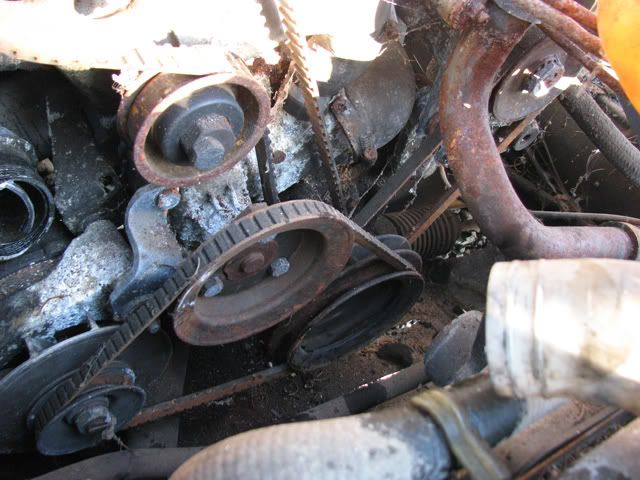
Additionally, it seems that actually a LARGE majority of the hoses are actually still flexible and seem fine... no cracks and no splitting. Amazingly, even the timing belt didn't seem too bad... (still going to replace it of course).
As you can see, anything with a gasket is sealed, and even though all of this surface corrosion and rust occurred, almost anything electrical is perfectly fine.
\\Today I got pretty much all of the fuel system out except for the intake manifold and a few of the lines which I am very iffy about taking out until I'm ready to put the new one just to keep from having any contaminants in the lines and engine, etc....
The injectors are crap (at least the cold start injector) so i assume the rest look insanely dirty. After I took off the throttle pieces I noticed that it's in need of a dire cleaning. It functions, and needs a cleanup... but it's in perfectly fine working condition, just dirty.
I also took out a huge majority of brackets and rusted parts to add to the box of glassbeading that needs to be done. It'll feel nice to get it all glassbeaded and painted...
I need to get a repair manual to identify what is what. But here's some pictures of the timing belt and accessories. I found what appears to be A/C at the bottom left (I assume). Which needs to go if it is....
(edited note - i found out later that this car has no ac, i found out what happened to be pumps and alt, etc... and the top was the emissions)
Additionally, it seems that actually a LARGE majority of the hoses are actually still flexible and seem fine... no cracks and no splitting. Amazingly, even the timing belt didn't seem too bad... (still going to replace it of course).
As you can see, anything with a gasket is sealed, and even though all of this surface corrosion and rust occurred, almost anything electrical is perfectly fine.
Last edited by CorsePerVita; 10-11-2008 at 03:30 PM.
#18
10-11-2008, 03:21 PM
Join Date: Jul 2008
Location: Redmond, OR
Posts: 154
Rep Power: 23
I also found out why this car is so hard to find parts for...
Keeping all the little brackets... don't want to lose this little bugger.
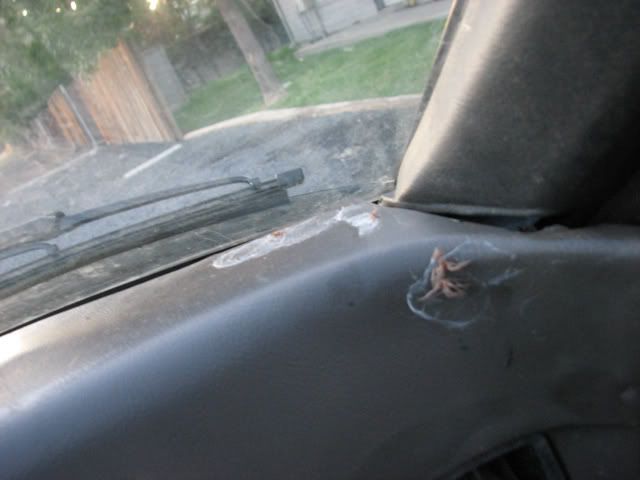
Last but not least I ripped out the dash cover and need to figure out what I want to do with it... replace the dash? Or, get a cover and put it on right...
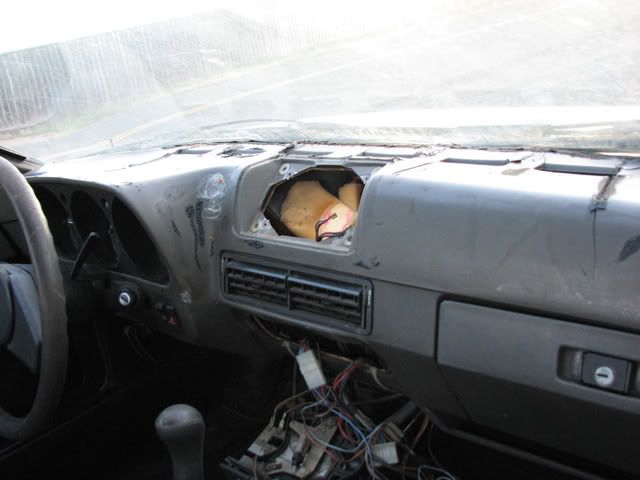
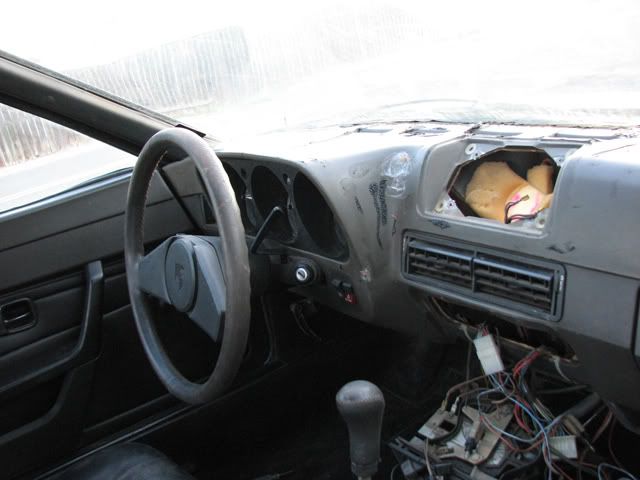
Mmmmm spiders.
So quick cliffnotes version:
- Removed all throttle pieces, coldstart injector, most of the fuel lines, several brackets holding in most of it.
- Removed brackets holding part of the cooling system
- All intake/Filters/Tubing removed for intake
- Hoses for vacuum lines checked, some removed... most were fine
- Removed dash cover
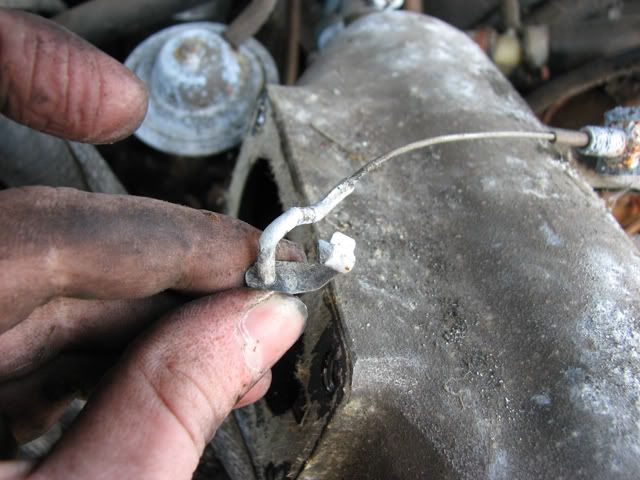
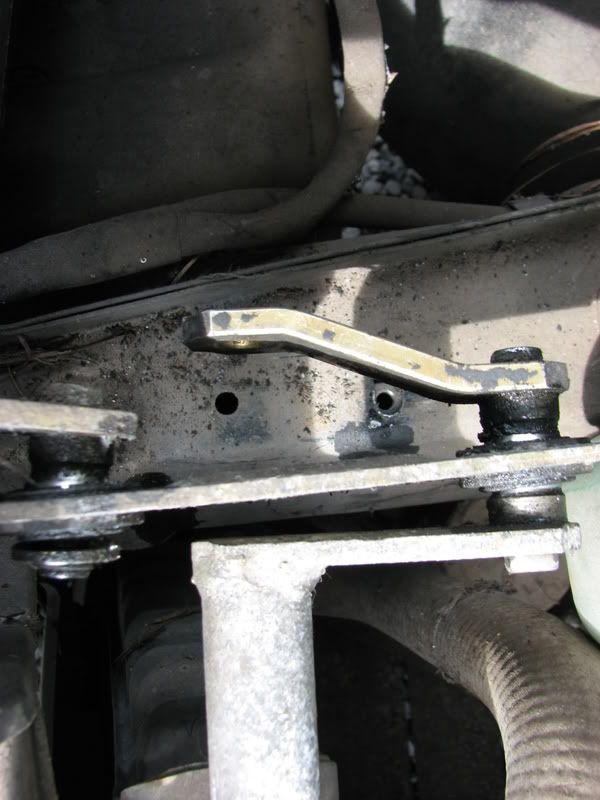
- Checked hood cable to make sure it wasn't rusted, pulled part of lever to be sandblasted
- All brackets, rusted pieces and pieces with corrosion added to the glassbead/paint box.
- Most fluid containers moved to the side to allow room to get to the fuel lines so they can be replaced (they route underneath the car and down to the accumulator)
- All throttle pieces removed into separate box to be checked for wear pieces and be rebuilt, then glassbeaded/painted
Keeping all the little brackets... don't want to lose this little bugger.
Last but not least I ripped out the dash cover and need to figure out what I want to do with it... replace the dash? Or, get a cover and put it on right...
Mmmmm spiders.
So quick cliffnotes version:
- Removed all throttle pieces, coldstart injector, most of the fuel lines, several brackets holding in most of it.
- Removed brackets holding part of the cooling system
- All intake/Filters/Tubing removed for intake
- Hoses for vacuum lines checked, some removed... most were fine
- Removed dash cover
- Checked hood cable to make sure it wasn't rusted, pulled part of lever to be sandblasted
- All brackets, rusted pieces and pieces with corrosion added to the glassbead/paint box.
- Most fluid containers moved to the side to allow room to get to the fuel lines so they can be replaced (they route underneath the car and down to the accumulator)
- All throttle pieces removed into separate box to be checked for wear pieces and be rebuilt, then glassbeaded/painted
#19
10-11-2008, 03:21 PM
Join Date: Jul 2008
Location: Redmond, OR
Posts: 154
Rep Power: 23
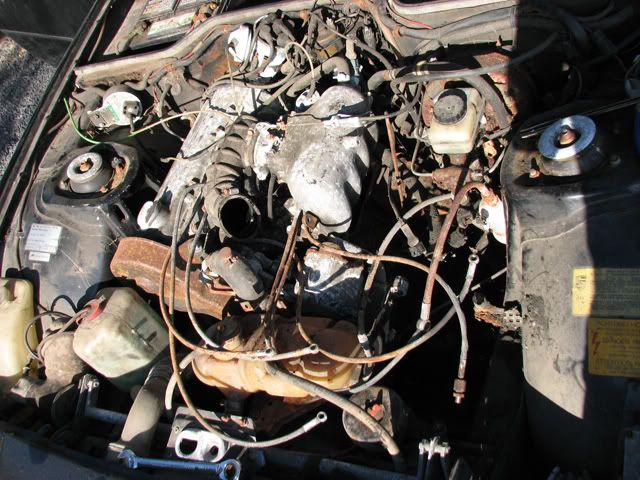
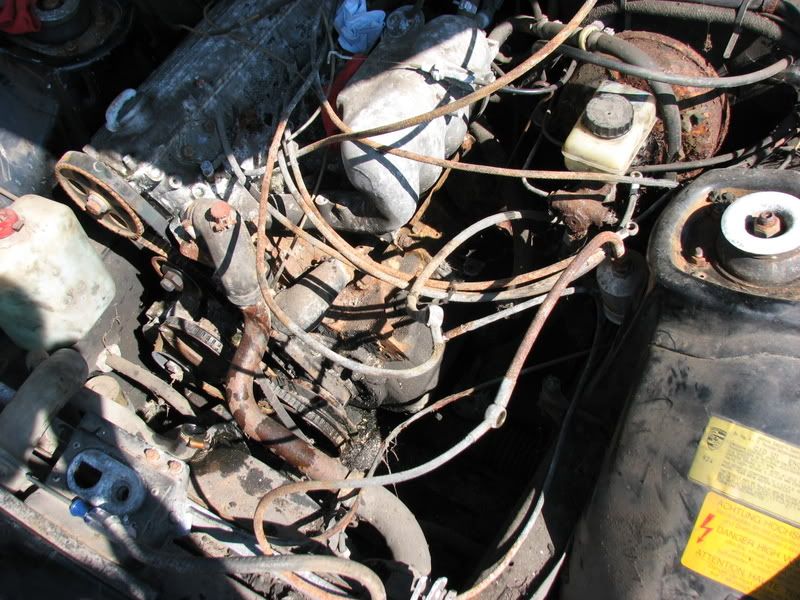
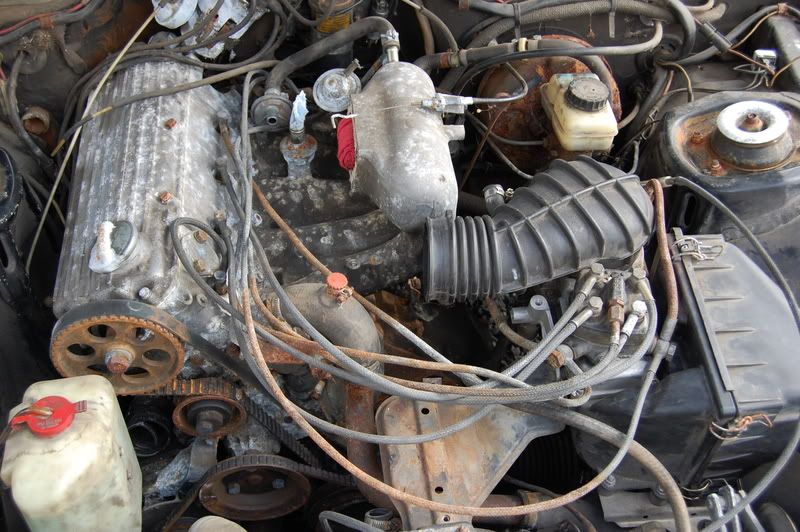
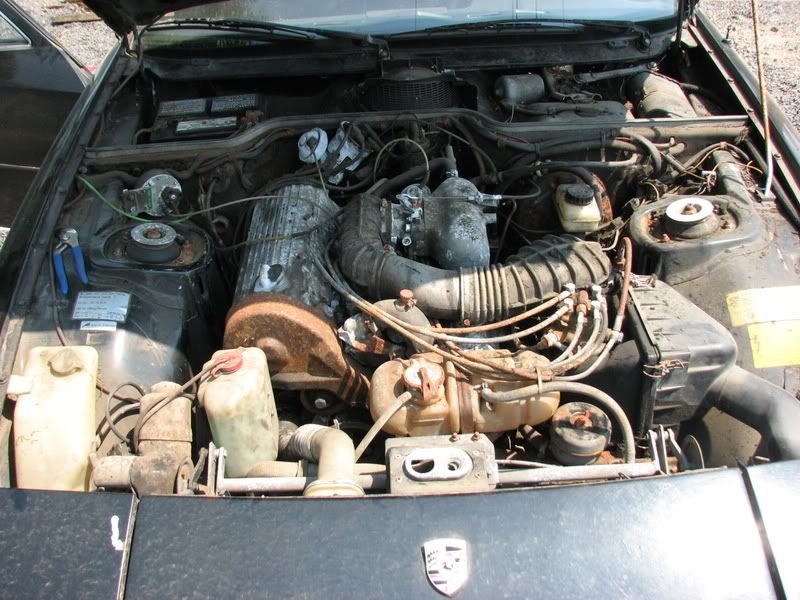
Ok folks, here's the pics of the engine bay after emissions was removed.
First is the pic before the entire fuel system was removed:

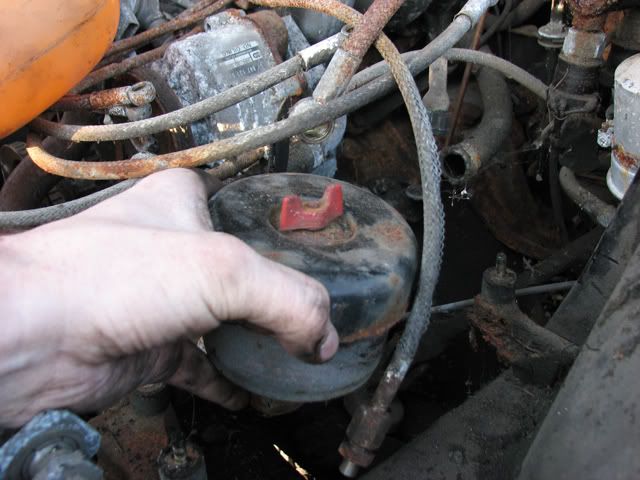
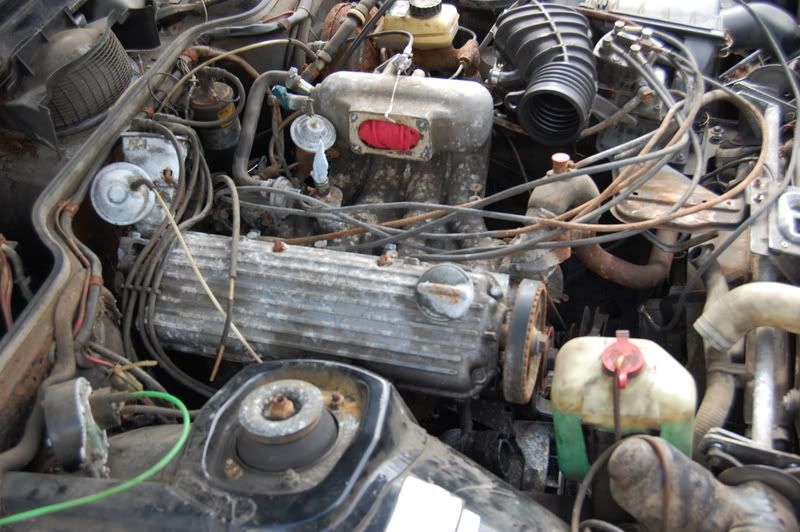
Here's the picture after it was removed, as you can see, lots of room, pretty messy. You'll also notice the pump for the emissions, the belt, the air filter, the hoses...
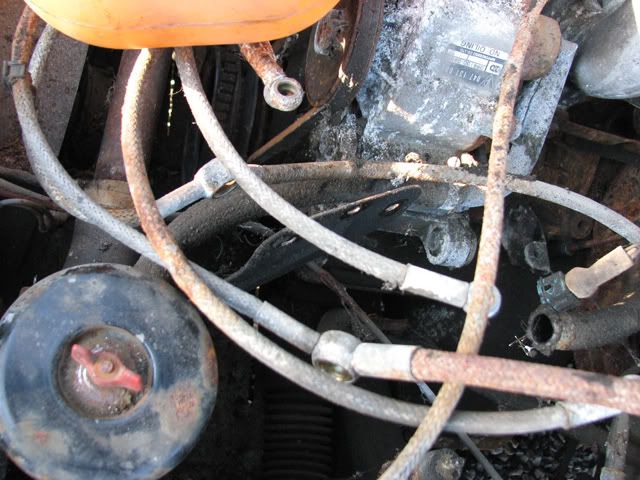
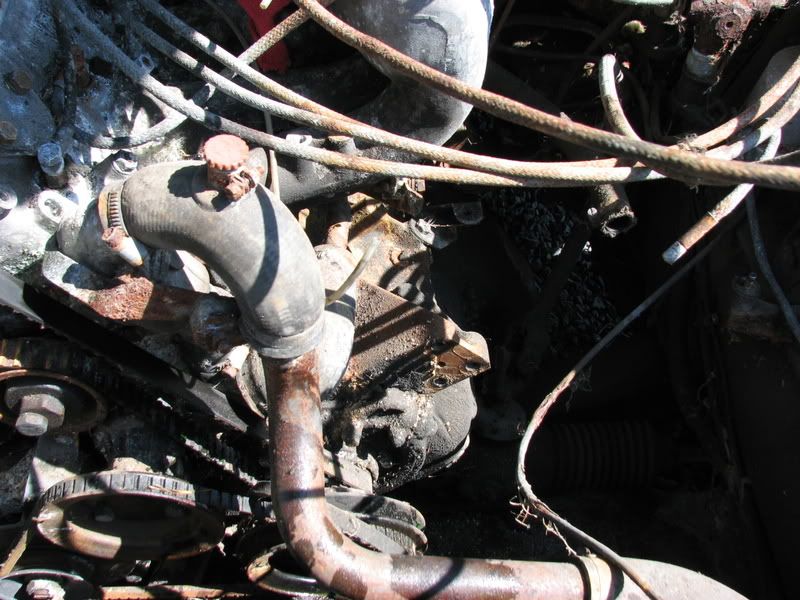
Closer view with the entire emissions system removed.
Here's a brief diagram i found on google from another Porsche 924 owner of what the engine bay looks like. This diagram is hoses, wiring, and the fuel system routing.

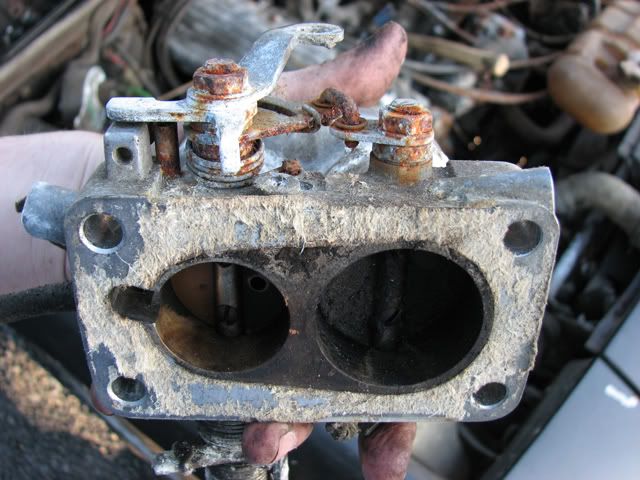
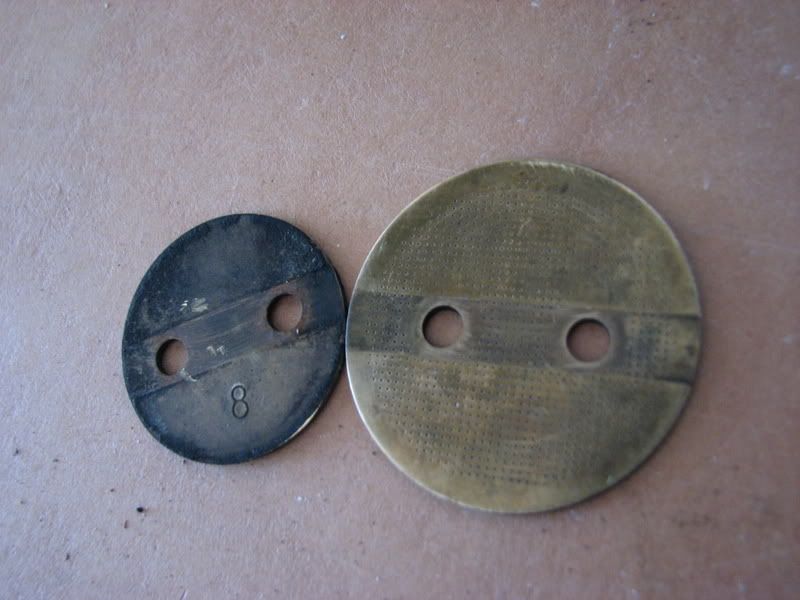
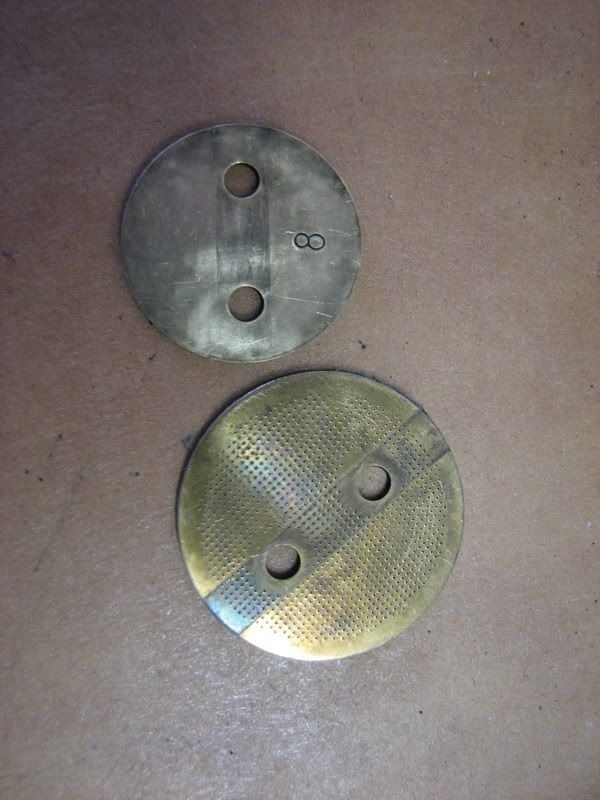
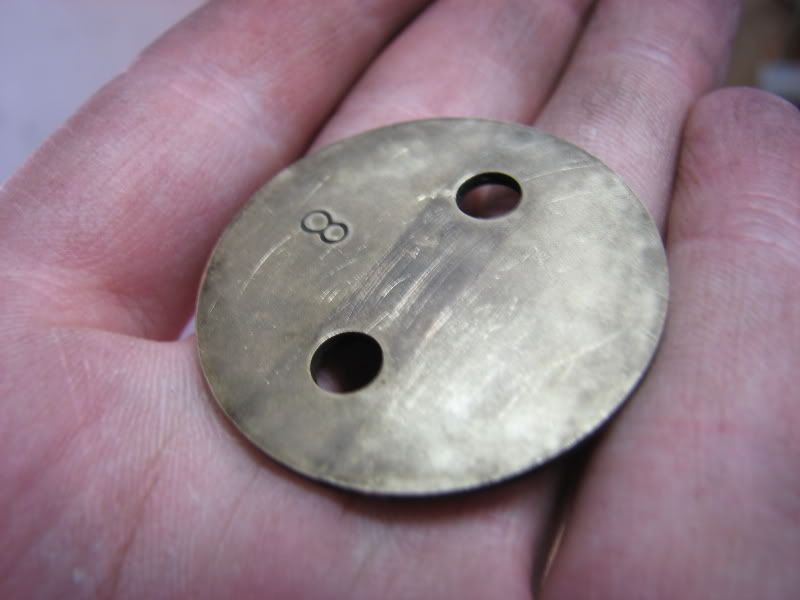
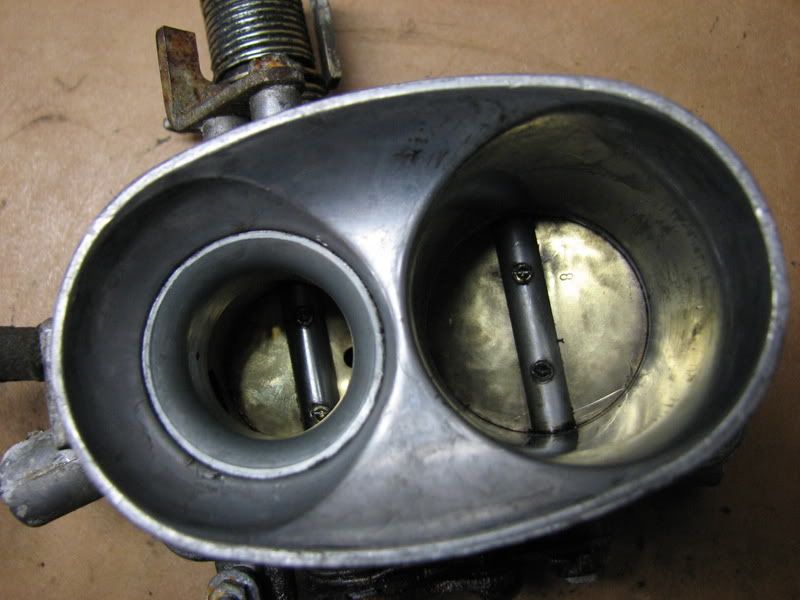
I still have the throttle body removed and disassembled the entire thing. Here's some pictures of the plates before. One on the left is unclean, one on the right is sanitized in alcohol, brushed, and lightly polished.
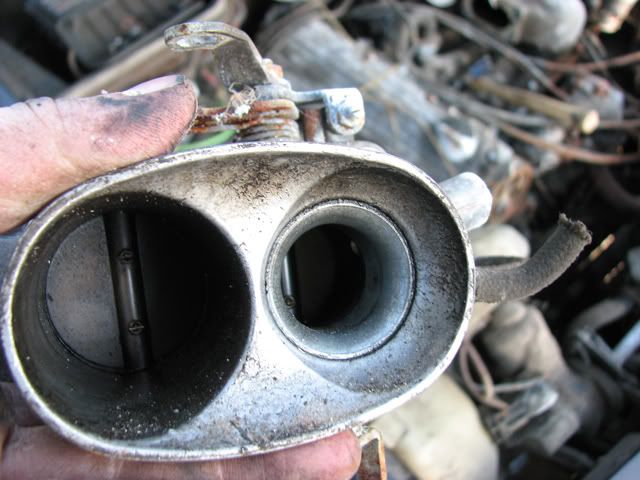
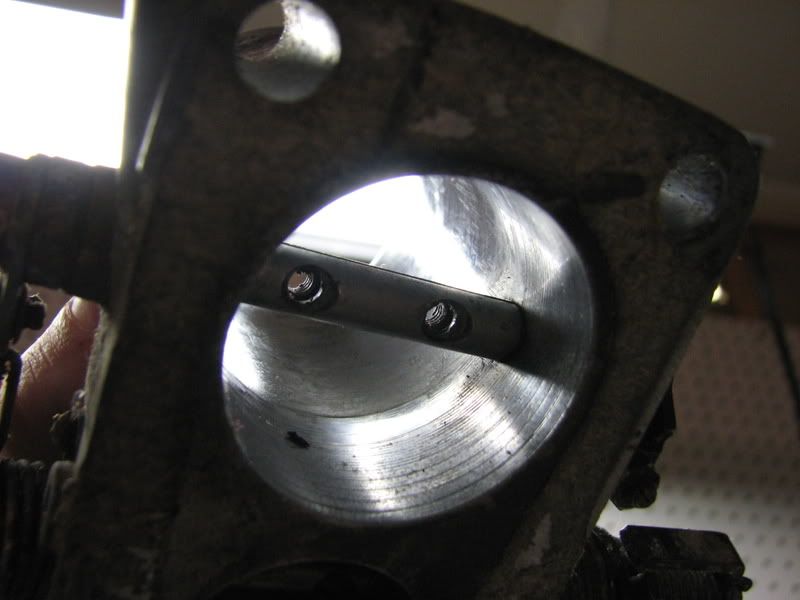
Here's a picture of the throttle body itself after a nice cleaning. Still have yet to thoroughly polish it.
Pictures of the plates after a full cleaning. Note I did not polish the one with the indents in it because I did not want to chance messing up the point of them having that as my understanding is it deals with mixing the air/fuel better... However, I did fully polish the smaller plate.
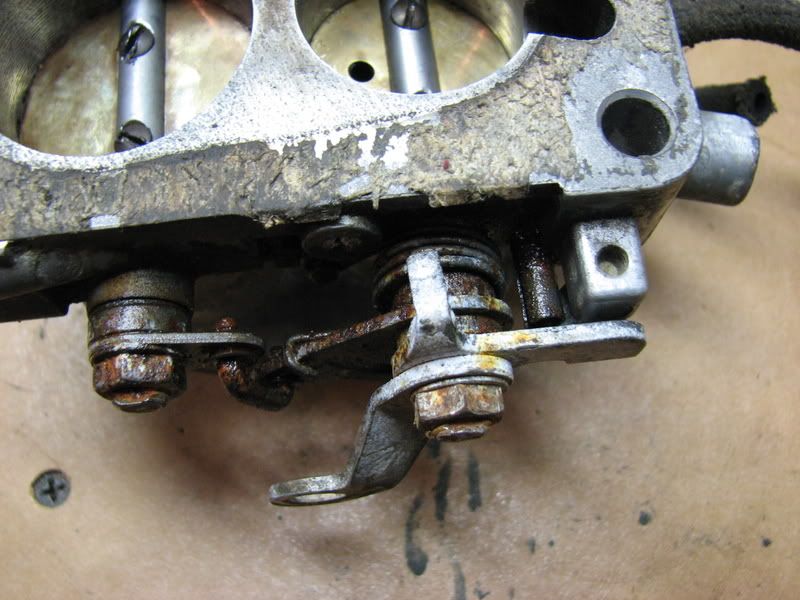
I still need to take off the springs and clean up the whole throttle body and mess around with it so it's working at 100% as it's somewhat sticky still from the old rusted springs.
I installed the new fuel injectors yesterday. Turns out i have 12 injectors total. 4 original injectors, 4 i bought, and 4 were donated with the fuel system i was given. The ones I bought were the right size, but, wouldn't work with my fuel lines as they were meant for threaded lines (I may keep them and buy some threaded tips for my lines so i can use them, they are VERY clean, and from a later year 924), the ones that came with the fuel system are full of crap and soiled, they were able to be cleaned, but I mixed and matched them with the current injectors that were there so none had rust and all were clean. You can see all the way down the barrel and they are quite spotless...
I mixed and matched the lines as some of the ones that came with the CIS system that was donated were brittle, old, and even snapped. Mine did the same, but I inspected them first. However, the great part is that due to having 2 CIS system I have a crapload of those copper washers, all of which are in great condition, but now I have extras.
The cold start injector on the car that came with it was better than the one I bought, which sucks, because they aren't cheap, the one i bought used was rusted down inside, mine was pretty much flawless. I guess that goes to speak for worry about replacing parts when you haven't seen if they're bad yet anyway.....
I improvised on the brackets that held them in originally as the pump and parts of that system had some ginormous brackets helping to hold the CIS system in but really weren't necessary. I was able to remove probably a good 5-10LBS of brackets, emissions, bolts, nuts, etc.... that sucker was heavy.
I'd say I'm roughly 75% complete with getting it at least to running status.
Here's what is needed to get it running IF EVERYTHING ends up working fine.
- Battery
- Fresh gas (this is assuming the pump and accumulator are okay)
- Plugs
- Finish the throttle body
- Test the entire fuel system
- Penetrating oil to ensure the rings don't snap (this is assuming they are bound or seized, hopefully this is not the case, and thus far EVERY internal part is showing signs that they shouldn't be as they're all flawless so far inside)
The new accumulator looks FLAWLESS and after pulling the new CIS system apart it appears to be fine. It drove another 924 from Idaho to Portland, Oregon a year ago, so it should be fine. I also got a new aux air valve installed and the thermo time switch, all of which were tested before they were sent to me. So I guess for $90 in used parts, I still came out on top, those thermo time switches are NOT cheap....
So far so good!
I'm not even going to mention the wiring for now till it's started and working LOL
AND, got a haynes manual ordered for $6 off of amazon, w00t!
First is the pic before the entire fuel system was removed:
Here's the picture after it was removed, as you can see, lots of room, pretty messy. You'll also notice the pump for the emissions, the belt, the air filter, the hoses...
Closer view with the entire emissions system removed.
Here's a brief diagram i found on google from another Porsche 924 owner of what the engine bay looks like. This diagram is hoses, wiring, and the fuel system routing.
I still have the throttle body removed and disassembled the entire thing. Here's some pictures of the plates before. One on the left is unclean, one on the right is sanitized in alcohol, brushed, and lightly polished.
Here's a picture of the throttle body itself after a nice cleaning. Still have yet to thoroughly polish it.
Pictures of the plates after a full cleaning. Note I did not polish the one with the indents in it because I did not want to chance messing up the point of them having that as my understanding is it deals with mixing the air/fuel better... However, I did fully polish the smaller plate.
I still need to take off the springs and clean up the whole throttle body and mess around with it so it's working at 100% as it's somewhat sticky still from the old rusted springs.
I installed the new fuel injectors yesterday. Turns out i have 12 injectors total. 4 original injectors, 4 i bought, and 4 were donated with the fuel system i was given. The ones I bought were the right size, but, wouldn't work with my fuel lines as they were meant for threaded lines (I may keep them and buy some threaded tips for my lines so i can use them, they are VERY clean, and from a later year 924), the ones that came with the fuel system are full of crap and soiled, they were able to be cleaned, but I mixed and matched them with the current injectors that were there so none had rust and all were clean. You can see all the way down the barrel and they are quite spotless...
I mixed and matched the lines as some of the ones that came with the CIS system that was donated were brittle, old, and even snapped. Mine did the same, but I inspected them first. However, the great part is that due to having 2 CIS system I have a crapload of those copper washers, all of which are in great condition, but now I have extras.
The cold start injector on the car that came with it was better than the one I bought, which sucks, because they aren't cheap, the one i bought used was rusted down inside, mine was pretty much flawless. I guess that goes to speak for worry about replacing parts when you haven't seen if they're bad yet anyway.....
I improvised on the brackets that held them in originally as the pump and parts of that system had some ginormous brackets helping to hold the CIS system in but really weren't necessary. I was able to remove probably a good 5-10LBS of brackets, emissions, bolts, nuts, etc.... that sucker was heavy.
I'd say I'm roughly 75% complete with getting it at least to running status.
Here's what is needed to get it running IF EVERYTHING ends up working fine.
- Battery
- Fresh gas (this is assuming the pump and accumulator are okay)
- Plugs
- Finish the throttle body
- Test the entire fuel system
- Penetrating oil to ensure the rings don't snap (this is assuming they are bound or seized, hopefully this is not the case, and thus far EVERY internal part is showing signs that they shouldn't be as they're all flawless so far inside)
The new accumulator looks FLAWLESS and after pulling the new CIS system apart it appears to be fine. It drove another 924 from Idaho to Portland, Oregon a year ago, so it should be fine. I also got a new aux air valve installed and the thermo time switch, all of which were tested before they were sent to me. So I guess for $90 in used parts, I still came out on top, those thermo time switches are NOT cheap....
So far so good!
I'm not even going to mention the wiring for now till it's started and working LOL
AND, got a haynes manual ordered for $6 off of amazon, w00t!
#20
10-11-2008, 03:22 PM
Join Date: Jul 2008
Location: Redmond, OR
Posts: 154
Rep Power: 23
Ok, pretty big update.
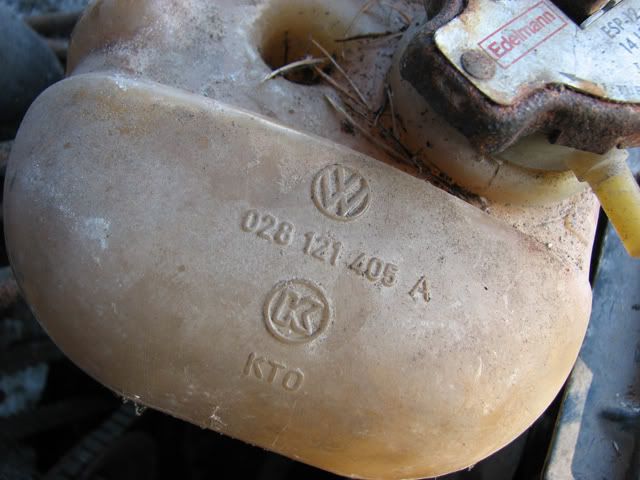
So i took a look at the accumulator, not rusted, looks great. I didn't look inside, but as the rest of this car looks perfect, and it's sealed, I'm going to assume it's fine. At this point I need to rebuild/repair the throttle body and slap it back on, tune it up, get a battery, and fire this badboy up.
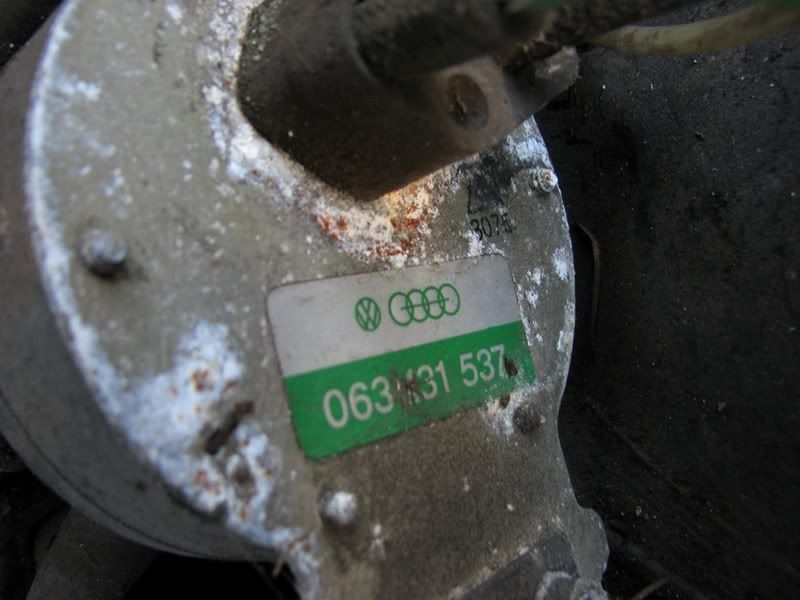
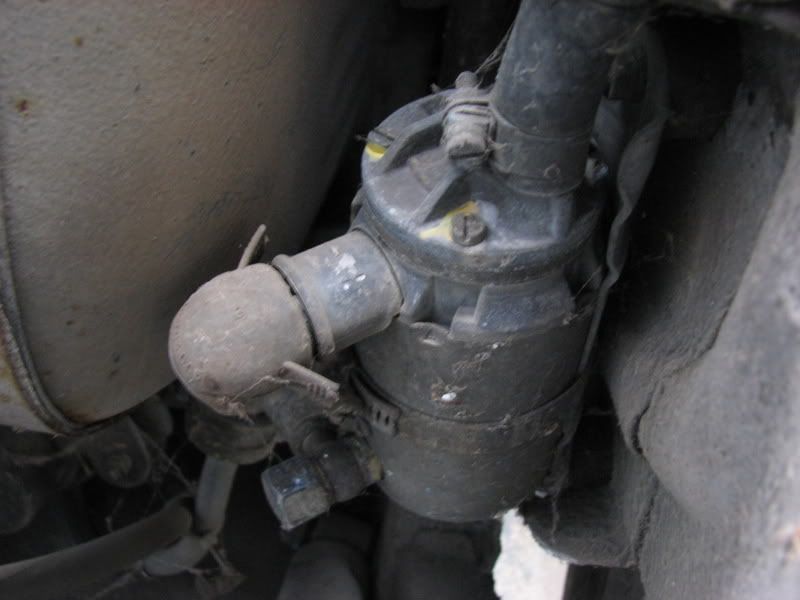
Fuel pump:
Today's job included lots of penetrating oil onto the parts to get a lot of the parts off so I can get them in a glass bath.
I've been talking about glassbeading for a while, FINALLY got ahold of my old boss and he's letting me come in not this monday, but next monday. I've got a nice big box of brackets and crap to glassbead and repaint with some high heat paint.
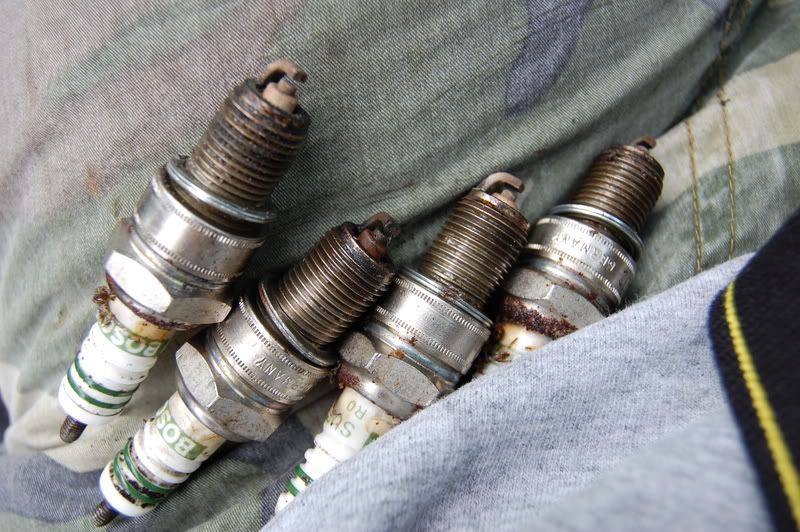
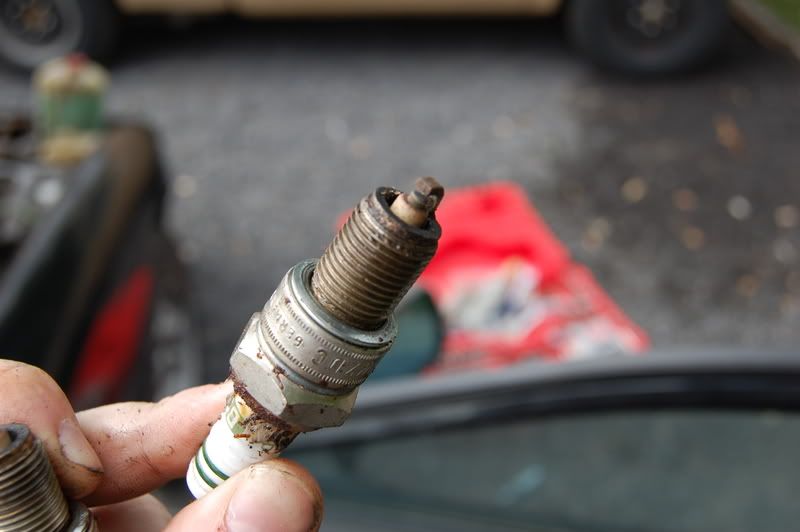
First thing was first, getting rid of the old plugs so i could get into the combustion chamber to spray in some penetrating oil at hopes that there is nothing wrong with the rings. At this point, I'm going to assume this motor is fine. The plugs had no rust, were not seized in, and came right out. I'm almost wondering if some things on this car had been touched a few years ago as some of the parts still move.
Pic tutorial.
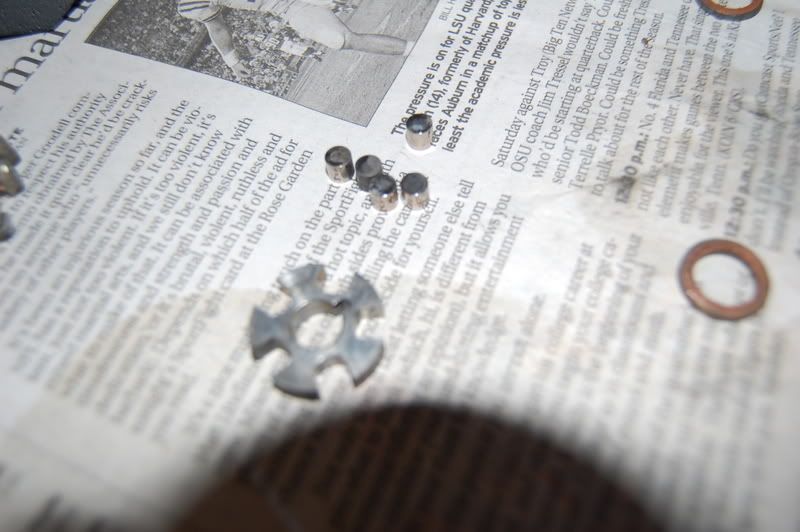
First off the plugs. Pulled them. not bad at all (don't mind the grit, i dropped them by accident)
I promised pics of the engine bay with the new lines installed.
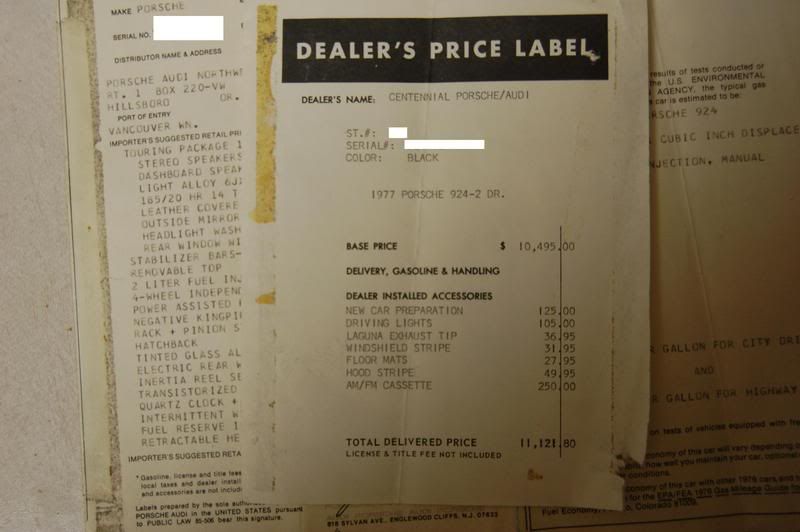
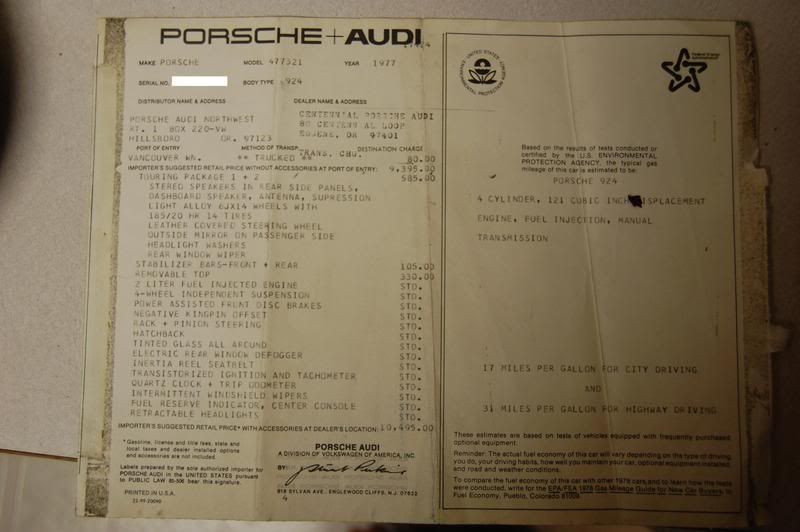
I found some interesting things in the big folder of papers that were in the car when I bought it.
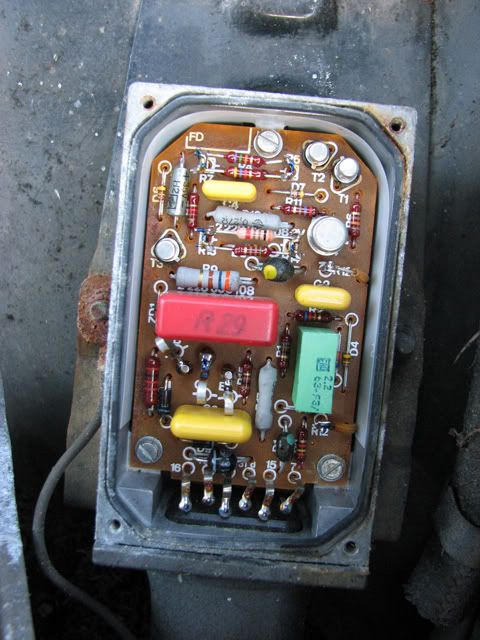
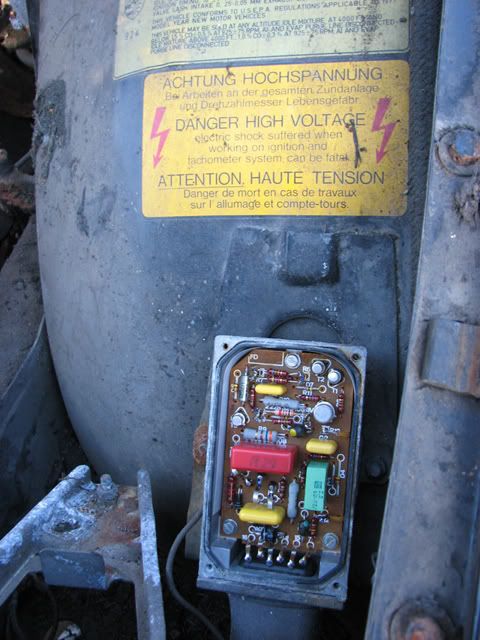
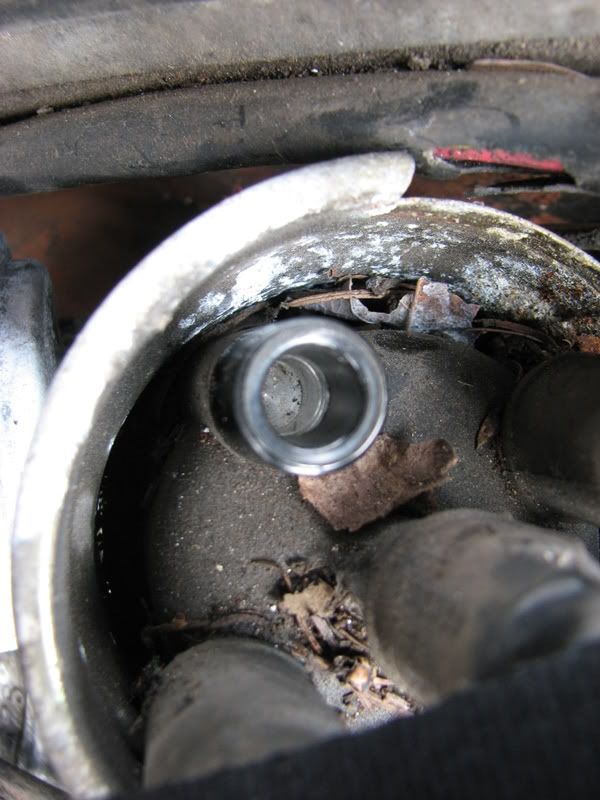
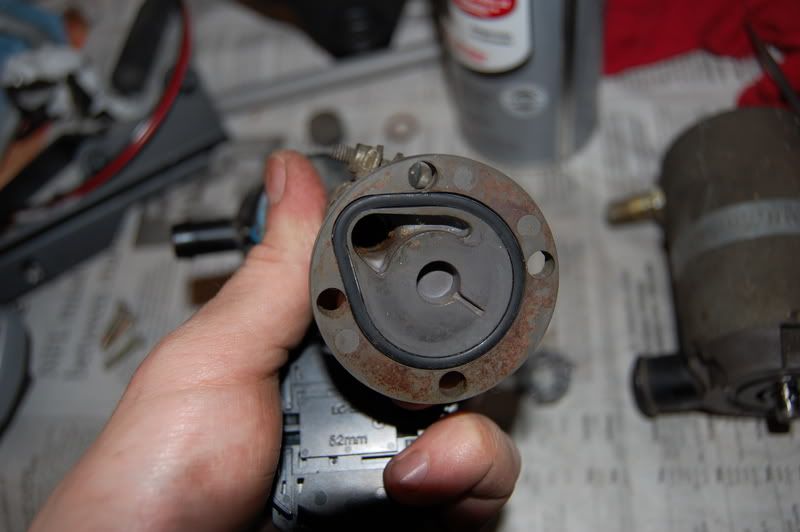
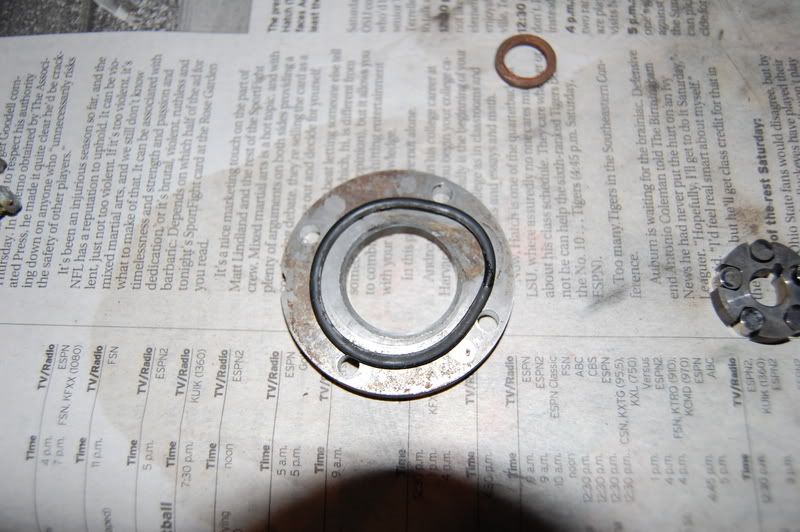
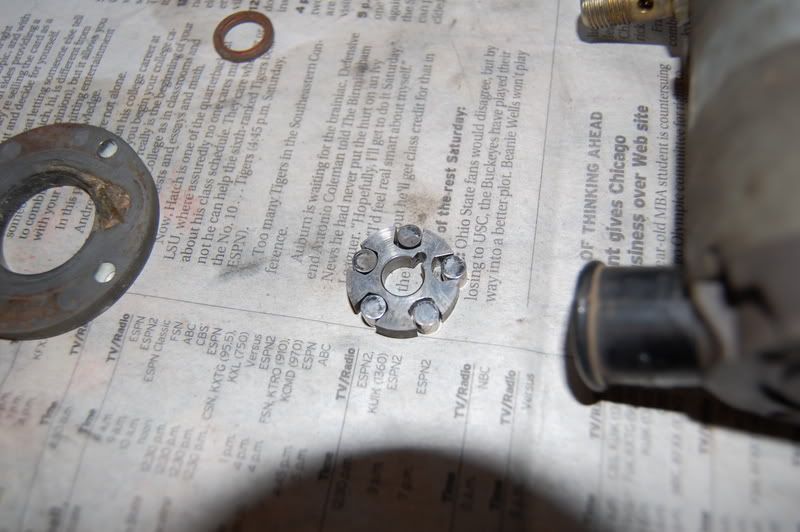
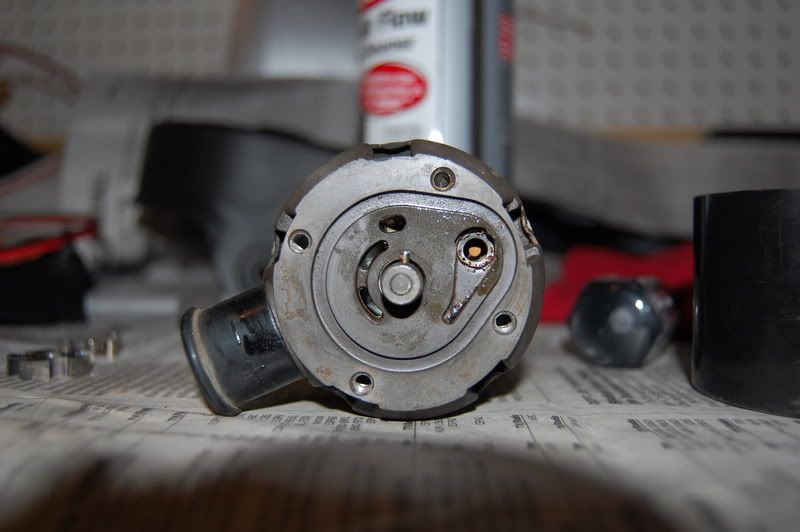
After I got the plugs back in and some neversieze on the plugs... i went after the ignition system. First thing I wanted to check was the distributor. I pulled apart pieces of it and low and behold........
Perfect inside.
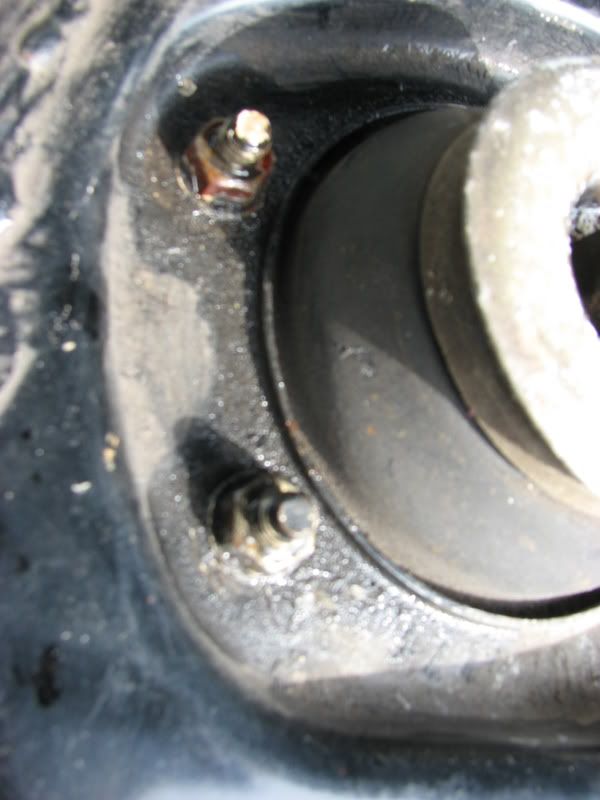
After I looked at the ignition and determined it may have a fighting chance at getting this car started I decided to tackle other things that had been giving me crap. Like getting the bolts off the struts as they were rusted on. Time for PENETRATING OIL! (Warning: only for use on parts... not your girlfriend)
So i took a look at the accumulator, not rusted, looks great. I didn't look inside, but as the rest of this car looks perfect, and it's sealed, I'm going to assume it's fine. At this point I need to rebuild/repair the throttle body and slap it back on, tune it up, get a battery, and fire this badboy up.
Fuel pump:
Today's job included lots of penetrating oil onto the parts to get a lot of the parts off so I can get them in a glass bath.
I've been talking about glassbeading for a while, FINALLY got ahold of my old boss and he's letting me come in not this monday, but next monday. I've got a nice big box of brackets and crap to glassbead and repaint with some high heat paint.
First thing was first, getting rid of the old plugs so i could get into the combustion chamber to spray in some penetrating oil at hopes that there is nothing wrong with the rings. At this point, I'm going to assume this motor is fine. The plugs had no rust, were not seized in, and came right out. I'm almost wondering if some things on this car had been touched a few years ago as some of the parts still move.
Pic tutorial.
First off the plugs. Pulled them. not bad at all (don't mind the grit, i dropped them by accident)
I promised pics of the engine bay with the new lines installed.
I found some interesting things in the big folder of papers that were in the car when I bought it.
After I got the plugs back in and some neversieze on the plugs... i went after the ignition system. First thing I wanted to check was the distributor. I pulled apart pieces of it and low and behold........
Perfect inside.
After I looked at the ignition and determined it may have a fighting chance at getting this car started I decided to tackle other things that had been giving me crap. Like getting the bolts off the struts as they were rusted on. Time for PENETRATING OIL! (Warning: only for use on parts... not your girlfriend)
#21
10-11-2008, 03:22 PM
Join Date: Jul 2008
Location: Redmond, OR
Posts: 154
Rep Power: 23 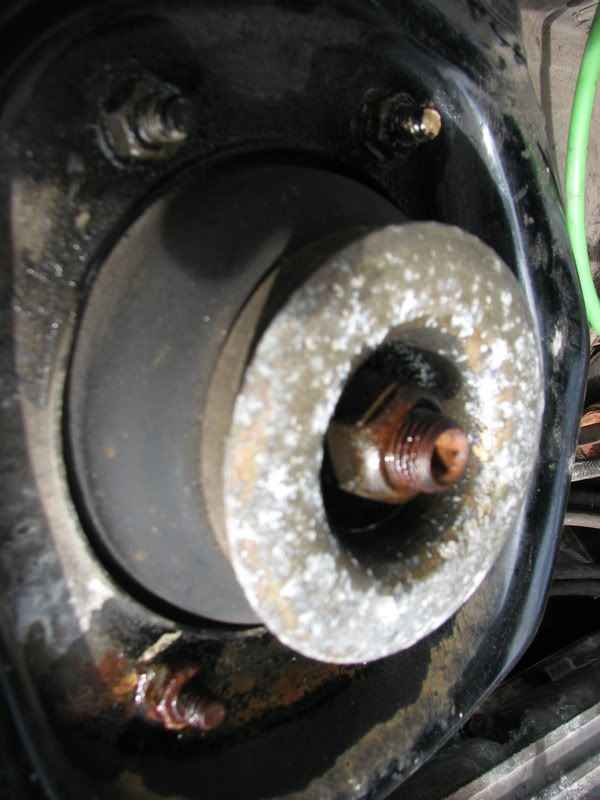
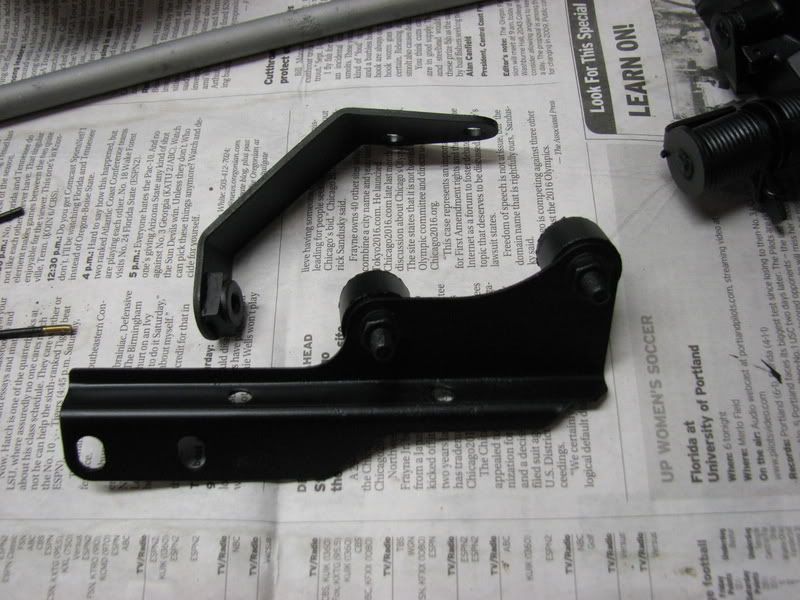
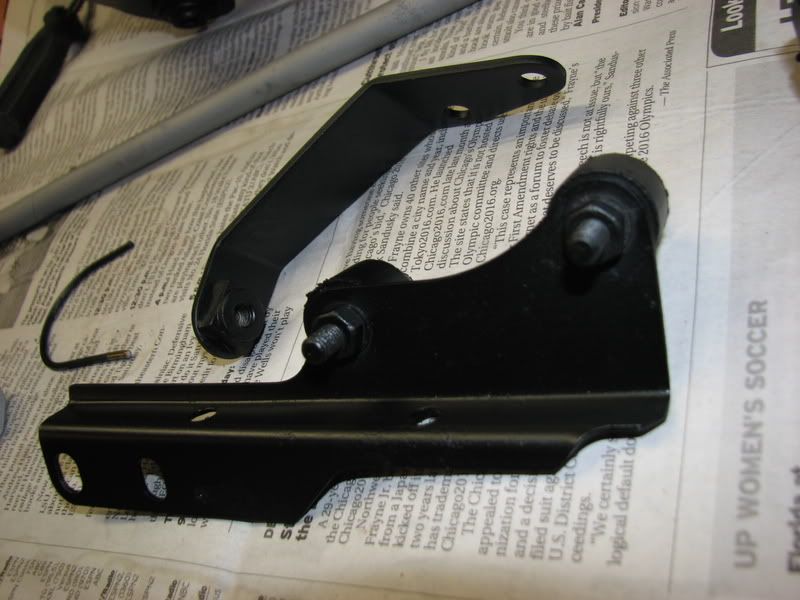
The pulley system too....
I'm going to let the oil sit for a few days and see if I can get them off then. It helped with the spark plugs.
The next thing to tackle was the lights. They wouldn't BUDGE. The motor was pretty old, my friend gave me a new one, so I put that in, but played with the system a little before I put it back on to see if i could get it to move. Thankfully, thanks to NAPA penetrating oil... and some patience.....
VICTORY
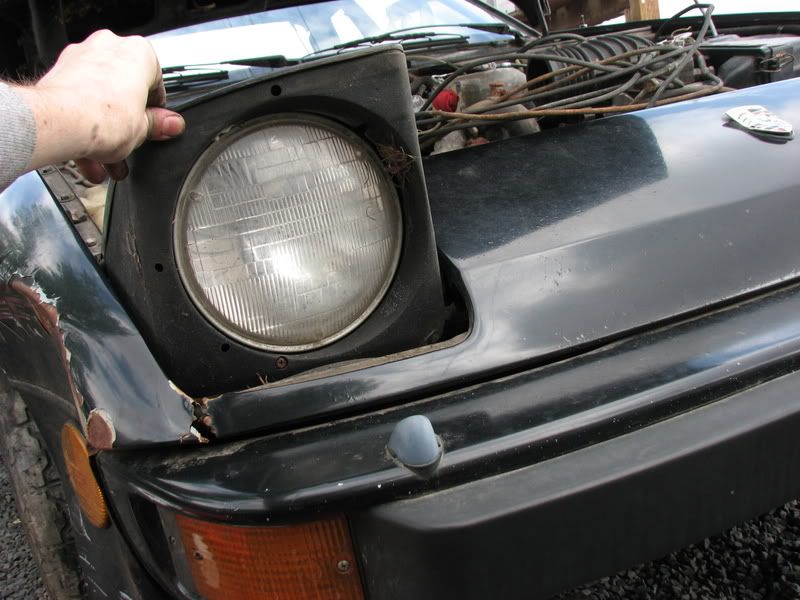
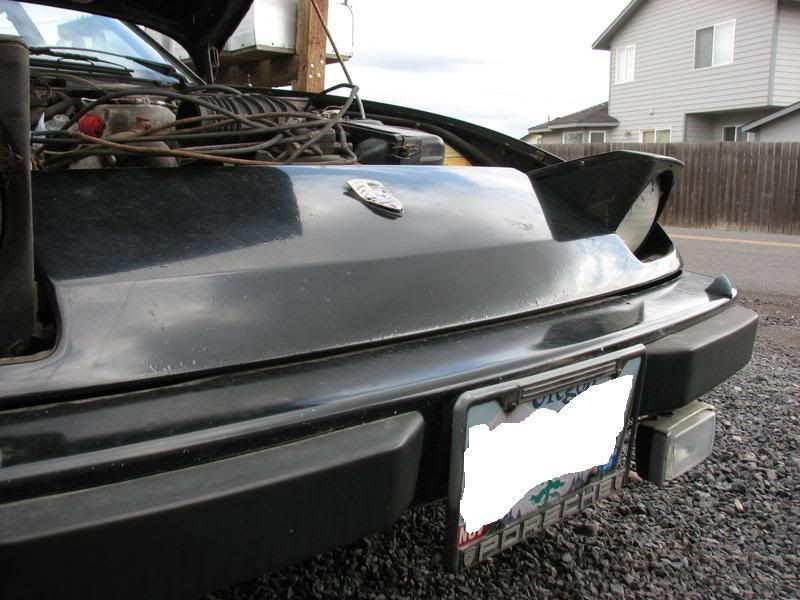
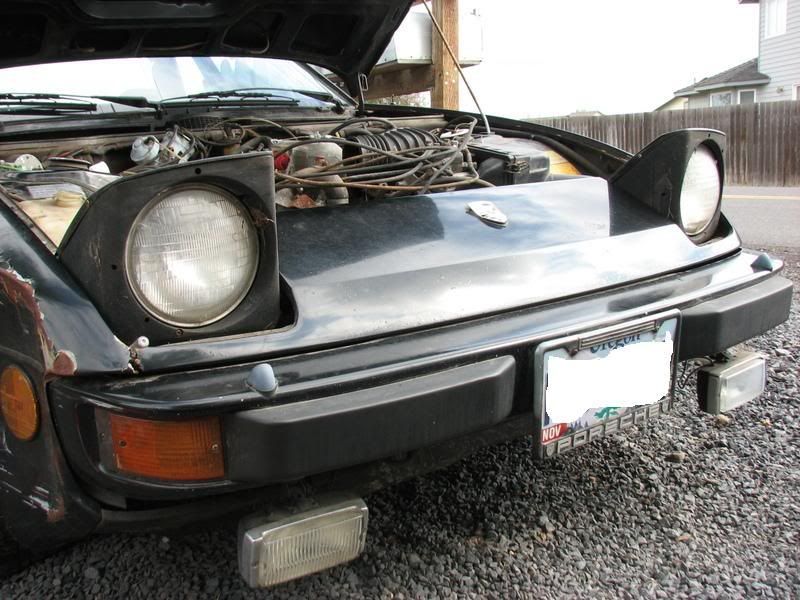
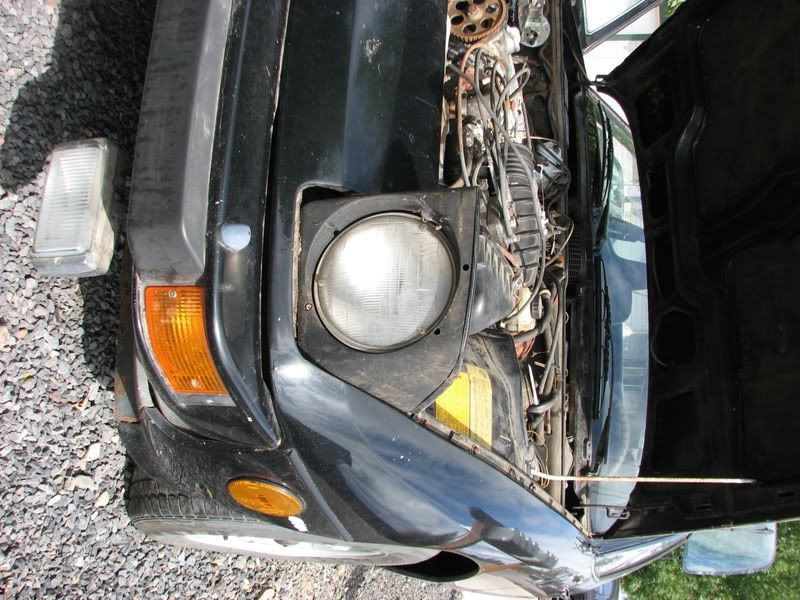
The culprit? The ball and gaskets they sit in were gunked up and stuck.
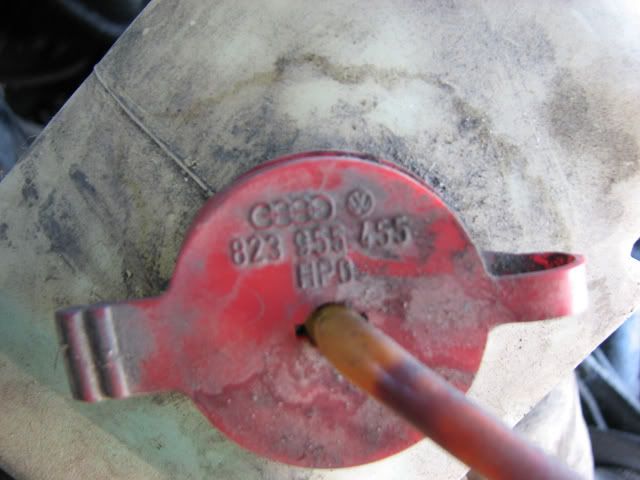
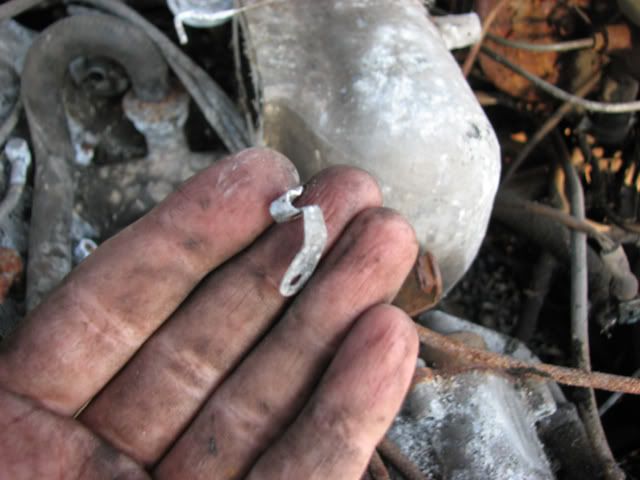
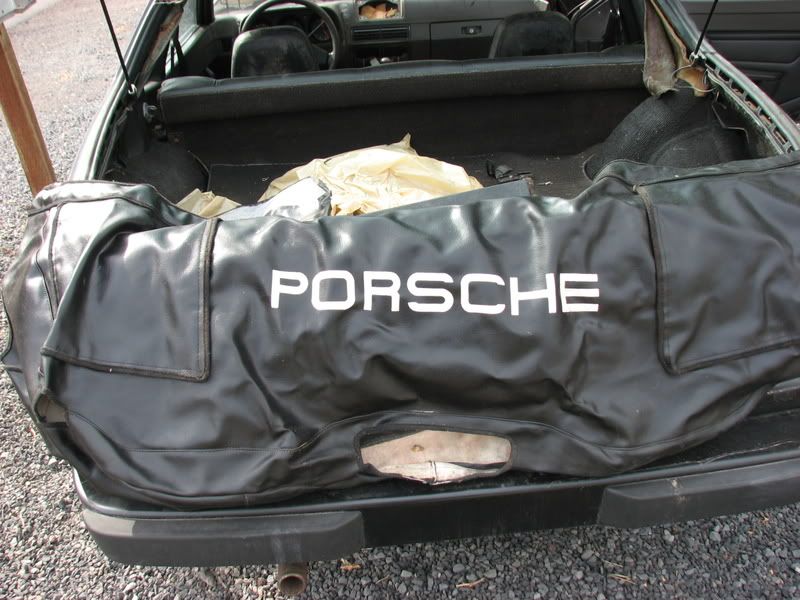
Found this while I was hunting in the back, cleaned it up. It's great!
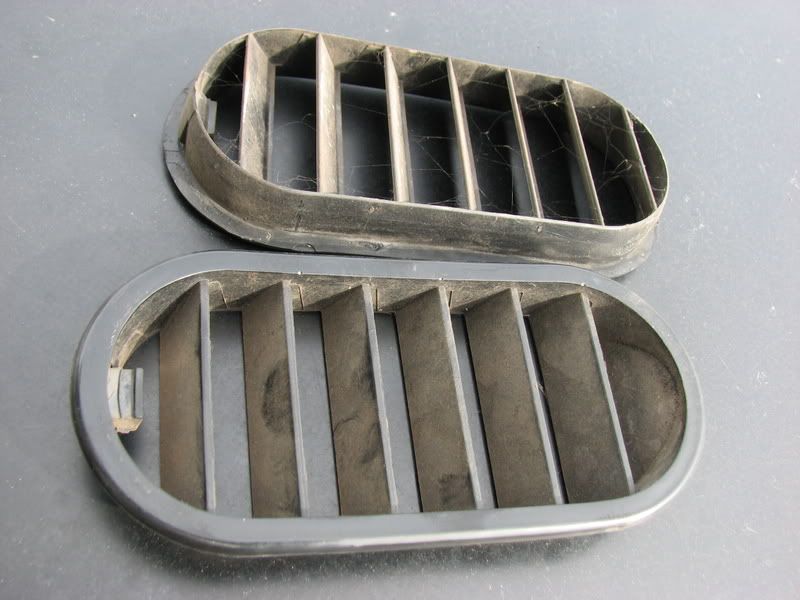
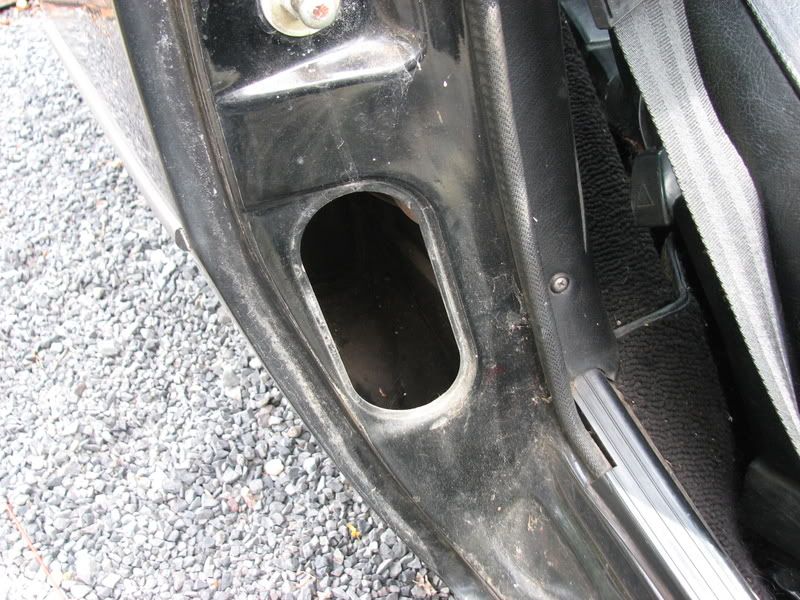
Pulled the door vents out, cleaning them up tonight
#22
10-11-2008, 03:23 PM
Join Date: Jul 2008
Location: Redmond, OR
Posts: 154
Rep Power: 23
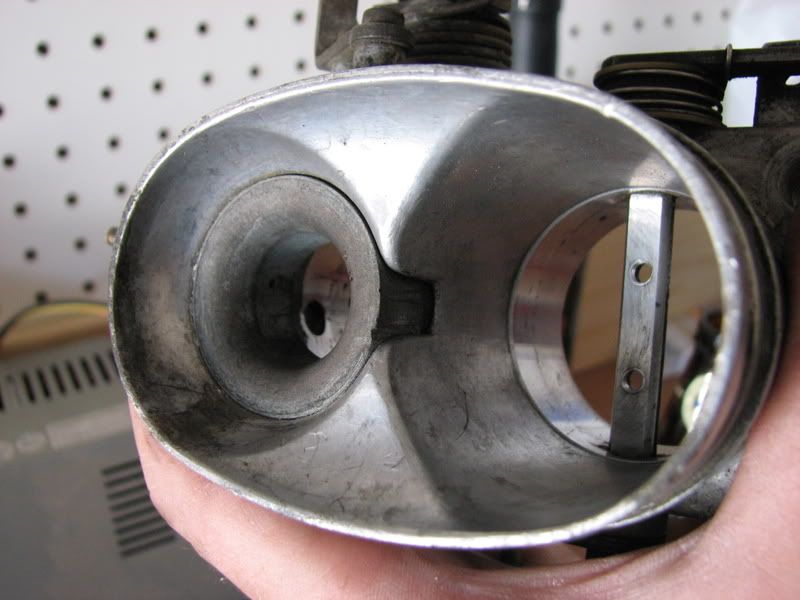
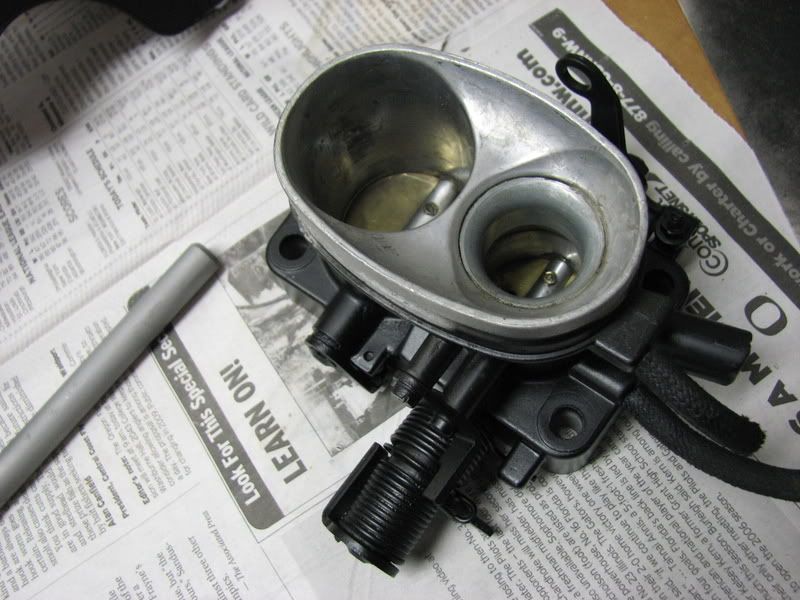
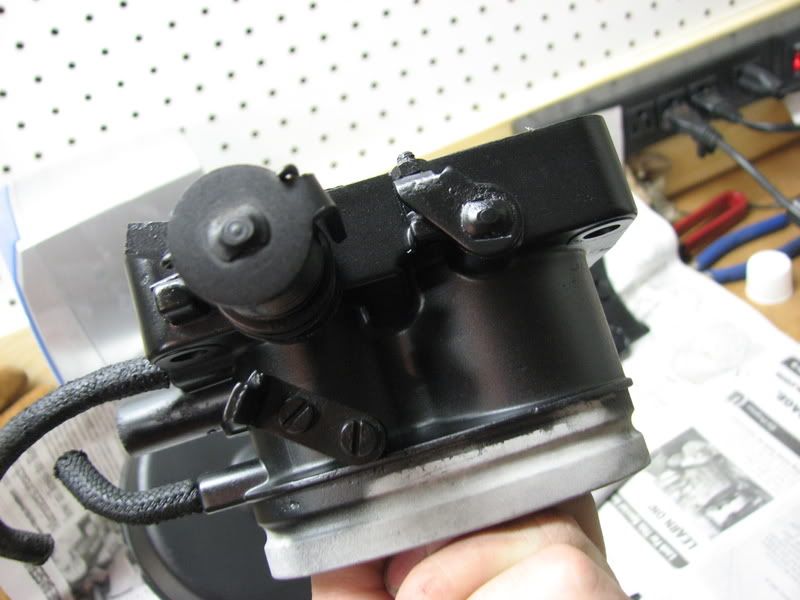
As you can see, the throttle body when i took it off was in pretty bad shape.
Last night thanks to elbow grease, alcohol, metal polish and mr dremel, and some penetrating oil and sandpaper, the throttle body is happy. Granted the bolts and springs are somewhat rusted still, they are now lubricated and sanded inbetween and works just as great as a new throttlebody. Turns out the other throttle body i cleaned up was the wrong one and wrong year, so i had to use the original You'll notice i polished the inside though best i could
Granted, once i get it all finished I will rebuild it entirely. But for now, i need to make sure it runs.
Last night thanks to elbow grease, alcohol, metal polish and mr dremel, and some penetrating oil and sandpaper, the throttle body is happy. Granted the bolts and springs are somewhat rusted still, they are now lubricated and sanded inbetween and works just as great as a new throttlebody. Turns out the other throttle body i cleaned up was the wrong one and wrong year, so i had to use the original
You'll notice i polished the inside though best i could Granted, once i get it all finished I will rebuild it entirely. But for now, i need to make sure it runs.
#23
10-11-2008, 03:23 PM
Join Date: Jul 2008
Location: Redmond, OR
Posts: 154
Rep Power: 23
A lot of progress today.
Found out why the headlights weren't working, the prop was misaligned and to top it off i found out why they wouldn't go back down. Turns out the motor relay was corroded and someone decided to rewire it but not crimp it right, so every time i touched the fuse box the headlight would go up........then down.......then up..... then down.. I had to screw with it a while until i got the right adjustment and retorque it back down and redo the wiring for it.. Because someone has been wanting a video.... here's a vid with the headlights working. I left the cell phone ring in because i thought it was funny.
[media]http://www.youtube.com/watch?v=EMv5QQpwrjk[/media]
Here's a brief picture of the fuse box. Not pretty.
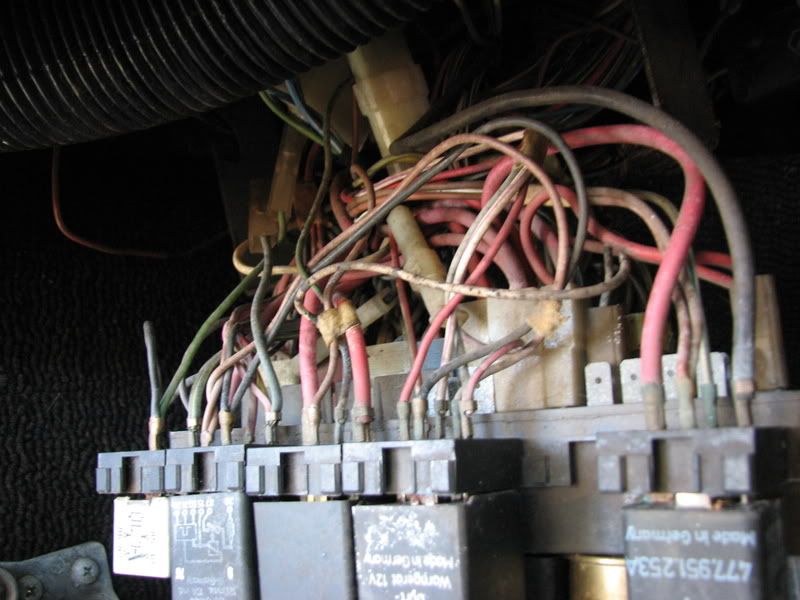
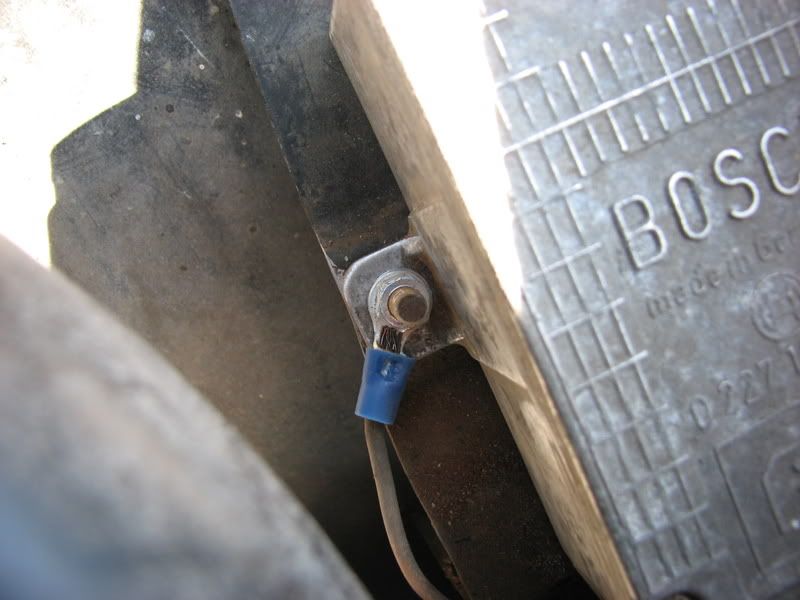
Picture of what i've been doing all day, re-grounding all my connections with new connectors, nuts, bolts, washers, wires and ends.
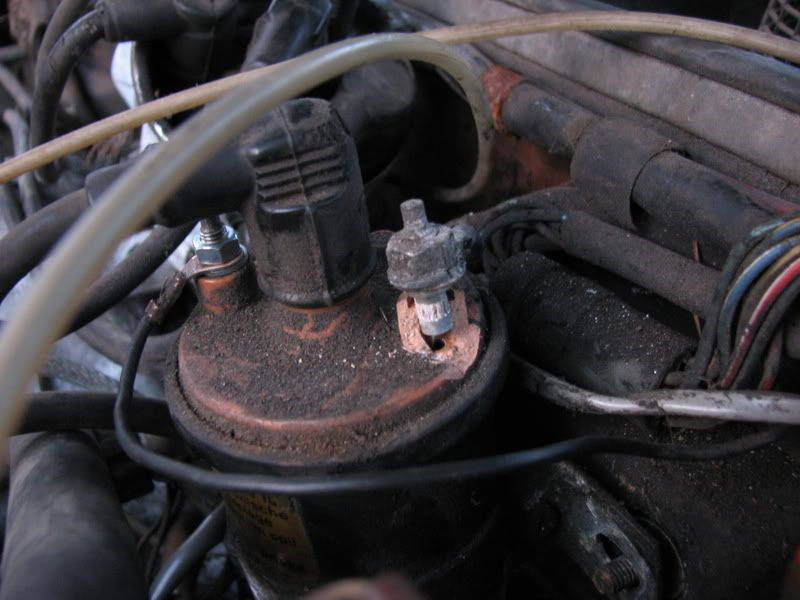
And the coil broke Still works! No arcing, but, still, i should replace it at some point.
Now, i'm not getting fuel and I don't know why. It isn't coming up to the distributor so it's one of the following things:
Pump>Accumulator>Filter>Lines
I'm going to aim at the pump maybe not working. I tested the connections and when you turn it over the fuel pump gets 10.x volts, so it IS getting voltage and it's staying. So I know it isn't the wiring, thank god that isn't the case.... The spark and fuel are both mysteries thus far, but until the wiring is ALL finished, I'm not even going to bother troubleshooting that.
Found out why the headlights weren't working, the prop was misaligned and to top it off i found out why they wouldn't go back down. Turns out the motor relay was corroded and someone decided to rewire it but not crimp it right, so every time i touched the fuse box the headlight would go up........then down.......then up..... then down.. I had to screw with it a while until i got the right adjustment and retorque it back down and redo the wiring for it.. Because someone has been wanting a video.... here's a vid with the headlights working. I left the cell phone ring in because i thought it was funny.
[media]http://www.youtube.com/watch?v=EMv5QQpwrjk[/media]
Here's a brief picture of the fuse box. Not pretty.
Picture of what i've been doing all day, re-grounding all my connections with new connectors, nuts, bolts, washers, wires and ends.
And the coil broke
Still works! No arcing, but, still, i should replace it at some point.Now, i'm not getting fuel and I don't know why. It isn't coming up to the distributor so it's one of the following things:
Pump>Accumulator>Filter>Lines
I'm going to aim at the pump maybe not working. I tested the connections and when you turn it over the fuel pump gets 10.x volts, so it IS getting voltage and it's staying. So I know it isn't the wiring, thank god that isn't the case.... The spark and fuel are both mysteries thus far, but until the wiring is ALL finished, I'm not even going to bother troubleshooting that.
#24
10-11-2008, 03:24 PM
Join Date: Jul 2008
Location: Redmond, OR
Posts: 154
Rep Power: 23
Ok so here's what I started with in the engine bay.
This is a picture of a box of rust.
This is a picture of the box of rust turned into a clean pile of metal.
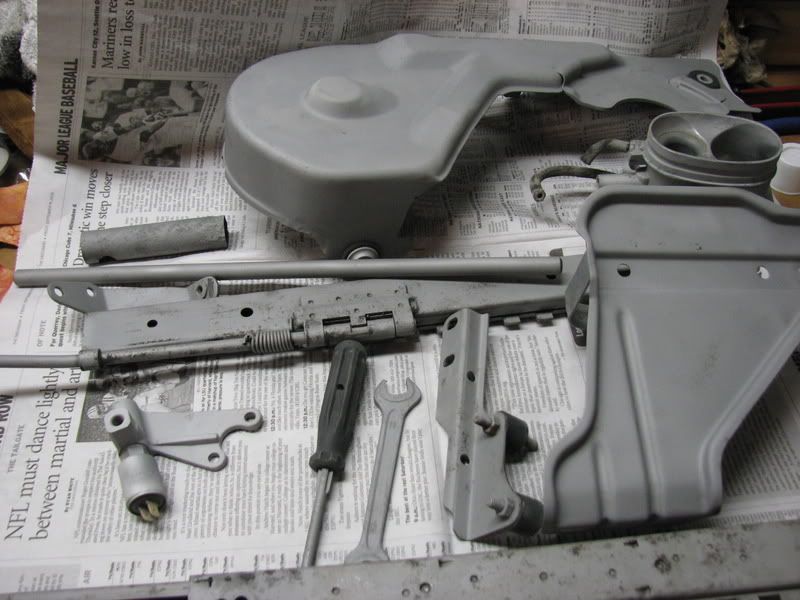
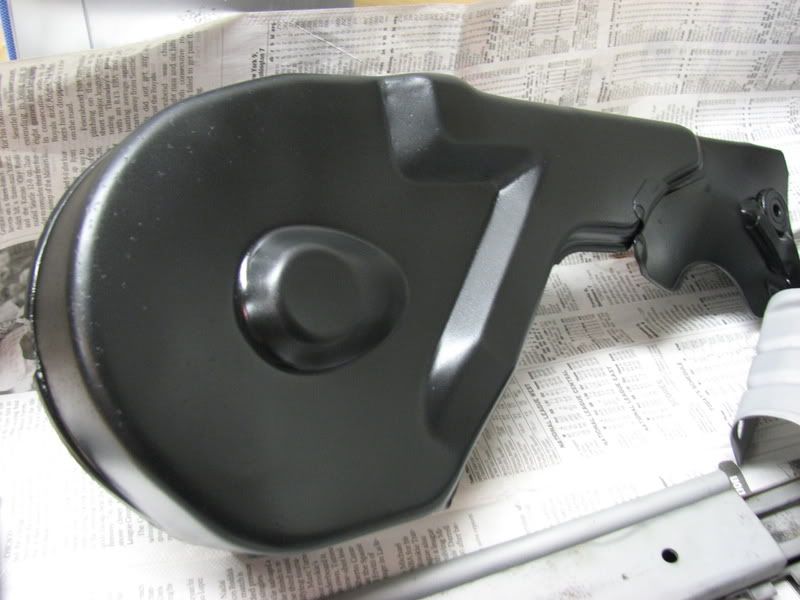
This is the happy metal getting a nice fresh coat of high heat paint, low gloss, black, happy, fresh... fresh... happy paint.
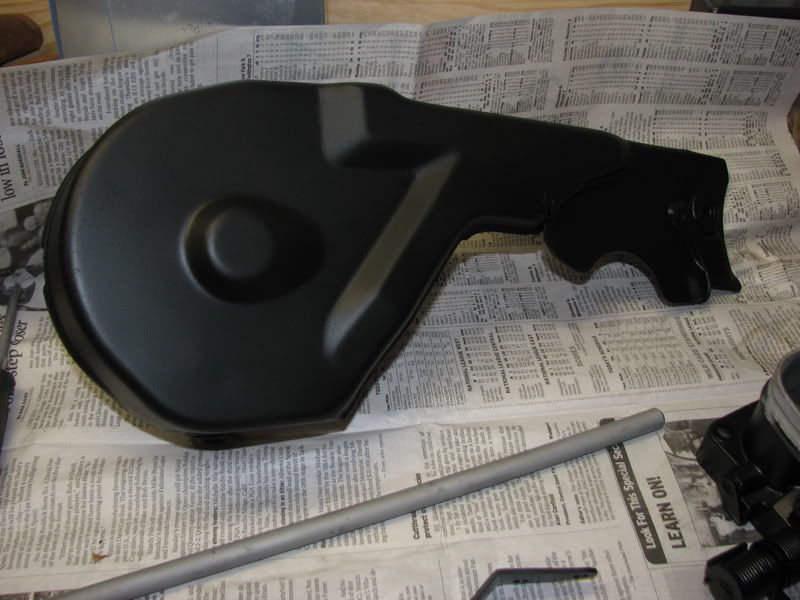
Timing belt cover
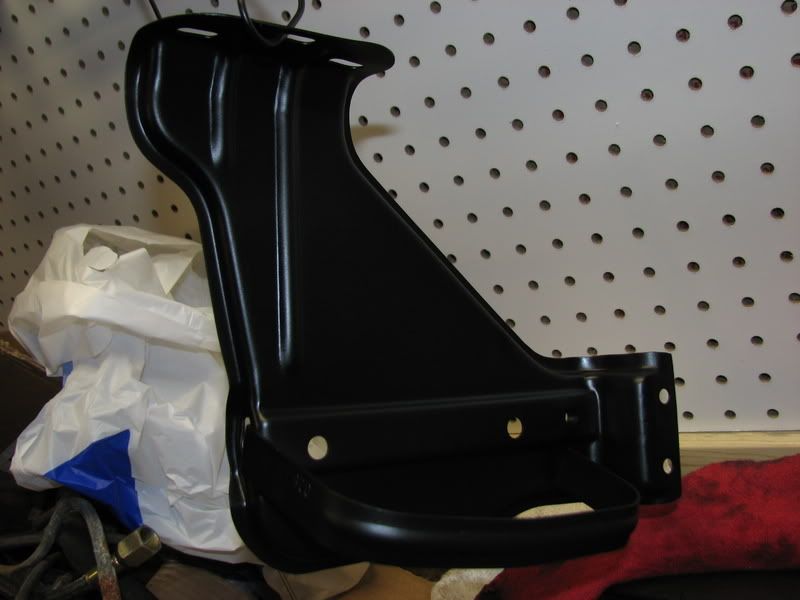
Radiator reservoir brackets

Some of you may remember my happy friend mr rusty throttle body.
Then we cleaned and polished him.
And now he's painted. I still need to polish up the edges where the tubing goes. But at least it's clean now.
This is a picture of a box of rust.
This is a picture of the box of rust turned into a clean pile of metal.
This is the happy metal getting a nice fresh coat of high heat paint, low gloss, black, happy, fresh... fresh... happy paint.
Timing belt cover
Radiator reservoir brackets
Some of you may remember my happy friend mr rusty throttle body.
Then we cleaned and polished him.
And now he's painted. I still need to polish up the edges where the tubing goes. But at least it's clean now.
#25
10-11-2008, 03:25 PM
Join Date: Jul 2008
Location: Redmond, OR
Posts: 154
Rep Power: 23 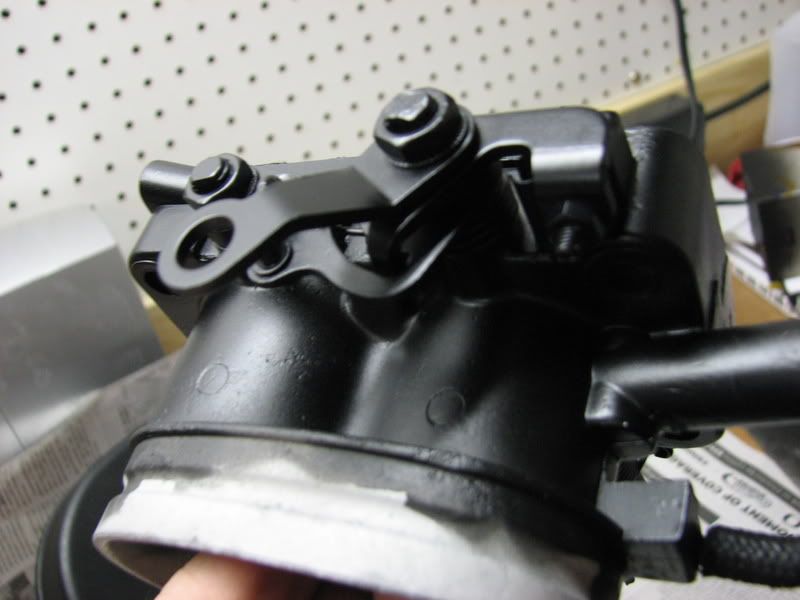
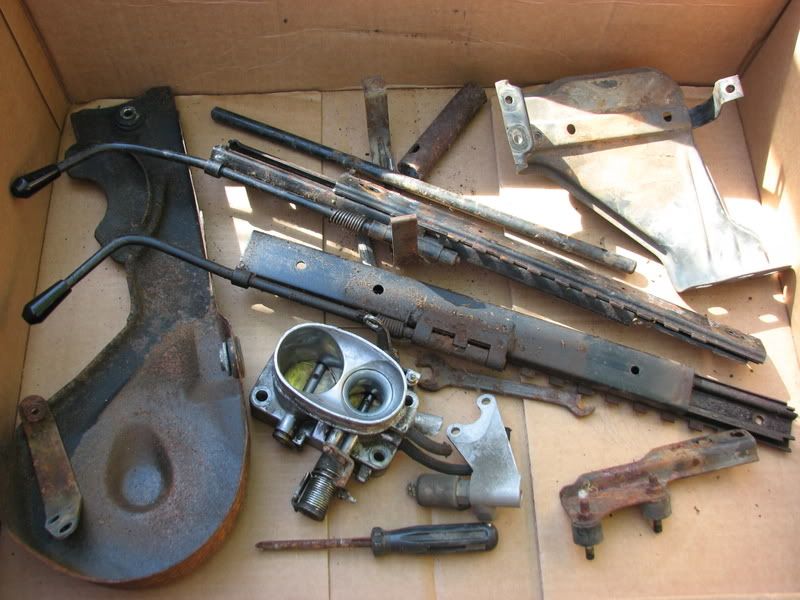
I was able to salvage 2 of the seat rails.
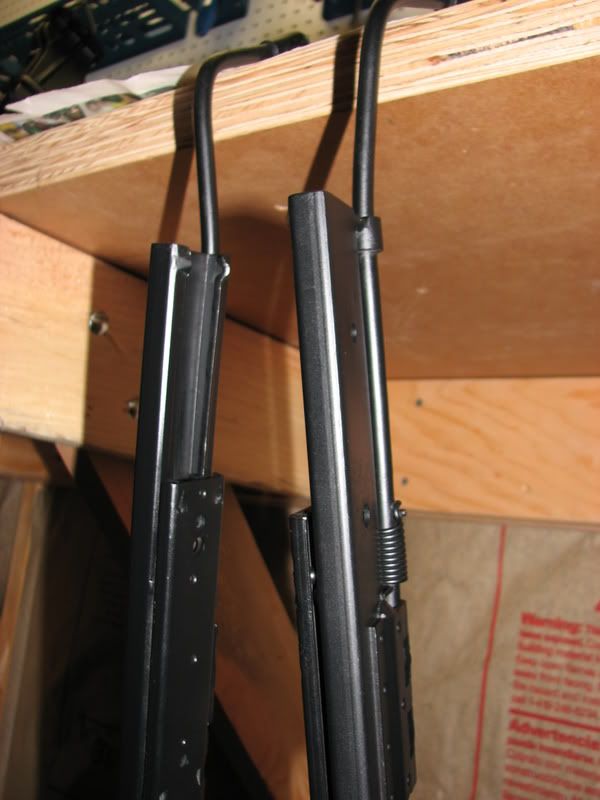
Misc brackets
This isn't all the parts i got but i got tired of taking pictures. I'll have more to glassbead next week. God knows there's a LOT to do.
#26
10-11-2008, 03:25 PM
Join Date: Jul 2008
Location: Redmond, OR
Posts: 154
Rep Power: 23
FUEL PUMP IS WORKING NOW!
I disassembled the frontend portion of it only to find out that it had entirely bound up from gas that had varnished and literally locked up the moving pieces. Nothing a little choke cleaner and armstrong, rags and patience couldn't fix. I'm not quite 100% done cleaning it yet but i will be tomorrow.
I drained the tank, only to find gas that was so old it had quite literally turned a dark dark dark yellow and smelled like a cross between nail polish remover, gasoline, and oil and glue. So nasty it made me sick to my stomach.
I hooked it up to the battery on my Ducati and sure enough, SPINNING action! This pump is good to go!
So if spark is coming tomorrow and the rest the fuel system works great, looks like we'll be good to go!
Last edited by CorsePerVita; 10-11-2008 at 03:39 PM.
#27
10-12-2008, 09:52 AM

WOW, amazing undertaking. Keep up the good work. I love threads like this that show what hard work can do. Good luck
#28
10-12-2008, 06:32 PM
Join Date: Jul 2008
Location: Redmond, OR
Posts: 154
Rep Power: 23
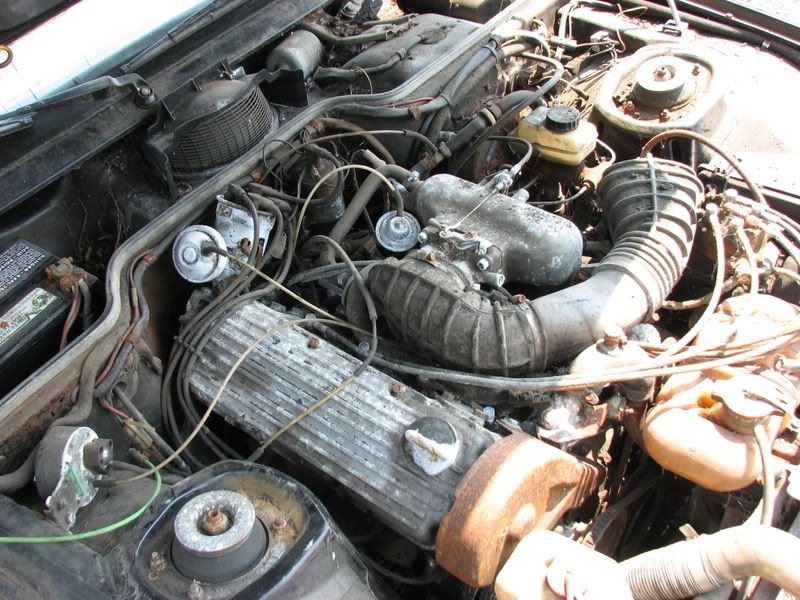
Pics of the engine bay after some cleanup today.
Pic of when I started when I first got the car...
And today.

Still got a LONG ways to go. But it's progress.
I'm also getting rid of and chiseling all the sound deadening out today so that I can grind down the floor pan and de-rust it and anti-rust coat it so it'll be one less thing to sweat.
Pic of when I started when I first got the car...
And today.
Still got a LONG ways to go. But it's progress.
I'm also getting rid of and chiseling all the sound deadening out today so that I can grind down the floor pan and de-rust it and anti-rust coat it so it'll be one less thing to sweat.
Last edited by CorsePerVita; 10-12-2008 at 08:24 PM.
#29
10-19-2008, 07:31 AM
Excellent job thus far. Keep up the hard work. I am interested to see your progress. Keep posting photo updates.
Joe
Joe
