
How To Install a GT2 Bumper and Why
#1
 12-12-2008, 11:42 AM

How To Install a GT2 Bumper and Why
So you want to upgrade the look of your 996 Turbo. One of the best ways to do that is by adding a GT2 front bumper. There are many options from the real deal to the replica one. So we have put together some information on this upgrade including how to install the bumper and why this upgrade is beneficial.
Installation:
Tools - Flat Head to pop out clips, Phillips Head, Torx Set, and a buddy.
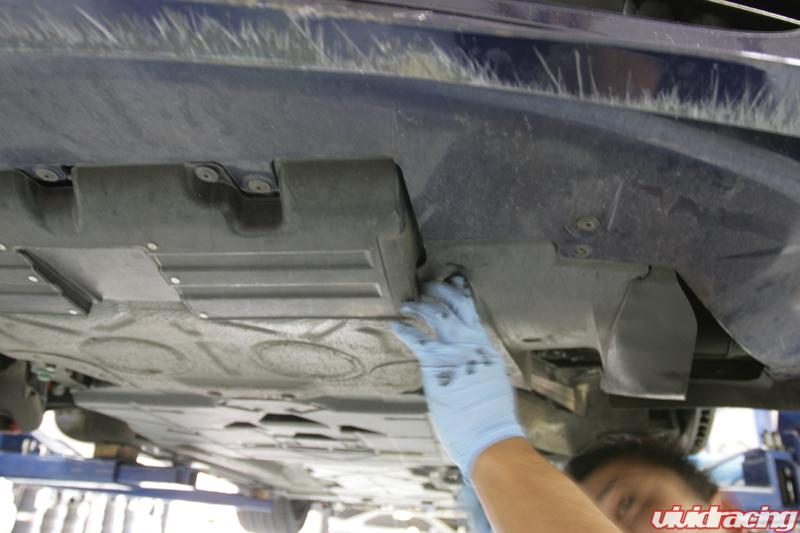
Step 1 - The first thing you need to do is to remove the inner fender liner that connects to the bumper. There are a couple of clips to pop out and then a couple on the underside of the bumper. Once these are removed the fender liner will slide out.
Step 2 -
Once the fender liners are removed, undo the clips and torx bolts from the underside of the bumper.
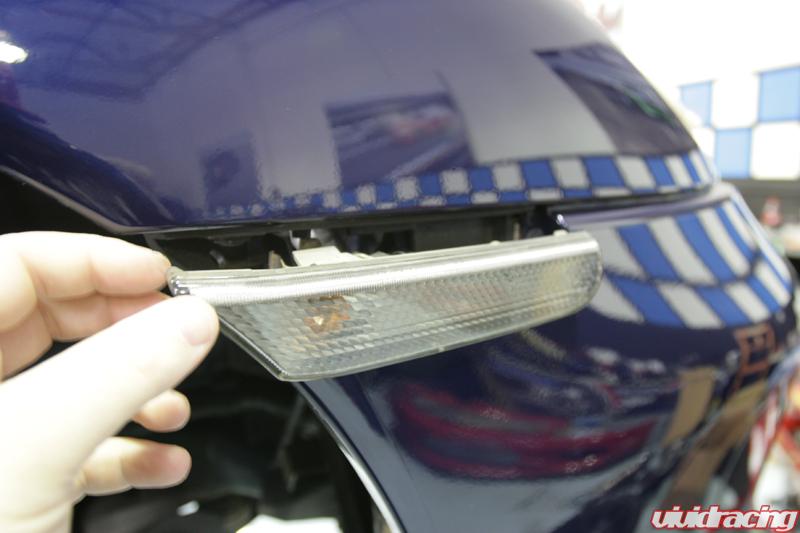
Step 3 -
Now you will want to remove the side markers. They come out really easy. Grap ahold of them from the end and simply pull forward and out. You will need to unclip the wiring harness. Behind the light is a Phillips Head screw to remove. Do this on either side of the bumper.
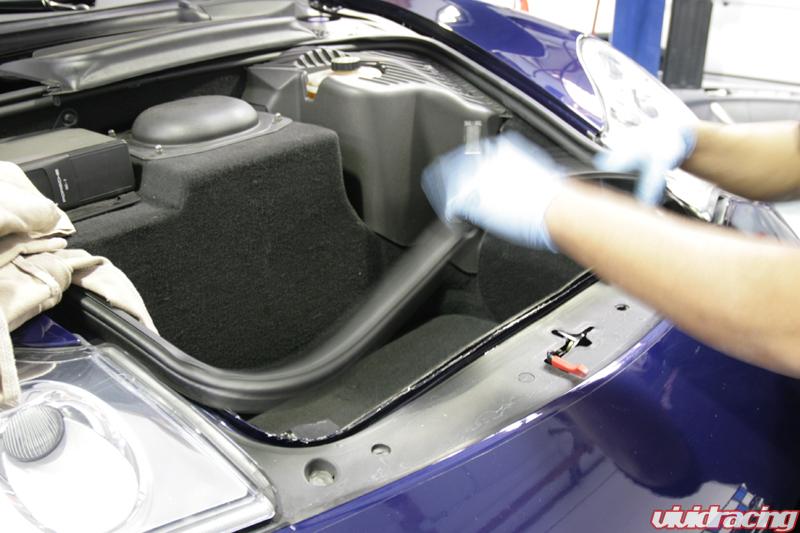
Step 4 -
Next you need to remove the trunk rubber seal and hood latch trim panel to access some of the final clips and bolts. The rubber seal lifts up as pictured. To remove the hood latch trim, there is 2 Flat Head clips to turn and pop out. Once you remove the trim you can see the remaining hardware to remove that will allow the bumper to slide out.

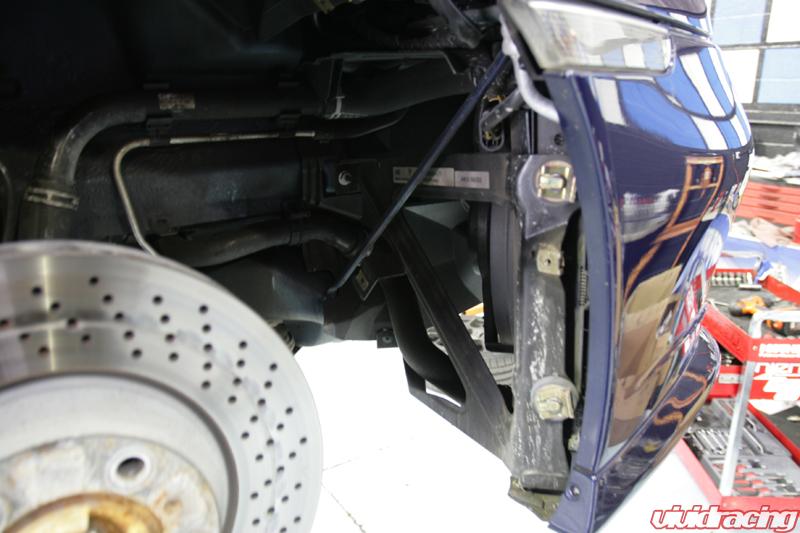
Step 5 -
Now pull gently from each side and the middle and it will slide off. If you feel anything catching, make sure you look to ensure you removed all the necessary clips.
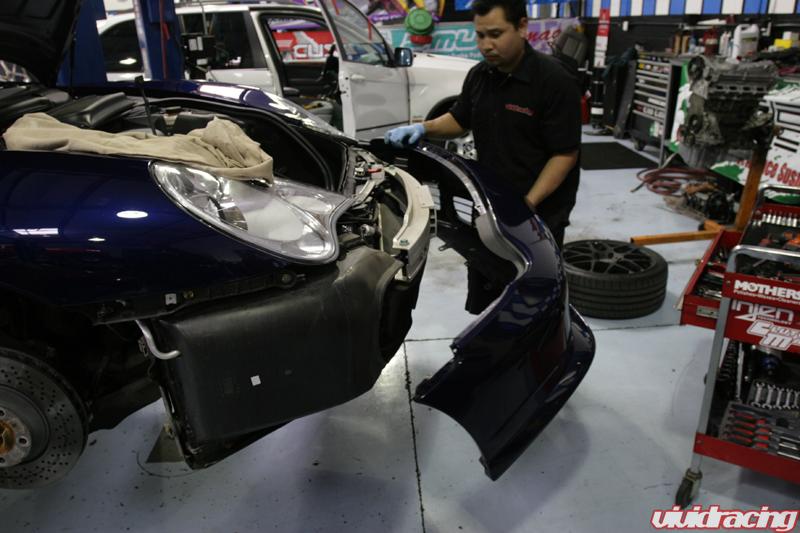
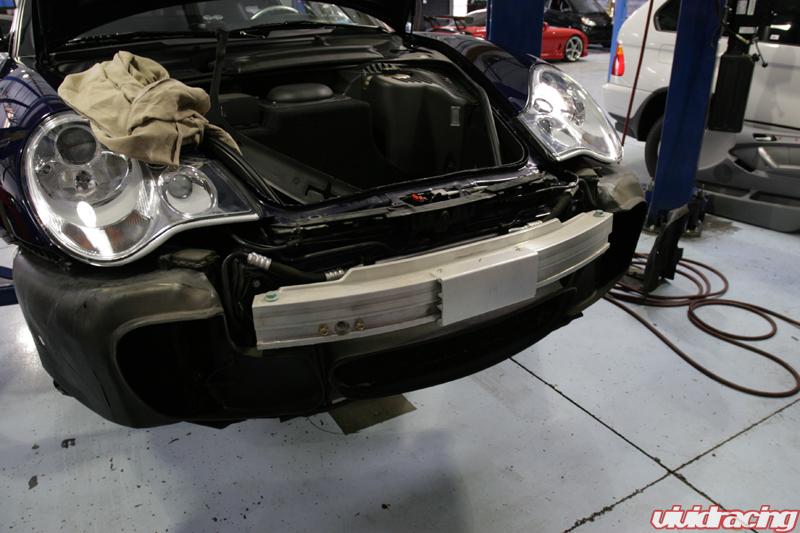
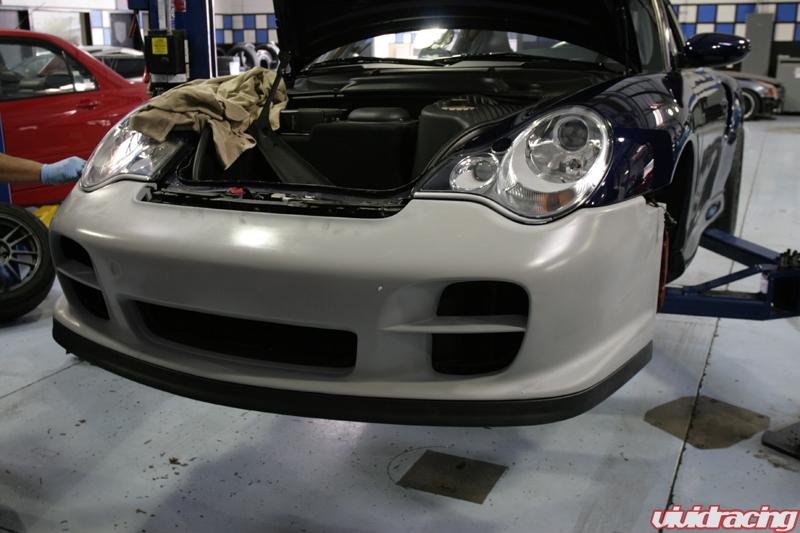
Comparison - The GT2 bumper actually has alittle more ground clearance then the factory 996TT aero kit lip spoiler. The bumper has a flatter nose and slight change in ducting. Discussion on this below.
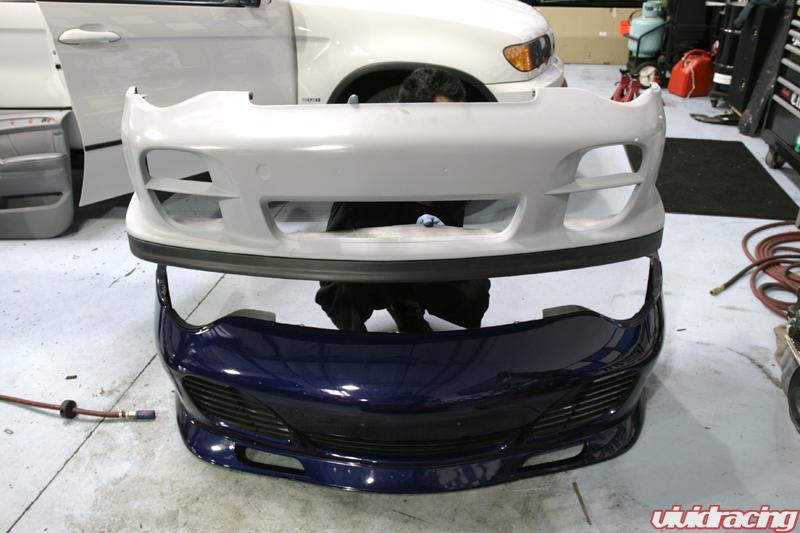
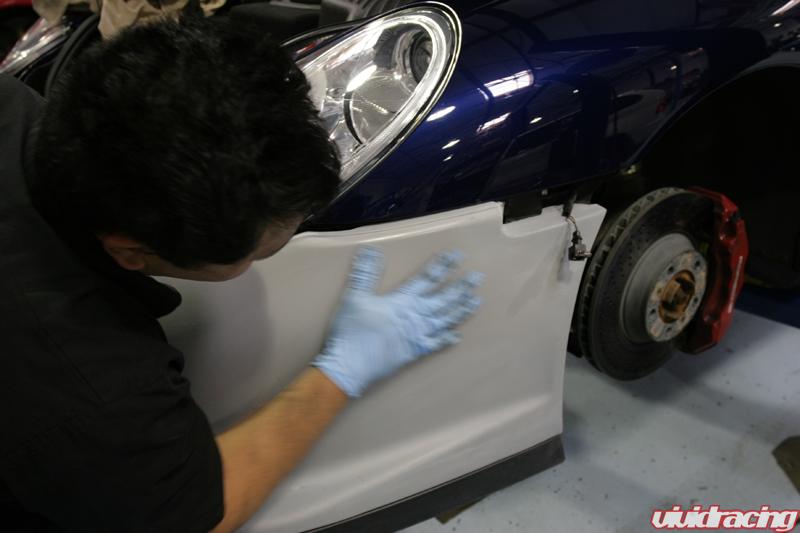
Step 6 -
You always want to test fit your parts before painting to ensure they fit. The bumper will slide into place same as you removed the old one. When you run the GT2 front bumper, you will need the OEM hood grill which goes between the hood and the bumper. Porsche has these in standard ABS plastic and a carbon fiber version. Our ABS plastic one is not pictured here. The part number you need is 996.575.326.30. Also included on this replica bumper is the OEM lower lip spoiler which is urethane. The actual bumper its self is high quality fiberglass. Discussion below.
You can view all the installation pictures of this GT2 Bumper here - http://www.vividracing.com/forums/ga...p?i=9164&c=301
Once the bumper is painted you will want to follow the instructions in reverse to refit. Make sure you also predrill the toe hook hole for your factory cap to fit in place. We always recommend doing a 3M clear bra to protect your bumper from paint chips. With any new bumper, before you clear bra, make sure you wait the adequate time to make sure the paint has cured. You will want to discuss this with your bodyshop.
Installation:
Tools - Flat Head to pop out clips, Phillips Head, Torx Set, and a buddy.
Step 1 - The first thing you need to do is to remove the inner fender liner that connects to the bumper. There are a couple of clips to pop out and then a couple on the underside of the bumper. Once these are removed the fender liner will slide out.
Step 2 -
Once the fender liners are removed, undo the clips and torx bolts from the underside of the bumper.
Step 3 -
Now you will want to remove the side markers. They come out really easy. Grap ahold of them from the end and simply pull forward and out. You will need to unclip the wiring harness. Behind the light is a Phillips Head screw to remove. Do this on either side of the bumper.
Step 4 -
Next you need to remove the trunk rubber seal and hood latch trim panel to access some of the final clips and bolts. The rubber seal lifts up as pictured. To remove the hood latch trim, there is 2 Flat Head clips to turn and pop out. Once you remove the trim you can see the remaining hardware to remove that will allow the bumper to slide out.
Step 5 -
Now pull gently from each side and the middle and it will slide off. If you feel anything catching, make sure you look to ensure you removed all the necessary clips.
Comparison - The GT2 bumper actually has alittle more ground clearance then the factory 996TT aero kit lip spoiler. The bumper has a flatter nose and slight change in ducting. Discussion on this below.
Step 6 -
You always want to test fit your parts before painting to ensure they fit. The bumper will slide into place same as you removed the old one. When you run the GT2 front bumper, you will need the OEM hood grill which goes between the hood and the bumper. Porsche has these in standard ABS plastic and a carbon fiber version. Our ABS plastic one is not pictured here. The part number you need is 996.575.326.30. Also included on this replica bumper is the OEM lower lip spoiler which is urethane. The actual bumper its self is high quality fiberglass. Discussion below.
You can view all the installation pictures of this GT2 Bumper here - http://www.vividracing.com/forums/ga...p?i=9164&c=301
Once the bumper is painted you will want to follow the instructions in reverse to refit. Make sure you also predrill the toe hook hole for your factory cap to fit in place. We always recommend doing a 3M clear bra to protect your bumper from paint chips. With any new bumper, before you clear bra, make sure you wait the adequate time to make sure the paint has cured. You will want to discuss this with your bodyshop.
#2
12-12-2008, 11:43 AM
Now why do you want to run the GT2 bumper over the stock 996TT one?
First and foremost, is styling preference. When Porsche released the 996 GT2 model, the front bumper was a more aggressive design to aerodynamically match it to the rear wing. The GT2 bumper does have larger ducting to keep the cooling efficiency at a maximum. With the hood grill, air will pass through the front ducting and instead of turbulently getting caught in the bumper, it moves right out through the hood grill. The radiator cooling air system is derived from the race-winning 911 GT1 and 911 GT3 RS.
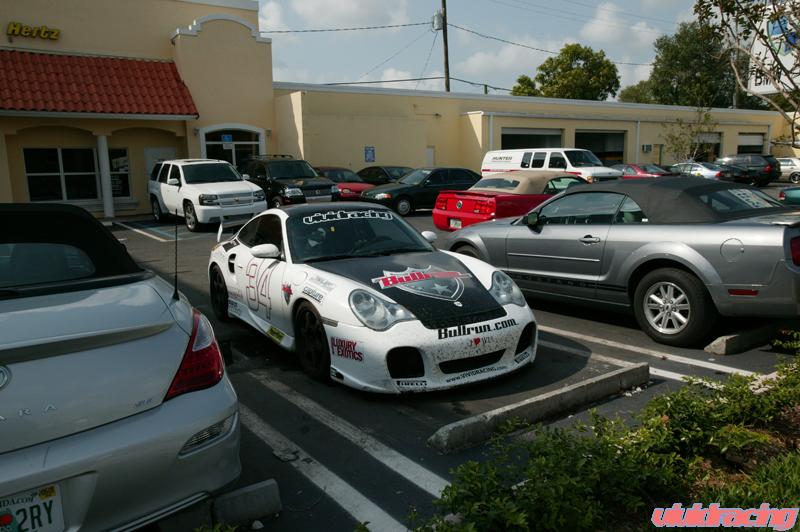
In addition to its enhanced appearance in aerodynamic improvements, the replica GT2 bumper is lighter then the original ABS plastic piece. Many people are concerned at the thought of fiberglass. This is not as flexible as a urethane bumper, however the strength of the fiberglass is more durable upon impact and rather easy to repair compared to urethane. Proving this true, on the Bullrun 2007 Rally, I took a piece of tire tread to my fiberglass bumper of the same manufacturer at 110MPH which it left a crack that was repaired easily later. Here is a picture of that car with 3000 miles applied to it in 6 days.
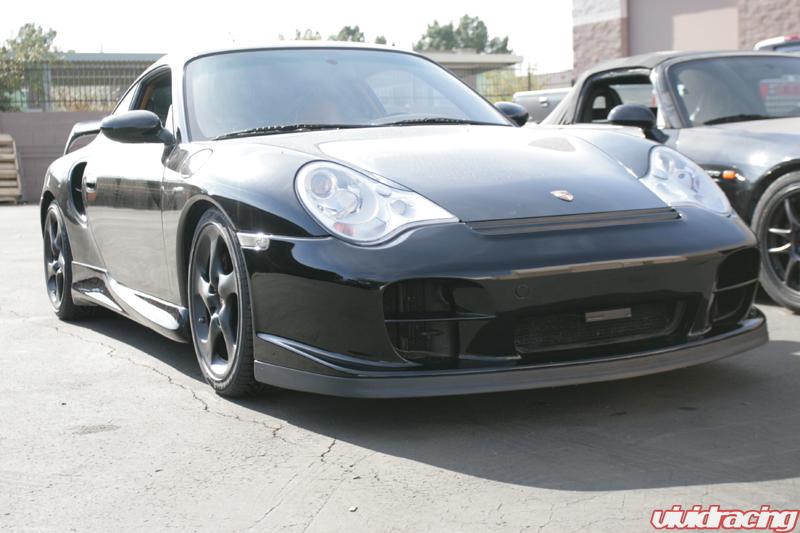
The final result of the GT2 bumper is definitely upgraded styling. Once we have the blue car finished, we will post updated pictures. Here is a black car we recently did including the clear bra.
First and foremost, is styling preference. When Porsche released the 996 GT2 model, the front bumper was a more aggressive design to aerodynamically match it to the rear wing. The GT2 bumper does have larger ducting to keep the cooling efficiency at a maximum. With the hood grill, air will pass through the front ducting and instead of turbulently getting caught in the bumper, it moves right out through the hood grill. The radiator cooling air system is derived from the race-winning 911 GT1 and 911 GT3 RS.
In addition to its enhanced appearance in aerodynamic improvements, the replica GT2 bumper is lighter then the original ABS plastic piece. Many people are concerned at the thought of fiberglass. This is not as flexible as a urethane bumper, however the strength of the fiberglass is more durable upon impact and rather easy to repair compared to urethane. Proving this true, on the Bullrun 2007 Rally, I took a piece of tire tread to my fiberglass bumper of the same manufacturer at 110MPH which it left a crack that was repaired easily later. Here is a picture of that car with 3000 miles applied to it in 6 days.
The final result of the GT2 bumper is definitely upgraded styling. Once we have the blue car finished, we will post updated pictures. Here is a black car we recently did including the clear bra.

#4
12-12-2008, 11:48 AM
Dan,
Great write up! Thanks for the pics and installation. What did you do about the radiator ducts and how did they fit/look in terms of the opening on the Gt2 ducts? Did you have to buy OEM gt2 ducts?
Edwin
Great write up! Thanks for the pics and installation. What did you do about the radiator ducts and how did they fit/look in terms of the opening on the Gt2 ducts? Did you have to buy OEM gt2 ducts?
Edwin
#5
12-12-2008, 11:50 AM
M32 - you can buy GT2 ducts if you wanted to. That would be the best thing to do. We took the standard radiator ducts and trimmed them a bit so they looked proper. This customers budget did not include the new ducts.
McD - Thanks for the comment.
McD - Thanks for the comment.
#7
12-12-2008, 12:58 PM
is that a precision Porsche bumper? how much is the top grill?
did your bumper come with the replica urethane lip?
did your bumper come with the replica urethane lip?
Trending Topics
#8
12-12-2008, 01:03 PM
This is the Precision Porsche bumper. It includes the OEM lower lip spoiler from Porsche. The hood grill can vary in price. The black ABS plastic ones I have seen for around $380 and the carbon fiber one for around $600. I have never priced out an actual GT2 bumper so not sure in comparison the total cost.
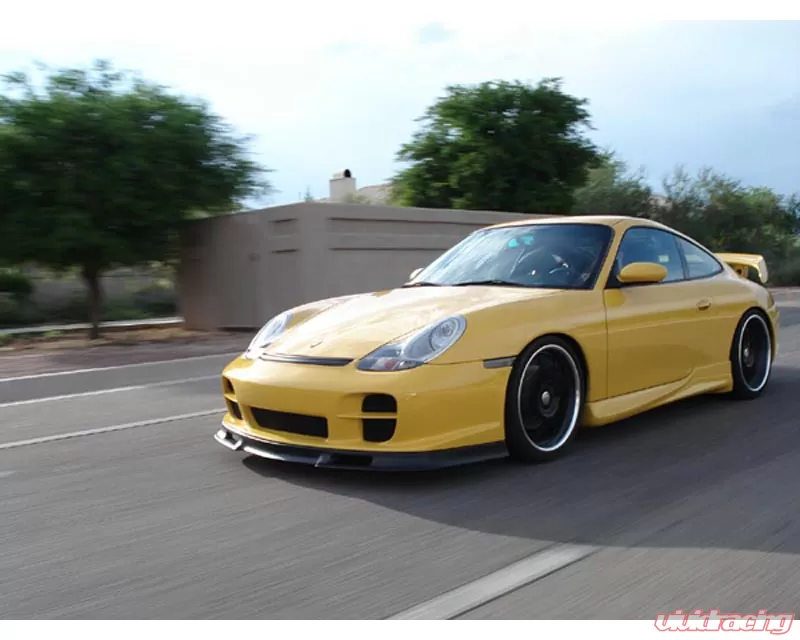
For those that like an even more aggressive look, Precision Porsche has a Fiberglass Lip spoiler they offer instead of the OEM one. I personally like the look of the OEM one as pictured below. Here is the other one on a 996C2.
Functionality and style, there is no better way then the GT2 components. Front bumper and rear wing. They really change the car.
#11
12-12-2008, 10:00 PM
Registered User
Right in time for my GT2 Bumper Install BTW> I believe my piece is a MA Shaw- got it from a member of this board as he didnt need it and it comes as one piece with the grill.
BTW> I believe my piece is a MA Shaw- got it from a member of this board as he didnt need it and it comes as one piece with the grill.
#14
12-13-2008, 06:11 AM
Registered User
Join Date: Jan 2008
Location: Coral Springs, Florida
Age: 43
Posts: 360
Rep Power: 58 
