
Spark Plug Installation - Basic DIY Guide
#16
 09-29-2010, 01:40 PM


Registered User
Join Date: Apr 2005
Location: North Bend, WA
Age: 50
Posts: 2,427
Rep Power: 162 


#18
09-29-2010, 02:39 PM

It appears you are showing just the passenger side, I presume the same goes for the drivers side?
#20
09-29-2010, 07:13 PM
Registered User
Join Date: Jul 2005
Location: Palos Verdes, California
Age: 59
Posts: 550
Rep Power: 71
#21
09-29-2010, 07:31 PM
#23
10-09-2010, 09:33 PM
Stupid question, but I only see two coil packs on the passenger side. Is the third one hidden by something and if so how do you get to it?
QUOTE=vividracing;2991332]
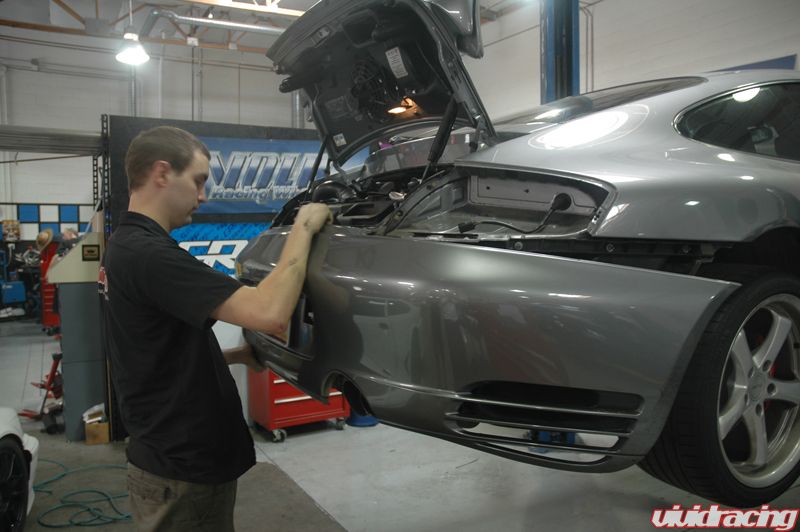
Remove Rear Bumper
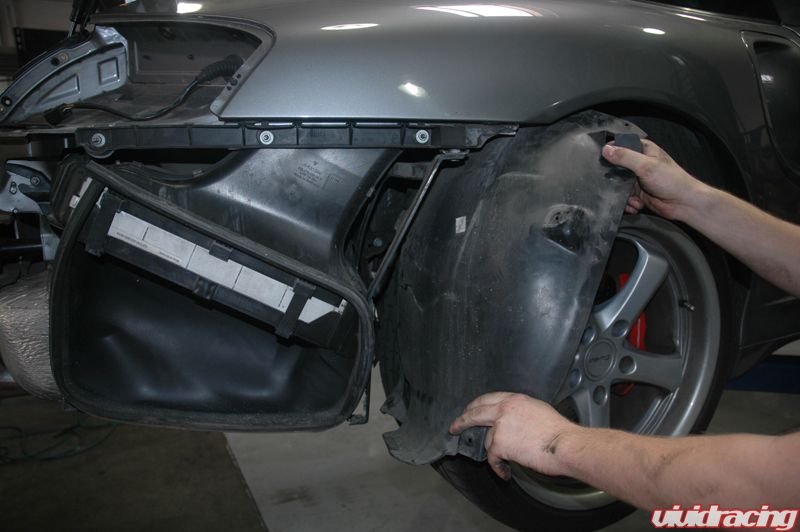
Remove Inner Wheel Well Guard
Remove Intercooler Bracket Bolts
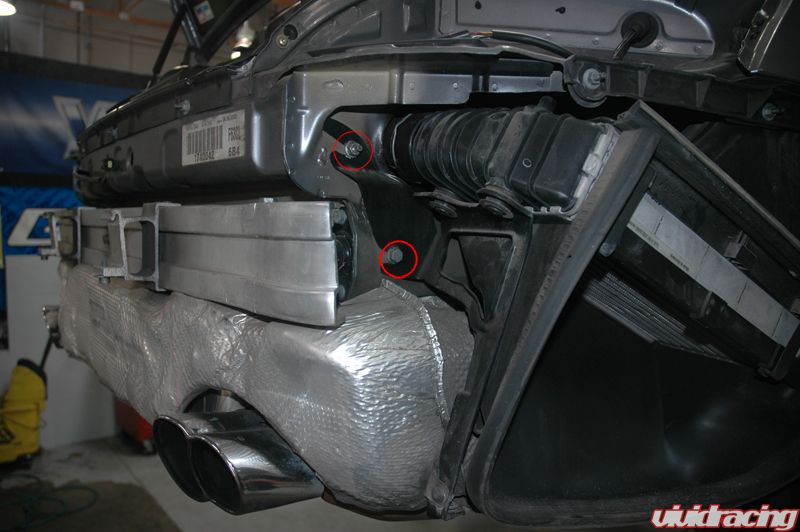

Remove Intercooler Upper and Lower Hose Clamps

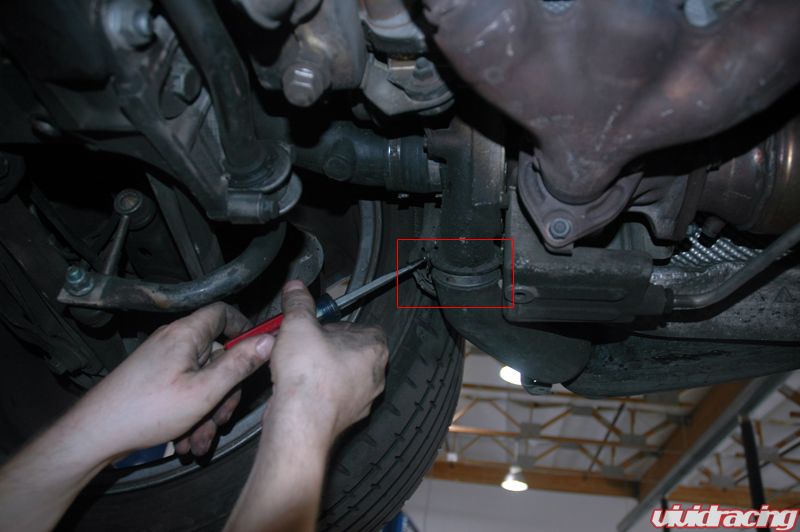
Remove Intercooler
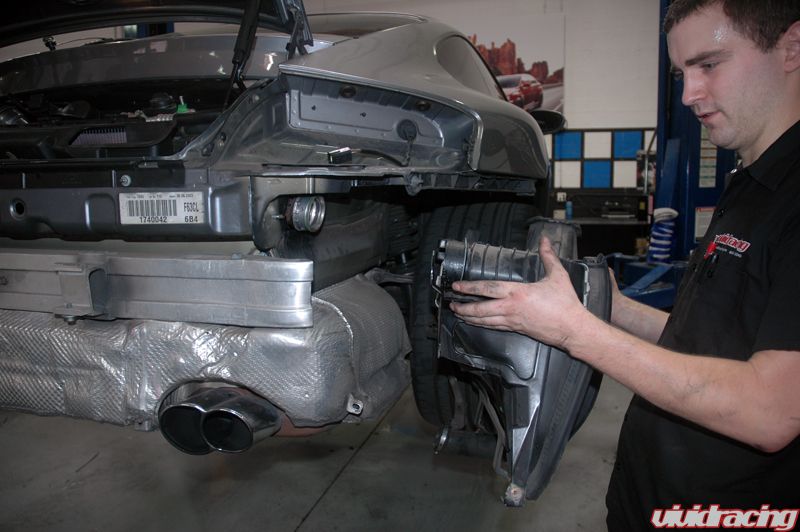
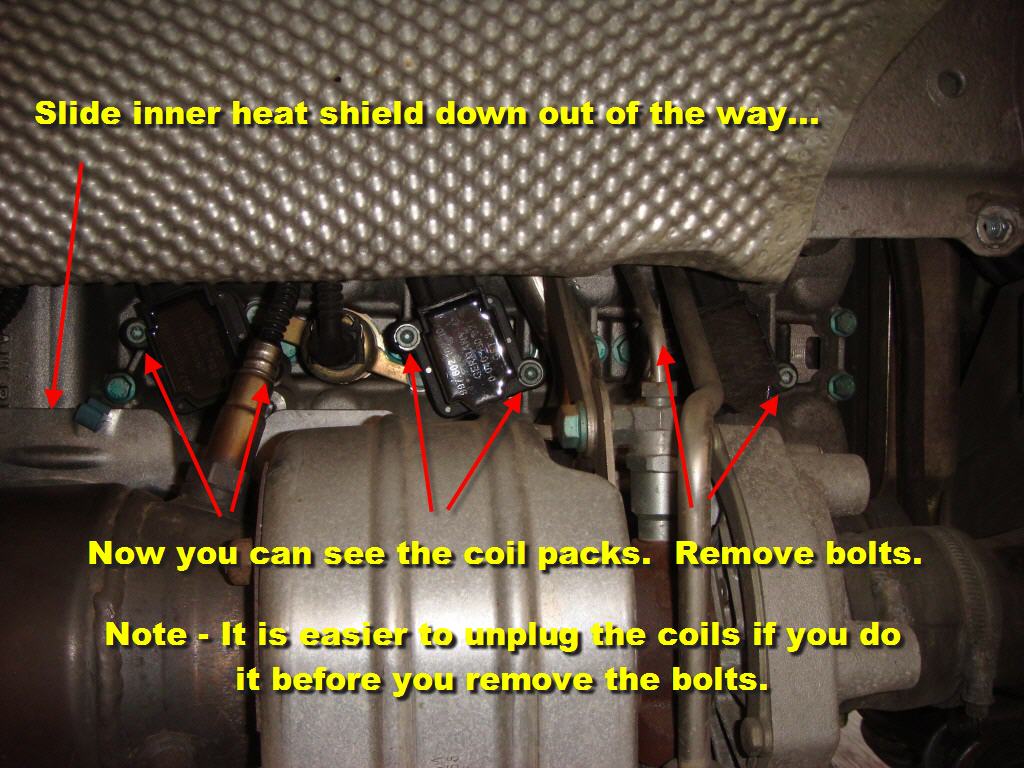
Bend Heatshield out of the way

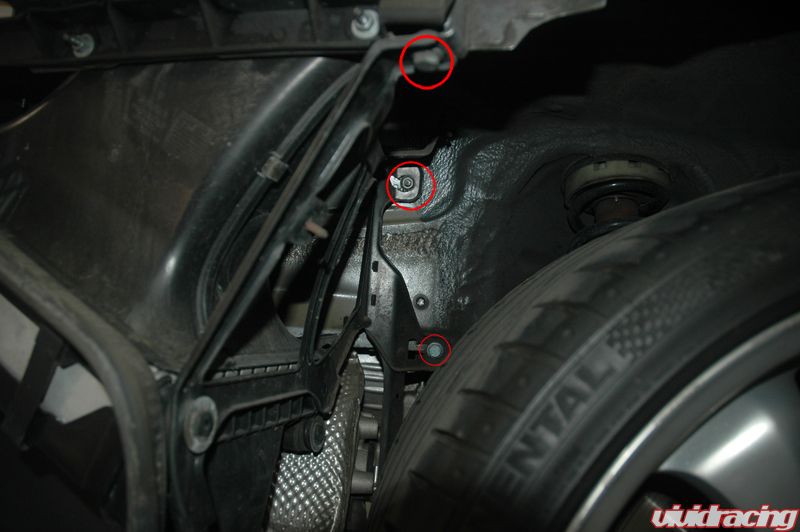
Remove Coilpack Bolts
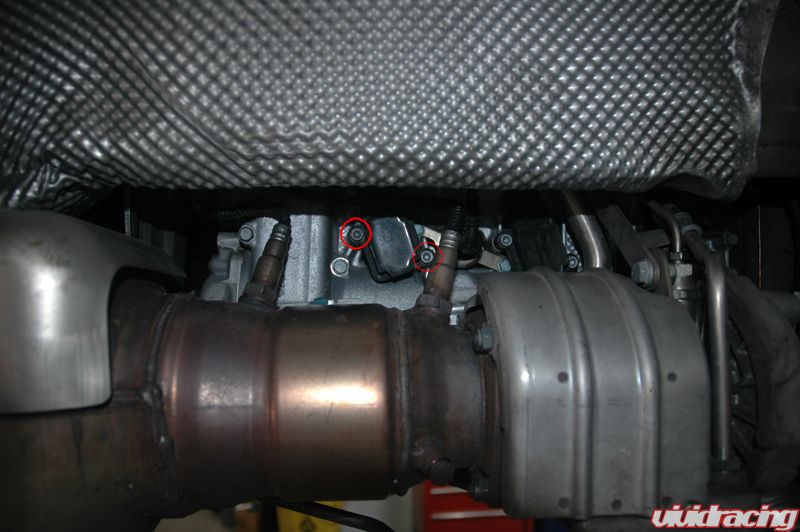
Remove Coilpack
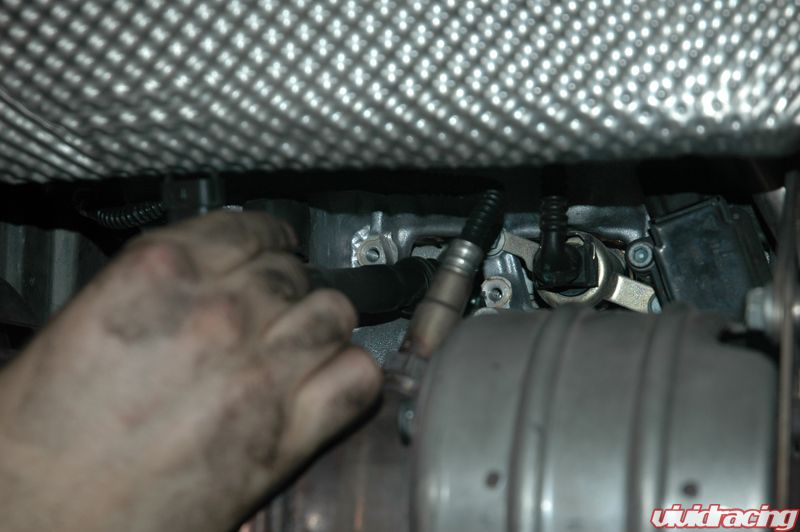
Remove Spark Plug

Change Spark Plugs and reverse the uninstall for re-assembly[/QUOTE]
QUOTE=vividracing;2991332]
Changing the Spark Plugs in the Porsche 996TT
Remove Rear Bumper
Remove Inner Wheel Well Guard
Remove Intercooler Bracket Bolts
Remove Intercooler Upper and Lower Hose Clamps
Remove Intercooler
Bend Heatshield out of the way
Remove Coilpack Bolts
Remove Coilpack
Remove Spark Plug
Change Spark Plugs and reverse the uninstall for re-assembly[/QUOTE]
#24
10-10-2010, 01:41 AM
When you get in there you will see all three without difficulty. This is from my DIY on RennTech...
http://www.renntech.org/forums/index...tion-pictures/
http://www.renntech.org/forums/index...tion-pictures/
Last edited by Slider; 10-10-2010 at 01:43 AM.
#26
04-14-2011, 12:27 PM
http://forums.rennlist.com/rennforum...g-r-and-r.html
Getting geared up for the DIY

#28
04-14-2011, 02:31 PM
I just replaced my plugs/coilpacks the other day.
Rather than remove everything outlined above, I removed the exhaust (plus O2 sensors and turbo heat shields of course) and the 2 heat shields covering the plugs. I was planning to swap the stock exhaust out anyway, so I thought I'd give it a try this way.
Tools I used were:
13mm ratcheting wrench (exhaust bolts)
13mm crows foot socket (exhaust bolts)
10mm ratcheting wrench (6 heat shield bolts)
O2 sensor socket
spark plug socket
5mm allen socket (coilpack bolts and exhaust straps I believe... maybe that was a 6mm?)
5mm (l-shaped) allen key (coilpack bolts)
socket wrench
6" extension
It was my first time working on the car and I went slowly and carefully. I also used jack stands and a creeper (no lift in my garage ). It still only took a bit under 3.5 hours total. I'm sure I could do it a bit faster next time now that I know what tool to use on each bolt.
The only difficult plug doing it this way is the passenger side front. I was still able to crack the coilpack bolts with the allen socket on a wrench, but getting both hands in there required some contorting of my right arm (above the boost hose, under a plastic liner, and kind of through a bracket).
The 2 passenger side back plugs and the drivers side back are easily accessible using this method. The 2 drivers side front plugs were not that difficult to get to, but required some maneuvering to remove and install the coilpacks. I needed to use an l-shaped allen key to break the coil pack bolts for these 2. There wasn't enough clearance to use the allen socket on a wrench and I prefer not to use wobble head sockets since I often don't get a perfect seat and tend to strip bolts (operator error for sure).
Rather than remove everything outlined above, I removed the exhaust (plus O2 sensors and turbo heat shields of course) and the 2 heat shields covering the plugs. I was planning to swap the stock exhaust out anyway, so I thought I'd give it a try this way.
Tools I used were:
13mm ratcheting wrench (exhaust bolts)
13mm crows foot socket (exhaust bolts)
10mm ratcheting wrench (6 heat shield bolts)
O2 sensor socket
spark plug socket
5mm allen socket (coilpack bolts and exhaust straps I believe... maybe that was a 6mm?)
5mm (l-shaped) allen key (coilpack bolts)
socket wrench
6" extension
It was my first time working on the car and I went slowly and carefully. I also used jack stands and a creeper (no lift in my garage
). It still only took a bit under 3.5 hours total. I'm sure I could do it a bit faster next time now that I know what tool to use on each bolt.The only difficult plug doing it this way is the passenger side front. I was still able to crack the coilpack bolts with the allen socket on a wrench, but getting both hands in there required some contorting of my right arm (above the boost hose, under a plastic liner, and kind of through a bracket).
The 2 passenger side back plugs and the drivers side back are easily accessible using this method. The 2 drivers side front plugs were not that difficult to get to, but required some maneuvering to remove and install the coilpacks. I needed to use an l-shaped allen key to break the coil pack bolts for these 2. There wasn't enough clearance to use the allen socket on a wrench and I prefer not to use wobble head sockets since I often don't get a perfect seat and tend to strip bolts (operator error for sure).
Last edited by idget; 04-14-2011 at 02:34 PM.
#29
04-14-2011, 02:57 PM
+1 tools above look about right, but you don't need to remove the O2 sensors if you take the bumper off. You also need torx bits 25 and 40. I've changed my exhaust system as well. I would say it is far easier to remove the bumper than take the exhaust off to do the spark plugs. Once you have done it once, it should only take about 20 minutes to get to the plugs - less than an hour for the whole swap whether or not you change the coils too.
#30
04-14-2011, 03:09 PM
+1 tools above look about right, but you don't need to remove the O2 sensors if you take the bumper off. You also need torx bits 25 and 40. I've changed my exhaust system as well. I would say it is far easier to remove the bumper than take the exhaust off to do the spark plugs. Once you have done it once, it should only take about 20 minutes to get to the plugs - less than an hour for the whole swap whether or not you change the coils too.
Based on the pictures it definitely looks like access to the front plugs would be much more direct with the bumper off.
To be honest I was being a bit lazy and decided to try it with the exhaust off since it was coming off anyway.