
Tapping transmission case for GT2 slave conversion
#1
 12-29-2011, 05:06 PM


Join Date: Mar 2011
Location: Florida
Posts: 183
Rep Power: 40 

Tapping transmission case for GT2 slave conversion
I wanted to post this DIY for people that want to mount the GT2 slave as it is on a GT2.
Before you tackle this project know you may want to extend the the slave shaft 1/16" to 1/8". If you look at the side where the stock slave went you notice they machined the case a bit. when i measured it, it was about 0.060". That is what you want to add to the shaft.
John@speedtech says his clutch engages almost at the floor. He did this same mode but did not extend the shaft. We both think that is is best to lengthen the shaft a little to give you engagement at 75% of the way with the pedal.
Related thread:
https://www.6speedonline.com/forums/996-turbo-gt2/261187-993-gt2-slave-conversion.html
Parts needed:
Tools needed:
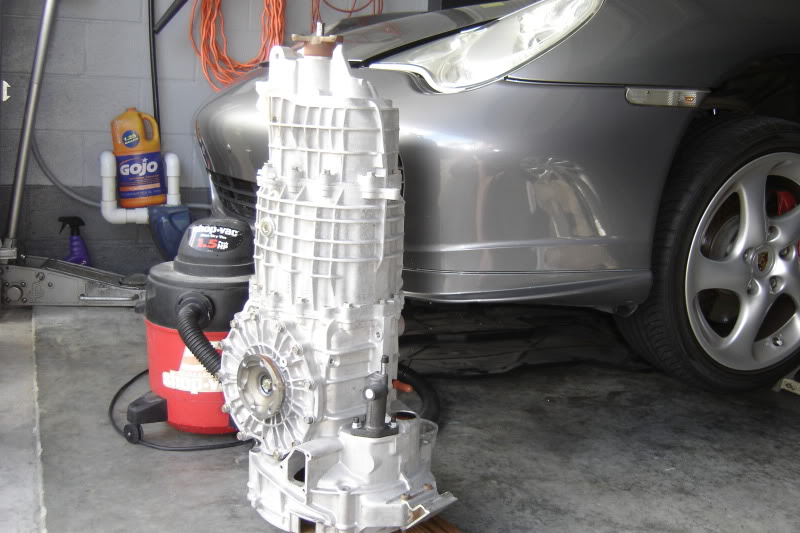
1. Plug the vent on the top of the transmission so oil can't come out. Using two pieces of 2x4, stand the transmission up. It should be very stable.
2. Using the flat file, evenly file the rough casting marks on the area where the slave will mount to. After you get it cleaned up with the file, use sand paper with a block to smooth it out.
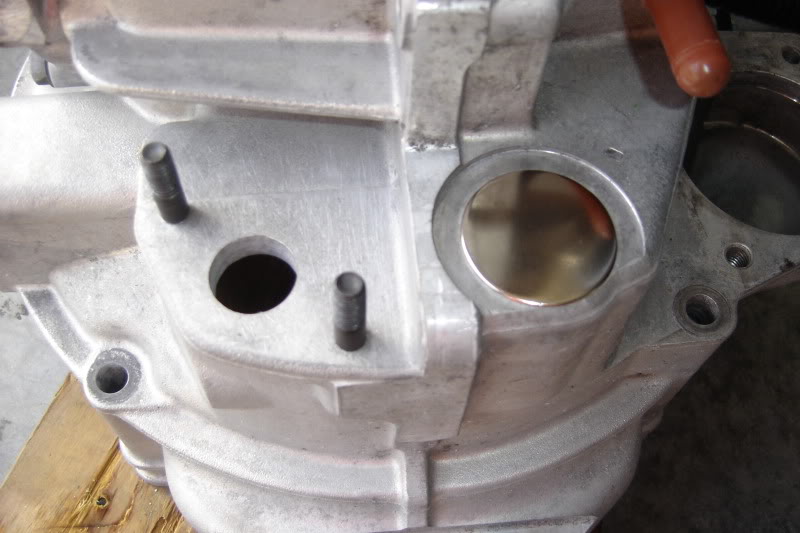
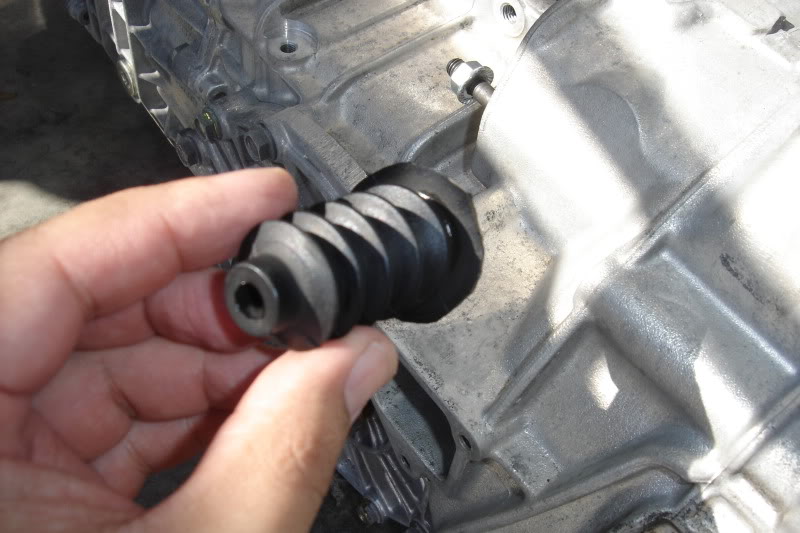
3. Take you new slave and pull the shaft out. Place the slave over the area where is needs to go. You can see that it follows the shape of the transmission case. Also align the holes over the areas that have the extra aluminum where you will drill and tap. You can referance the pictures below.
4. Using a sharp pencil, trace the holes that you will drill.
5. With the slave removed, use a center punch to mark the center of the hole to help guide your drill bit.
6. Using your drill, drill the holes out about 1.25" deep. Start with smaller bits and end with your 17/64" bit. Make sure you are drilling straight!!
7. Now drill a hole directly in between those two holes. This is for the slave cylinder shaft. Use the step bit to drill a 7/8" hole. Use a file and sand paper to smooth all sharp edges.
8. Clean everything before you start to tap the holes!!!!
9. Using oil on the tap, tap the holes until the tap hits the bottom. Cut slow and pull the tap out and clean it as you are going down. Use oil each time you go back in. Use a vacuum to clean and shavings. Use brake/carb cleaner and air to clean out the holes really well after you're done.
10. Plug the hole for the old slave with your 1.375" hole plug you got from the hardware store.
11. Install your new studs. I put a little oil on my threads to make sure they never get stuck in the future.
I'll post on how to mod the shaft later.
NEW NEW NEW!!! you have to check for this. make sure your clutch fork does not hit the inside of the bellhousing. i found this the hard way. The GT2 has a hole in this area so it does not hit. This made my feel clutch rock hard until i took some material away so the clutch fork could pass.
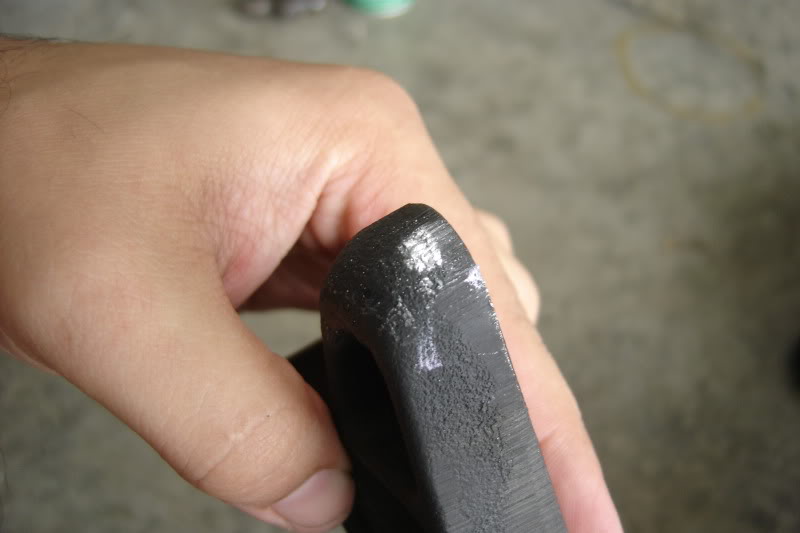

After i fixed it:
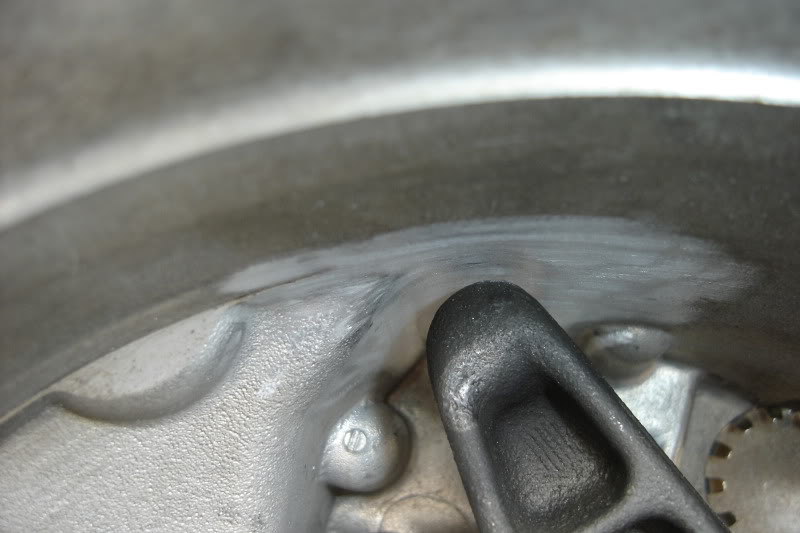
The clutch feels perfect now.
Before you tackle this project know you may want to extend the the slave shaft 1/16" to 1/8". If you look at the side where the stock slave went you notice they machined the case a bit. when i measured it, it was about 0.060". That is what you want to add to the shaft.
John@speedtech says his clutch engages almost at the floor. He did this same mode but did not extend the shaft. We both think that is is best to lengthen the shaft a little to give you engagement at 75% of the way with the pedal.
Related thread:
https://www.6speedonline.com/forums/996-turbo-gt2/261187-993-gt2-slave-conversion.html
Parts needed:
- GT2 slave part number 996 116 237 90
- GT2 clutch fork part number 99711608690
- Two M8 x 1.25 studs
- Two M8 x 1.25 nuts
- 1.375" hole plug
Tools needed:
- Drill
- M8 x 1.25 thread tap and tool
- 17/64" drill bit
- 7/8" max diameter step drill bit
- Flat file
- Round file
- medium/fine grit sand paper
- Two 2x4 pieces of wood
- pencil
- center punch
1. Plug the vent on the top of the transmission so oil can't come out. Using two pieces of 2x4, stand the transmission up. It should be very stable.
2. Using the flat file, evenly file the rough casting marks on the area where the slave will mount to. After you get it cleaned up with the file, use sand paper with a block to smooth it out.
3. Take you new slave and pull the shaft out. Place the slave over the area where is needs to go. You can see that it follows the shape of the transmission case. Also align the holes over the areas that have the extra aluminum where you will drill and tap. You can referance the pictures below.
4. Using a sharp pencil, trace the holes that you will drill.
5. With the slave removed, use a center punch to mark the center of the hole to help guide your drill bit.
6. Using your drill, drill the holes out about 1.25" deep. Start with smaller bits and end with your 17/64" bit. Make sure you are drilling straight!!
7. Now drill a hole directly in between those two holes. This is for the slave cylinder shaft. Use the step bit to drill a 7/8" hole. Use a file and sand paper to smooth all sharp edges.
8. Clean everything before you start to tap the holes!!!!
9. Using oil on the tap, tap the holes until the tap hits the bottom. Cut slow and pull the tap out and clean it as you are going down. Use oil each time you go back in. Use a vacuum to clean and shavings. Use brake/carb cleaner and air to clean out the holes really well after you're done.
10. Plug the hole for the old slave with your 1.375" hole plug you got from the hardware store.
11. Install your new studs. I put a little oil on my threads to make sure they never get stuck in the future.
I'll post on how to mod the shaft later.
NEW NEW NEW!!! you have to check for this. make sure your clutch fork does not hit the inside of the bellhousing. i found this the hard way. The GT2 has a hole in this area so it does not hit. This made my feel clutch rock hard until i took some material away so the clutch fork could pass.
After i fixed it:
The clutch feels perfect now.
Last edited by 02turbo996; 01-14-2012 at 05:08 PM. Reason: found new issue
#3
12-29-2011, 05:30 PM
Registered User
Join Date: Mar 2007
Location: San Diego, San Francisco
Age: 69
Posts: 1,870
Rep Power: 114
"Ok this is really not a hard thing to do but take your time so you don't screw it up." quote"
I have to say your DYI is excellent and your tranny looks spotless. I'm not to sure about this not being a hard thing, I think you didn't count the part about pulling the tranny.
I have to say your DYI is excellent and your tranny looks spotless. I'm not to sure about this not being a hard thing, I think you didn't count the part about pulling the tranny.
#4
12-29-2011, 05:36 PM
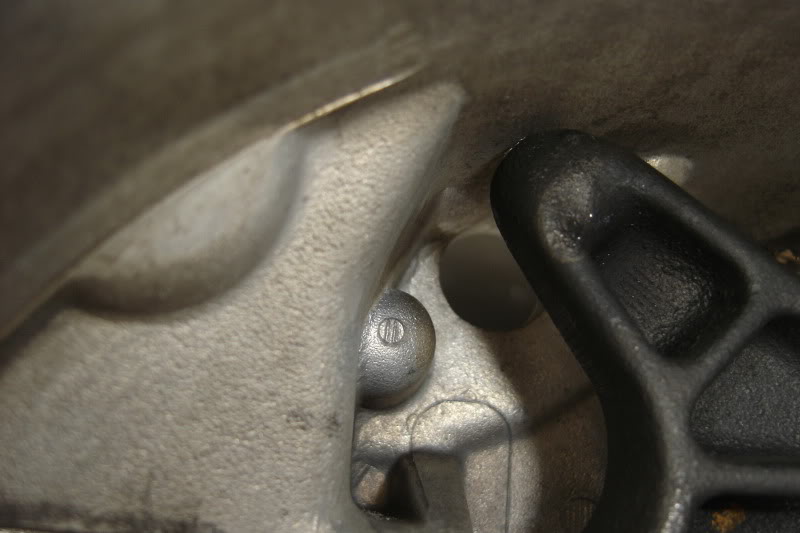
I did the same thing years ago. I remember that drilling the hole closest to the case was tough because the chuck of the drill I was using was rubbing on the rib of the case. Nice work. I also added to the rod then need to cut it for the clutch I am using now.
#5
12-29-2011, 06:05 PM
Join Date: Mar 2011
Location: Florida
Posts: 183
Rep Power: 40 "Ok this is really not a hard thing to do but take your time so you don't screw it up." quote"
I have to say your DYI is excellent and your tranny looks spotless. I'm not to sure about this not being a hard thing, I think you didn't count the part about pulling the tranny.
I have to say your DYI is excellent and your tranny looks spotless. I'm not to sure about this not being a hard thing, I think you didn't count the part about pulling the tranny.
This is something you would do while do the clutch. the drilling and tapping is not hard at all.
I pulled the tranny all by myself yesterday if that says anything. no help at all, just me and a jack.
#6
12-29-2011, 08:19 PM


Nice job, Ed! That looks very familiar to me...
__________________
991.2 GT3 RS Weissach Racing Yellow
991.2 Turbo S GT Silver
991.2 GT3 Chalk (Manual)
2022 Cayenne White
former 1972 911T white, 1984 911 3.2 Targa black, 993 cab white, 993TT arena red, 993TT silver, 996TT speed yellow, 991.1 GT3 white
www.speedtechexhausts.com
info@speedtechexhausts.com
Testimonials facebook SpeedTech Exhaust Videos
#7
12-30-2011, 12:14 PM
Join Date: Mar 2011
Location: Florida
Posts: 183
Rep Power: 40
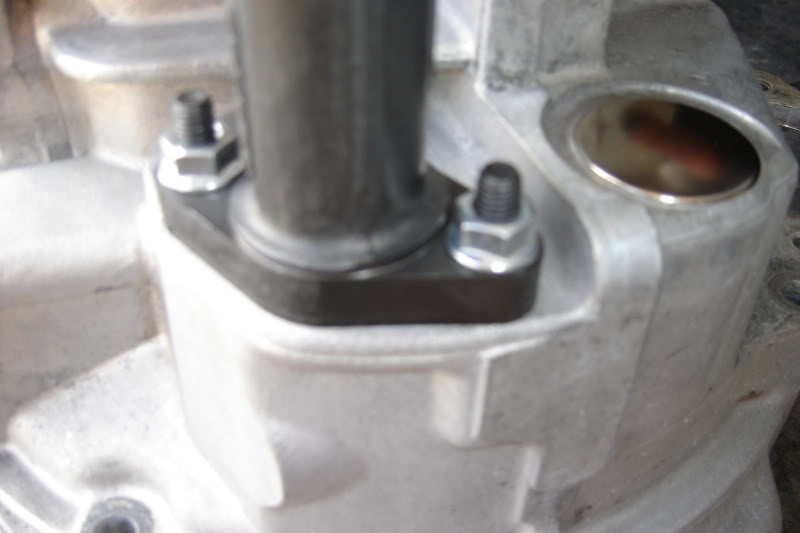
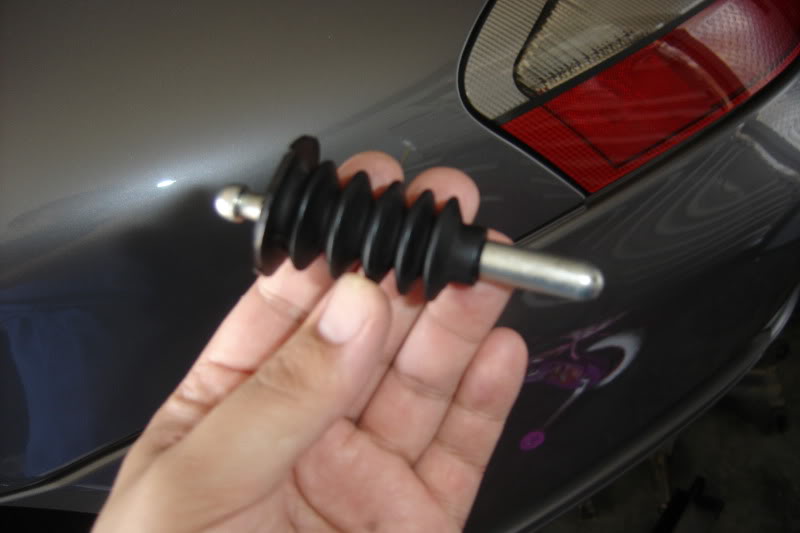
I wanted to add a boot so things would be sealed so i cut the stock turbo slave boot to fit. You'll have to install the shaft in the boot then shove the boot into the hole first when installing the slave cylinder. you'll install the slave last.

Trending Topics
#8
12-31-2011, 06:14 PM
Join Date: Mar 2011
Location: Florida
Posts: 183
Rep Power: 40
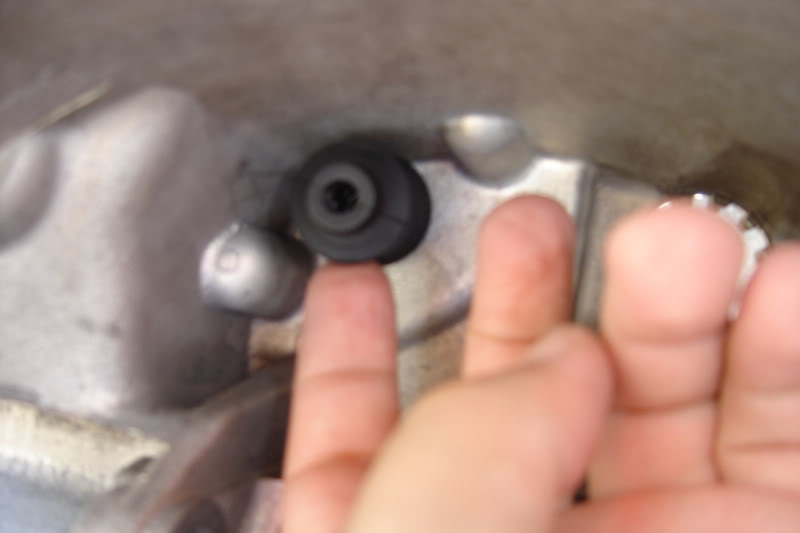
Follow the instructions to remove the drive coupler to stop the second pump for the clutch assist. A simple search will find the thread. I'm going to remove all the lines from my car too.
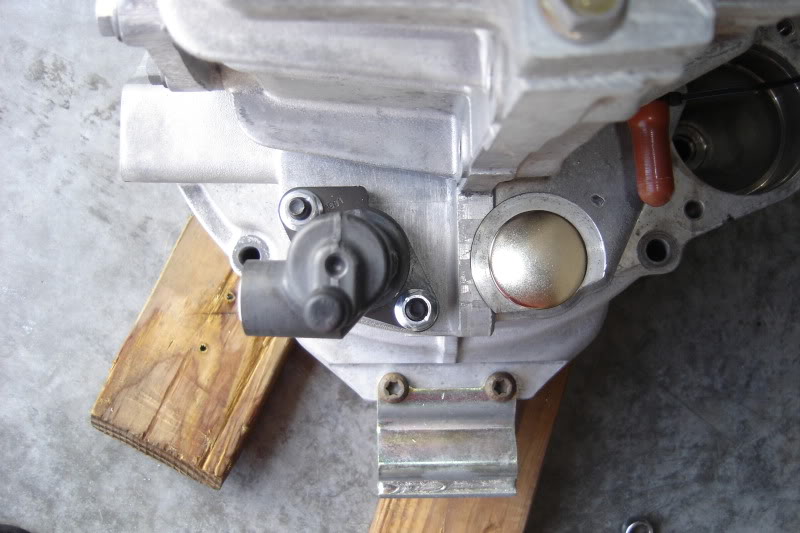
Using a 1/4"npt tap, i tapped and plugged the output from the back of the pump. Porsche feeds the pressure from here to the resevoir lid and then out to the clutch slave.
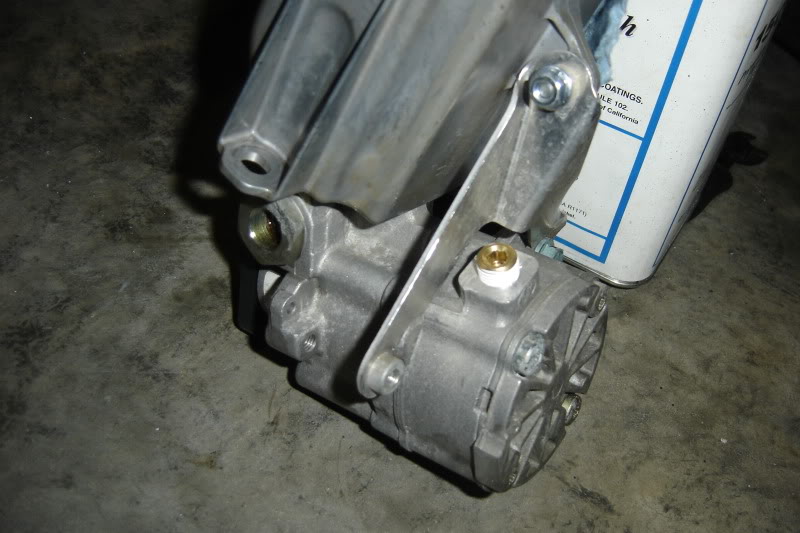
In this picture, "P" is the pressure input from the back of the power steering pump, "A" is the pressure output to the clutch slave, "T1" is the power steering return line and "T2" is the clutch return line.

You want to use a 1/8" NPT tap to thread into "T2" so you can use a 1/8" NPT plug to plug it. Use a pick to pull out the O-rings first. Only run the tap 3/4 of the way.
for "P" and "A", just find a nice plastic plug at the hardware store to plug them. at this point there is nothing running through them. Clean every thing out with brake clean so any petosin can't eat your plugs.
I think this is the plug you need to plug the pump. two if you want to cap the large one on top of the reservoir.
http://www.jegs.com/i/JEGS-Performan...oductId=758519
This one is the smaller one.
http://www.jegs.com/i/JEGS-Performan...oductId=758519
Using a 1/4"npt tap, i tapped and plugged the output from the back of the pump. Porsche feeds the pressure from here to the resevoir lid and then out to the clutch slave.
In this picture, "P" is the pressure input from the back of the power steering pump, "A" is the pressure output to the clutch slave, "T1" is the power steering return line and "T2" is the clutch return line.
You want to use a 1/8" NPT tap to thread into "T2" so you can use a 1/8" NPT plug to plug it. Use a pick to pull out the O-rings first. Only run the tap 3/4 of the way.
for "P" and "A", just find a nice plastic plug at the hardware store to plug them. at this point there is nothing running through them. Clean every thing out with brake clean so any petosin can't eat your plugs.
I think this is the plug you need to plug the pump. two if you want to cap the large one on top of the reservoir.
http://www.jegs.com/i/JEGS-Performan...oductId=758519
This one is the smaller one.
http://www.jegs.com/i/JEGS-Performan...oductId=758519
Last edited by 02turbo996; 01-01-2012 at 07:32 PM.
#10
01-01-2012, 02:55 PM
Join Date: Mar 2011
Location: Florida
Posts: 183
Rep Power: 40
I have not got to that yet, i plan to add 1/8". I may just have a new rod machined or tig weld a piece in. After reading some posts i see some people had a slight rattle with this conversion at idle when not pressing the clutch in. This would be from the rod being to short and not putting some tension on the T/O bearing.
#11
01-01-2012, 05:15 PM
I was planing on doing the same mod to my trans so that I can eliminate the hydraulic assist. Here's a GT2 trans for reference. On the factory GT2 trans, the area where you mount the slave is machined. So, since the TT trans has the extra material in that area the rod length will need to be increased (don't know the exact #) or some how machine out the aluminum to the rib line. If your trans is out, can you measure the material area?


#12
01-01-2012, 06:33 PM
Join Date: Mar 2011
Location: Florida
Posts: 183
Rep Power: 40
Great picture!!! Thank you. We TT guys plan to just extend the rod to make up for the machining.
I just measured that area on mine, which is actually marked by a casting line, and it was just under 1/4". So i guess the magic number is 1/4". It seems the slave is not going to be 100% parallel with the bellhousing face but i guess it has not caused issues for others who have done this.
I just measured that area on mine, which is actually marked by a casting line, and it was just under 1/4". So i guess the magic number is 1/4". It seems the slave is not going to be 100% parallel with the bellhousing face but i guess it has not caused issues for others who have done this.
Last edited by 02turbo996; 01-01-2012 at 06:43 PM.
#13
01-01-2012, 06:59 PM
Unless you have the motor out it is going to be really hard to remove the lines. I used a piece of cromo tube as a sleeve. I cut the stock turbo shaft and the gt2 one to make the final length needed slid the cromo sleeve over it and tig it up. I am using a triple disc so my length is no go to you. I do not know part numbers off hand but a 964 clutch fork is the mirror of the turbo one and the 964 slave is iron and uses the same thread as the turbo slave (no need to buy the line too) but the bleed is no at the high point. No problem because the slave is so easy to install you can easily bleed it then bolt it up.
#14
01-01-2012, 07:35 PM
Join Date: Mar 2011
Location: Florida
Posts: 183
Rep Power: 40
I found that out today so i just cut the lines back as much as i could. I may do the same thing using the stock rod as i have a tig welder in the garage and my local hardware store has the tubing in stainless.
#15
01-01-2012, 08:55 PM
No problem! Let us know how you make out with extending the slave rod.
Is the GT2 fork the same size / geometry as the stock one, except for being a mirror image of it? Maybe another way to get the shaft length is to measure from the slave (stock) flange to rod end and see how much the rod sticks out. Then measure the differences between (TT / GT2) mounting points on the trans. You can use some sort of straight edge setup or dial calipers with depth gauge. Would that be the difference in length needed? Does the rod get extended when taken off the transmission? That would throw off the formula I think. :-/
Is the GT2 fork the same size / geometry as the stock one, except for being a mirror image of it? Maybe another way to get the shaft length is to measure from the slave (stock) flange to rod end and see how much the rod sticks out. Then measure the differences between (TT / GT2) mounting points on the trans. You can use some sort of straight edge setup or dial calipers with depth gauge. Would that be the difference in length needed? Does the rod get extended when taken off the transmission? That would throw off the formula I think. :-/
Great picture!!! Thank you. We TT guys plan to just extend the rod to make up for the machining.
I just measured that area on mine, which is actually marked by a casting line, and it was just under 1/4". So i guess the magic number is 1/4". It seems the slave is not going to be 100% parallel with the bellhousing face but i guess it has not caused issues for others who have done this.
I just measured that area on mine, which is actually marked by a casting line, and it was just under 1/4". So i guess the magic number is 1/4". It seems the slave is not going to be 100% parallel with the bellhousing face but i guess it has not caused issues for others who have done this.