
The world's first 10K GT2 Bumper Ever...
#1
 05-06-2004, 11:59 AM


The world's first 10K GT2 Bumper Ever...
OK so it's a silly title but after this ordeal, I've spent a pretty penny and just figured I'd share with you guys what went down and pass it on to you folks...
First of all, if you're going to do a GT2 bumper swap to a TT as Ken once said there are two ways to achieve this (actually even more depending on how authentic you want to get).
The first:
1) Just remove the TT bumper and slap on a GT2 one. Yes it does fit. However is it wise? Er.. no. The way the air flow is designed to work on the front mounted radiator for a TT goes a like this. The radiator is tilted slightly forward with a downward facing air shroud and under piece. The air come in the front passes the radiator and flows back down UNDER the car. When you put a GT2 bumper on, first of all none of the rubber interiors air ducts/shrouds line up correctly for the right air flow but worse still because you can't use the rear shroud anymore the air has nowhere to pass/vent to and is blocked off. Basically your front radiator won't be doing its job. This kind of scares me and I've seen too many TTs with GT2 bumpers that do this... Shrug. The vent at the top ends up being fo' show and nothing else. You can't fit the rear shroud in to direct air...
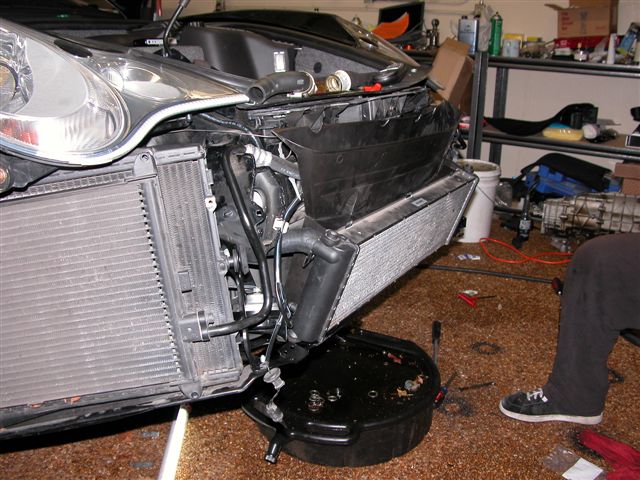
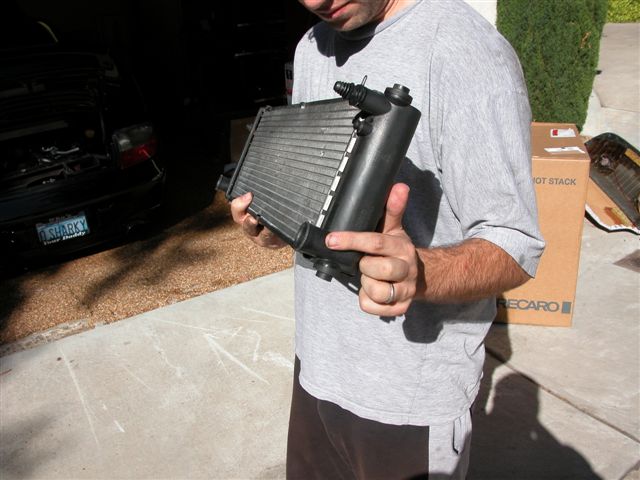
2)The other way is the right way but boy oh boy is it a pain in the **** and expensive. First of all you need a but load of parts that there usually aren't any diagrams or listings for and some have to come from Germany. Groovy. I ended up paying almost 3k for GT2-spec parts for the bumper. Having done this one could indeed shed some of that and simply reuse similar or identical TT parts. The key parts however are the radiator side mount frames (thanks Ken!!!) which enable you to actually tilt the radiator enough so you can fit in the air dam behind. Sounds easy but it's not. Once you have the parts and have spent hours and hours removing bits and pieces you then need to try and make the radiator actually fit in its intended position and connect the two hoses. This is impossible in its stock form because with the change of angle necessary, the connecter then gets pinched and/or doesn't even fit into the radiator clamp itself. Even if it did you need longer hoses because everything sort of moves forwards too. At this point Bob came up with a cool idea to actually saw off the radiator connectors (not for the feint hearted lol) and he left enough of a sleeve and lip (which you can see from the pics) that when we connected our own made hose (both sides have different diameters to make it more interesting) he managed to clamp it down nice and snug with the lip behind it to stop any movement during pressure. This way it won't leak or pop a hose- yay. So with the radiator in position and all the right parts and some perseverance the air now flows through the front radiator and out the top of the vents. Yay.
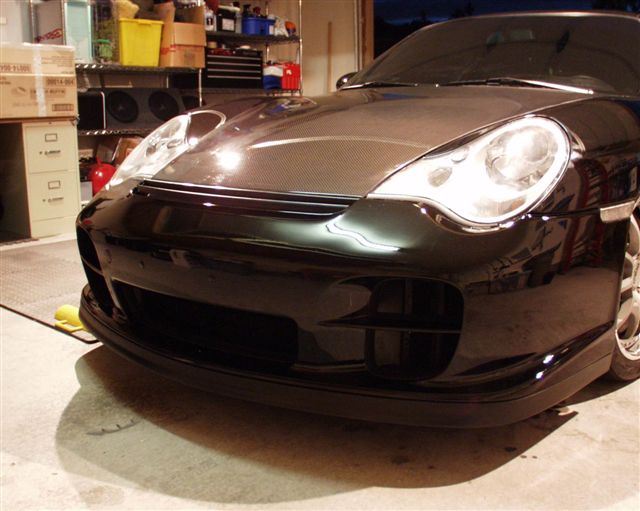
Finally some 6months on and about 8K later (remember I had to deal with all of that BS with buying the GT2 bumper from “that†former 6speed member) and about 2k of unwanted parts lol, I have my new front end to match the GT2 tail and no more warts.
PS I do NOT recommend ANYONE do this. It was a ROYAL PIA. Thanks ever so much Bob for keeping patient with it and for coming up with that ViperBob GT2 radiator. Also Ken (KPV), thanks for giving us your experiences with the whole thing. You told us what we were missing. Let me know if you want me to explain that radiator thing more to you because by the sounds of it you're almost there but just needing a little more security in terms of the clamping....
First of all, if you're going to do a GT2 bumper swap to a TT as Ken once said there are two ways to achieve this (actually even more depending on how authentic you want to get).
The first:
1) Just remove the TT bumper and slap on a GT2 one. Yes it does fit. However is it wise? Er.. no. The way the air flow is designed to work on the front mounted radiator for a TT goes a like this. The radiator is tilted slightly forward with a downward facing air shroud and under piece. The air come in the front passes the radiator and flows back down UNDER the car. When you put a GT2 bumper on, first of all none of the rubber interiors air ducts/shrouds line up correctly for the right air flow but worse still because you can't use the rear shroud anymore the air has nowhere to pass/vent to and is blocked off. Basically your front radiator won't be doing its job. This kind of scares me and I've seen too many TTs with GT2 bumpers that do this... Shrug. The vent at the top ends up being fo' show and nothing else. You can't fit the rear shroud in to direct air...
2)The other way is the right way but boy oh boy is it a pain in the **** and expensive. First of all you need a but load of parts that there usually aren't any diagrams or listings for and some have to come from Germany. Groovy. I ended up paying almost 3k for GT2-spec parts for the bumper. Having done this one could indeed shed some of that and simply reuse similar or identical TT parts. The key parts however are the radiator side mount frames (thanks Ken!!!) which enable you to actually tilt the radiator enough so you can fit in the air dam behind. Sounds easy but it's not. Once you have the parts and have spent hours and hours removing bits and pieces you then need to try and make the radiator actually fit in its intended position and connect the two hoses. This is impossible in its stock form because with the change of angle necessary, the connecter then gets pinched and/or doesn't even fit into the radiator clamp itself. Even if it did you need longer hoses because everything sort of moves forwards too. At this point Bob came up with a cool idea to actually saw off the radiator connectors (not for the feint hearted lol) and he left enough of a sleeve and lip (which you can see from the pics) that when we connected our own made hose (both sides have different diameters to make it more interesting) he managed to clamp it down nice and snug with the lip behind it to stop any movement during pressure. This way it won't leak or pop a hose- yay. So with the radiator in position and all the right parts and some perseverance the air now flows through the front radiator and out the top of the vents. Yay.
Finally some 6months on and about 8K later (remember I had to deal with all of that BS with buying the GT2 bumper from “that†former 6speed member) and about 2k of unwanted parts lol, I have my new front end to match the GT2 tail and no more warts.
PS I do NOT recommend ANYONE do this. It was a ROYAL PIA. Thanks ever so much Bob for keeping patient with it and for coming up with that ViperBob GT2 radiator. Also Ken (KPV), thanks for giving us your experiences with the whole thing. You told us what we were missing. Let me know if you want me to explain that radiator thing more to you because by the sounds of it you're almost there but just needing a little more security in terms of the clamping....
#3
05-06-2004, 12:20 PM
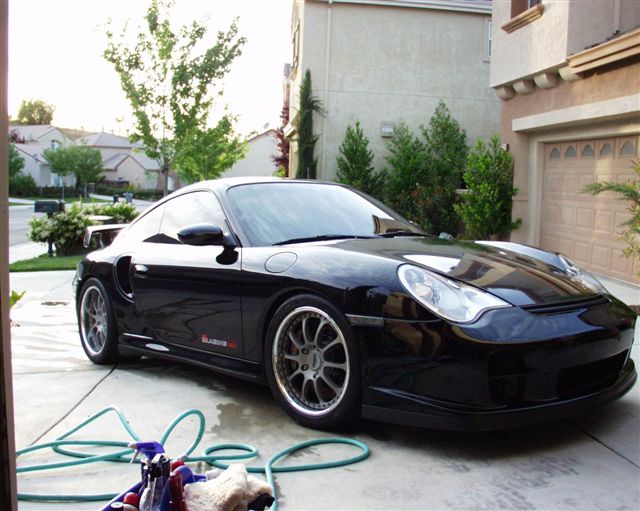
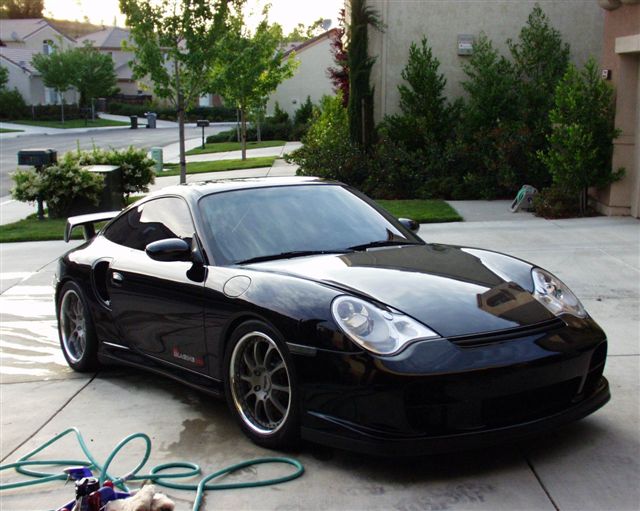
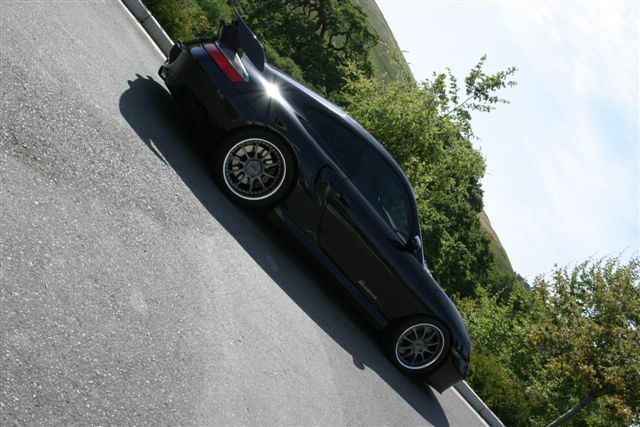
So here are some work-in-progress pix...
See how the radiator is now in GT2 mode facing forward? The whole front end has to be moved forward a good few inches....
Here's the radiator part that should interest Ken. See the lip that Bob left/carved and sanded...
And here it is on (sorry about the cam, the wife had the good one today):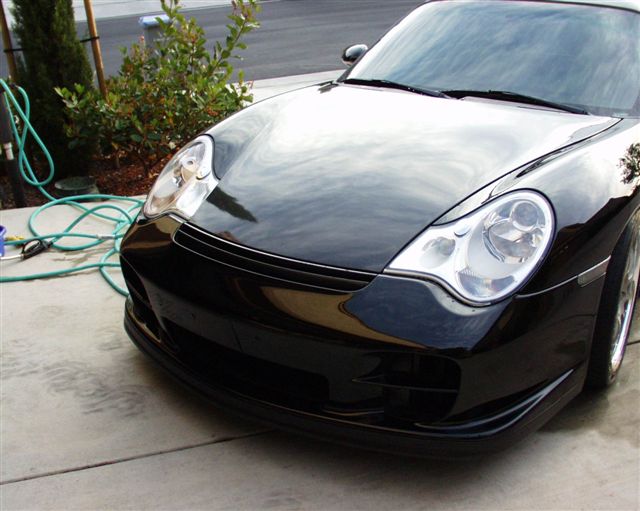
See how the radiator is now in GT2 mode facing forward? The whole front end has to be moved forward a good few inches....
Here's the radiator part that should interest Ken. See the lip that Bob left/carved and sanded...
And here it is on (sorry about the cam, the wife had the good one today):
#6
05-06-2004, 12:35 PM
Alex...I feel your pain. I have gone through the same bad dream. Like you, I bought the extra parts.
#7
05-06-2004, 12:37 PM
Originally posted by john stephanus
Alex...I feel your pain. I have gone through the same bad dream. Like you, I bought the extra parts.
Alex...I feel your pain. I have gone through the same bad dream. Like you, I bought the extra parts.
 ? At least you did it the right way though it sounds. How did you get the radiator hose clamps to work? Hopefully without pinching them...
Trending Topics
#8
05-06-2004, 12:39 PM
Originally posted by SANDOVAL
Great looking car!
Great looking car!
#9
05-06-2004, 12:54 PM
Re: The world's first 10K GT2 Bumper Ever...
Originally posted by sharkster
At this point Bob came up with a cool idea to actually saw off the radiator connectors (not for the feint hearted lol) and he left enough of a sleeve and lip (which you can see from the pics) that when we connected our own made hose (both sides have different diameters to make it more interesting) he managed to clamp it down nice and snug with the lip behind it to stop any movement during pressure. This way it won't leak or pop a hose- yay. .................................................. .................................................. ..........................
PS I do NOT recommend ANYONE do this. It was a ROYAL PIA. Thanks ever so much Bob for keeping patient with it and for coming up with that ViperBob GT2 radiator. Also Ken (KPV), thanks for giving us your experiences with the whole thing. You told us what we were missing. Let me know if you want me to explain that radiator thing more to you because by the sounds of it you're almost there but just needing a little more security in terms of the clamping....
Alex,
Regarding the Radiator:
The cutting of the radiator inlets was what I told you guys I did. I have since removed the bumper to check the fittings to make sure everything was secure and it was holding perfectly.
I was more concerning with the angle the hose has to make to continue towards the rear of the car. So far, so good.
Regarding the project:
I could not agree more about not taking this on. I will re-emphasize, it was a Royal PITA.
It was a pleasure to talk to you guys and I am glad I could help.
BTW, the car looks fabulous Alex!!!
Regards,
Ken
#10
05-06-2004, 01:05 PM
Re: Re: The world's first 10K GT2 Bumper Ever...
Originally posted by KPV
Alex,
Regarding the Radiator:
The cutting of the radiator inlets was what I told you guys I did. I have since removed the bumper to check the fittings to make sure everything was secure and it was holding perfectly.
I was more concerning with the angle the hose has to make to continue towards the rear of the car. So far, so good.
Regarding the project:
I could not agree more about not taking this on. I will re-emphasize, it was a Royal PITA.
It was a pleasure to talk to you guys and I am glad I could help.
BTW, the car looks fabulous Alex!!!
Regards,
Ken
PS There can be only one black king Ken and that one is you. Yours is just sick. That hood matches the front end as well. Plus you have the whole Star Wars thing inside
#11
05-06-2004, 01:12 PM
Originally posted by Doug H
Whoa. I glad you posted this because I was about to go down this path.
Whoa. I glad you posted this because I was about to go down this path.
 It's not fun...

#13
05-06-2004, 01:27 PM
Oh my god! is that Sharky's car all clean!?!?!?!
The shine caught me off guard! Almost didn't notice the new bumper
Looks sweet Alex! Can't wait to see it in person, maybe on Saturday.
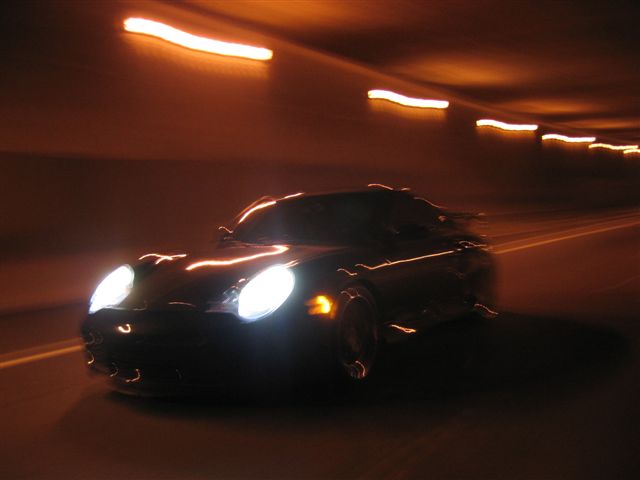
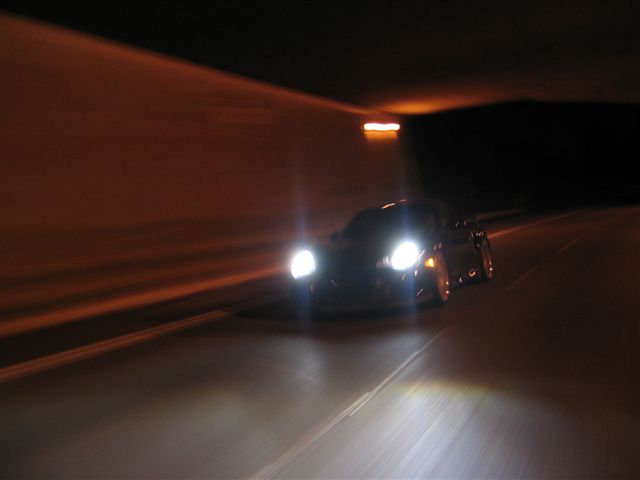
I like those action shots in the tunnel, I want some action shots of my car.
The shine caught me off guard! Almost didn't notice the new bumper
Looks sweet Alex! Can't wait to see it in person, maybe on Saturday.
I like those action shots in the tunnel, I want some action shots of my car.
Last edited by Itzkirb; 05-06-2004 at 01:31 PM.
