
Fun Little Project (Stereo)

#32
 03-04-2007, 11:02 PM

Originally Posted by Jurichar
Where is bloomfield.
I've looked over that NAK head unit quite a bit, for well over a year now . My issue with nak is one thing...reliability. From what i understand with their stuff it's not an issue of IF it will break down, but more WHEN it will break down. I guess now they offer free replacement now, but you have like 2 months downtime while you wait for them to send it to you. So im torn...??
I've looked over that NAK head unit quite a bit, for well over a year now
. My issue with nak is one thing...reliability. From what i understand with their stuff it's not an issue of IF it will break down, but more WHEN it will break down. I guess now they offer free replacement now, but you have like 2 months downtime while you wait for them to send it to you. So im torn...??Good point on the NAK. I had to send it in to have it fixed - forgot about that. My new suggestion ... avoid NAK - the wait was a nightmare!

How about a Mcintosh? - if I had the money, this one look good!
http://www.mcintoshlabs.com/mcprod/s...&product=MX406
Whatever you choose, you are going to have one sweet sounding system it seems. Can't wait to see and hear it!
I'll be back in MI with the car out hopefully sometime in mid May. We should get together.


#36
03-11-2007, 11:01 PM
Join Date: Sep 2006
Location: michigan
Age: 42
Posts: 331
Rep Power: 32 
OK!!! I ended up having to work yesterday so not much work got done, but today much better. I took a ton of pics, i wont post em alll up but i'll post up a bunch to give a good idea how things are working out....btw...they look awesome. I was getting worried for awhile, but now im pleasantly surprised!!!
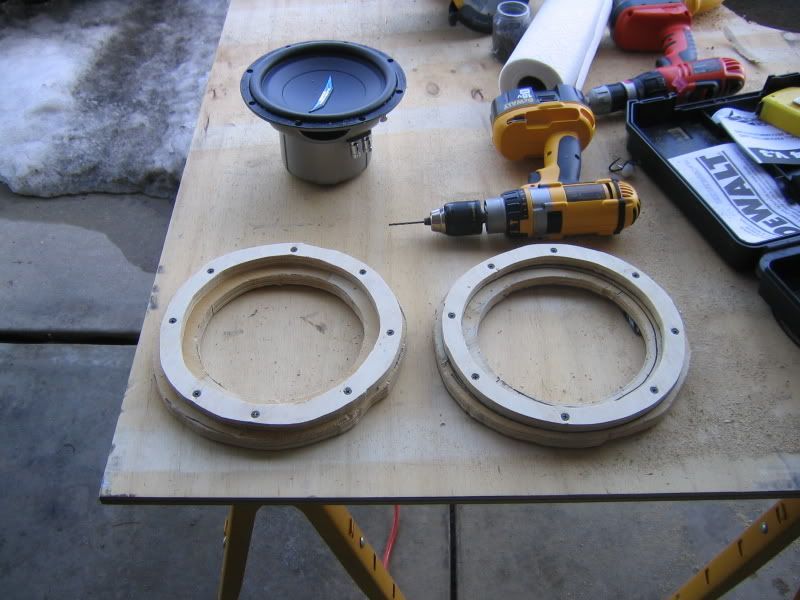
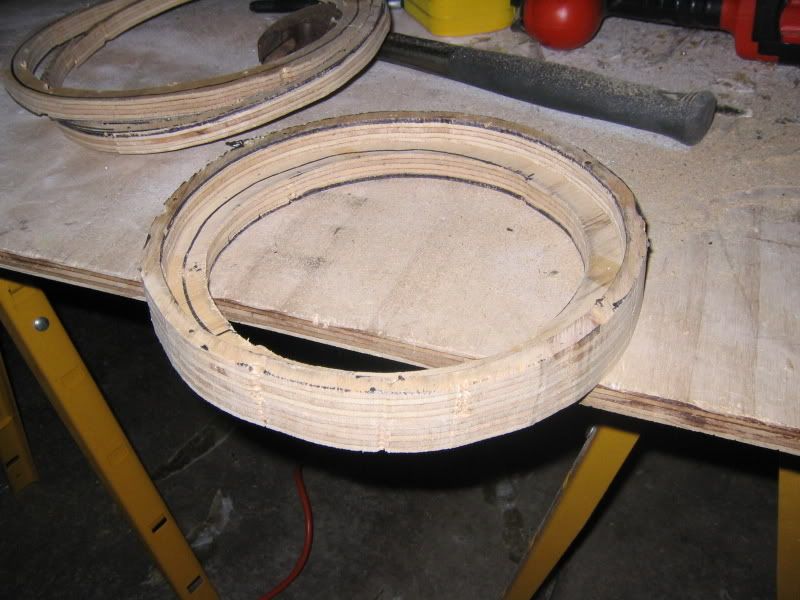
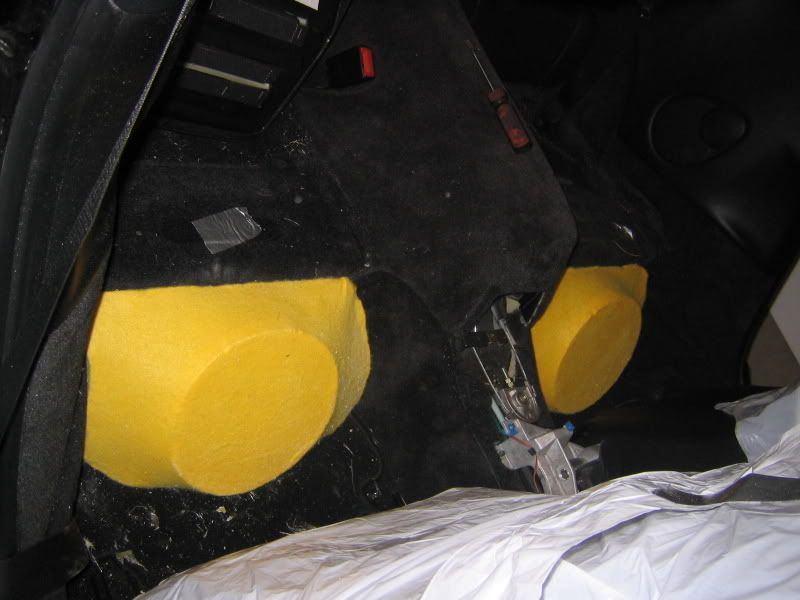
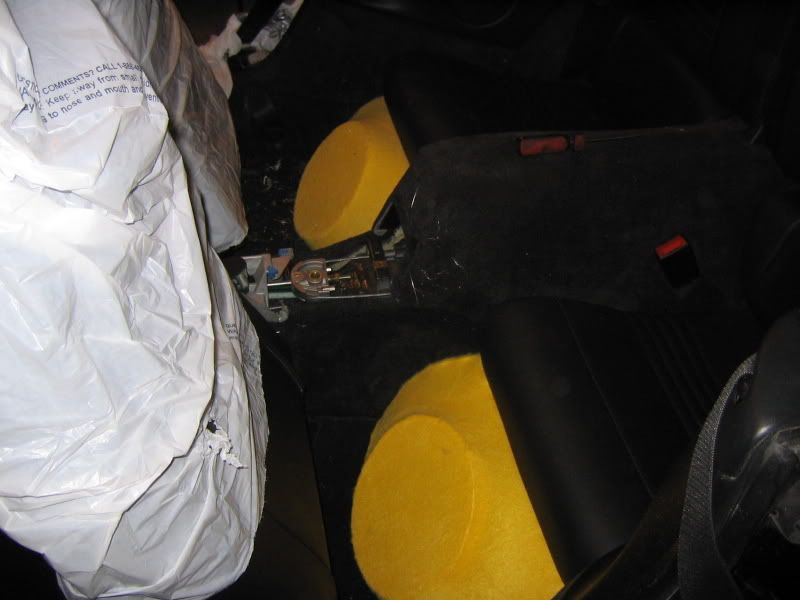
These first pics are of my original idea of making a big mounting flange. It turns out that there isnt much space in the back seat area and i needed a major downscale. A ton of work went into this failure
btw...i know my cuts are ****ty. would have gotten covered up by the fiberglass, so it wasn't worth the effort to make it pretty
Last edited by Jurichar; 03-11-2007 at 11:03 PM.
#37
03-11-2007, 11:10 PM
Join Date: Sep 2006
Location: michigan
Age: 42
Posts: 331
Rep Power: 32
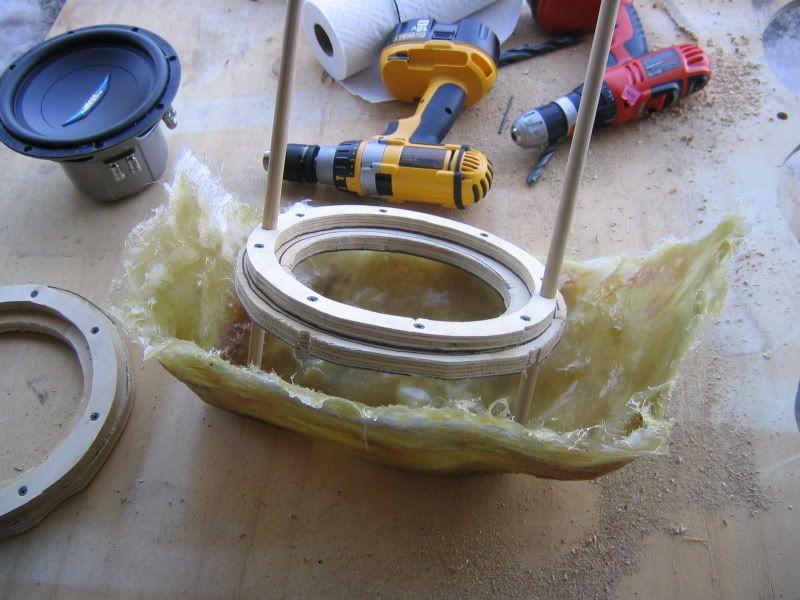
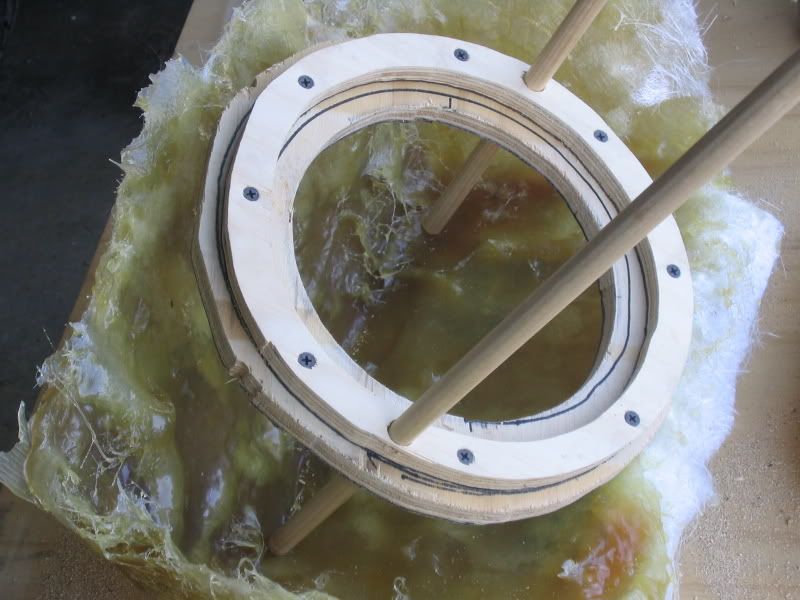
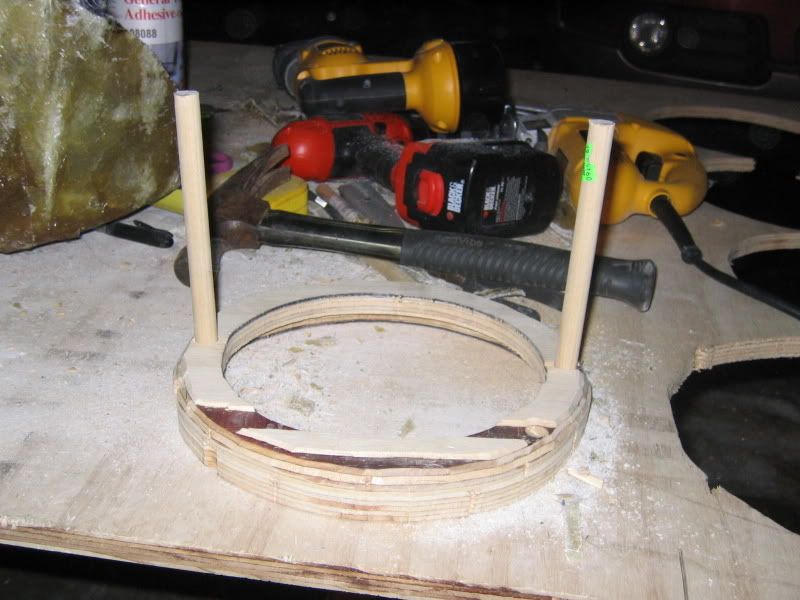
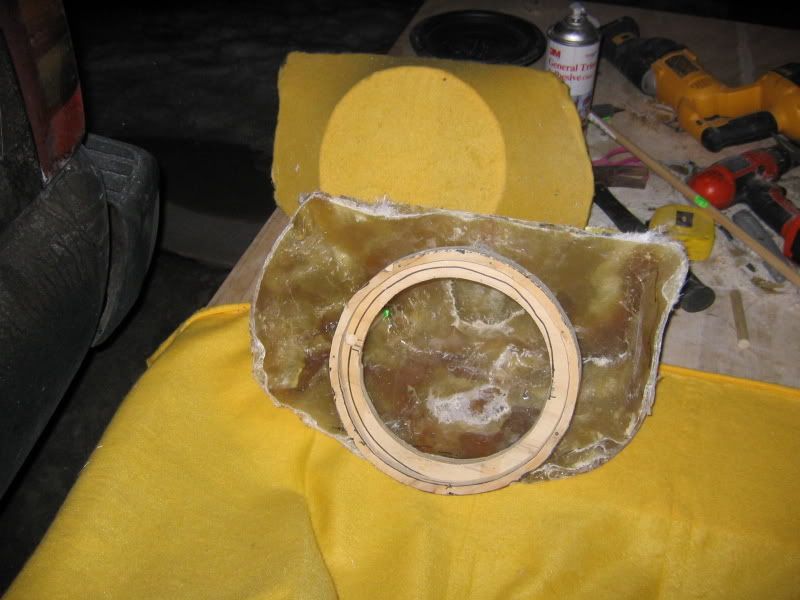
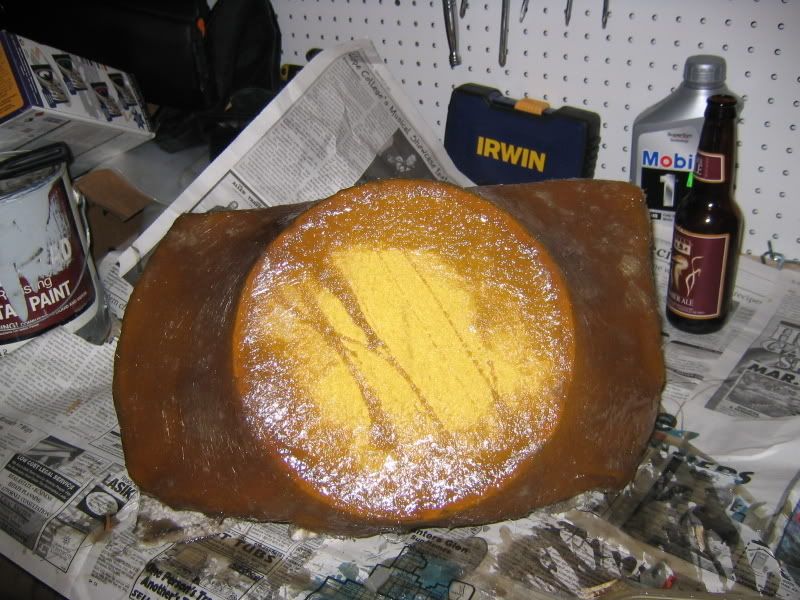
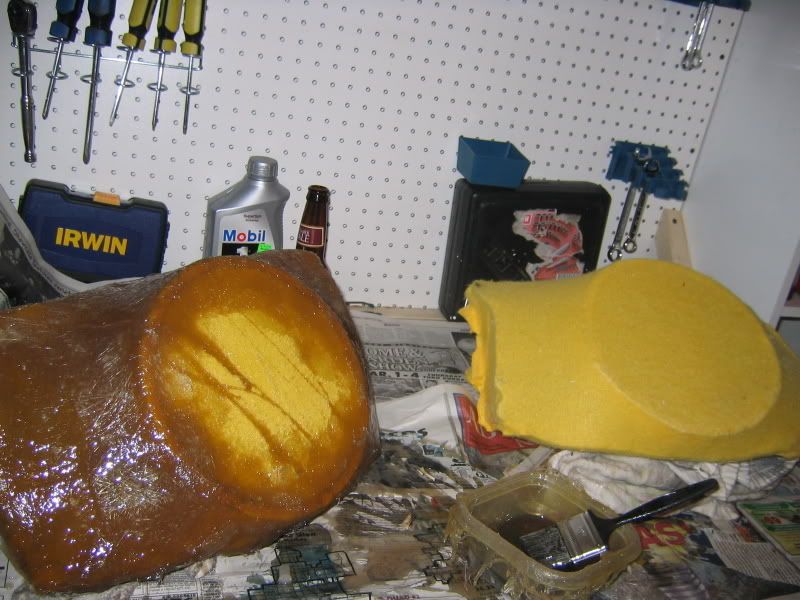
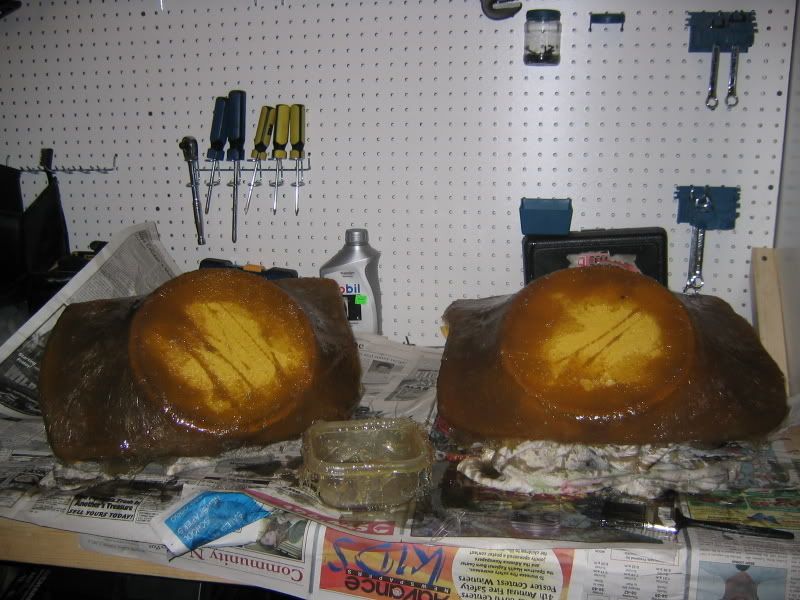
round 2 i decided to scale down the mounting aparatus a little bit and the results were much better. A little tougher to figure out how to use those big dowels though ...not much wood to work with!
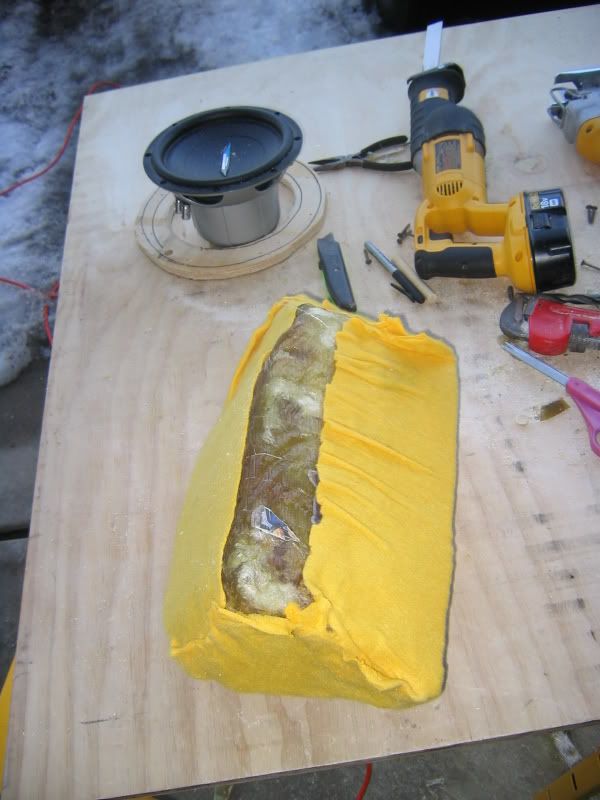
The last pic shows a cut down version of the fiberglass base...this BY FAR was the most time consuming step. I didnt know exactly how i wanted it to look, so i had to make a small adjustment and test fit like 200 times. I ended up cutting away about 30 % of the total mold to make it look right. Then i had to make the other side match up exactly the same....all in all just that part took about 4-6 hours to figure out
[edit] i just realized that last pic was only halfway finished with the cutdown...you can see the black marker
...not much wood to work with!The last pic shows a cut down version of the fiberglass base...this BY FAR was the most time consuming step. I didnt know exactly how i wanted it to look, so i had to make a small adjustment and test fit like 200 times. I ended up cutting away about 30 % of the total mold to make it look right. Then i had to make the other side match up exactly the same....all in all just that part took about 4-6 hours to figure out
[edit] i just realized that last pic was only halfway finished with the cutdown...you can see the black marker
Last edited by Jurichar; 03-11-2007 at 11:13 PM.
#38
03-11-2007, 11:17 PM
Join Date: Sep 2006
Location: michigan
Age: 42
Posts: 331
Rep Power: 32
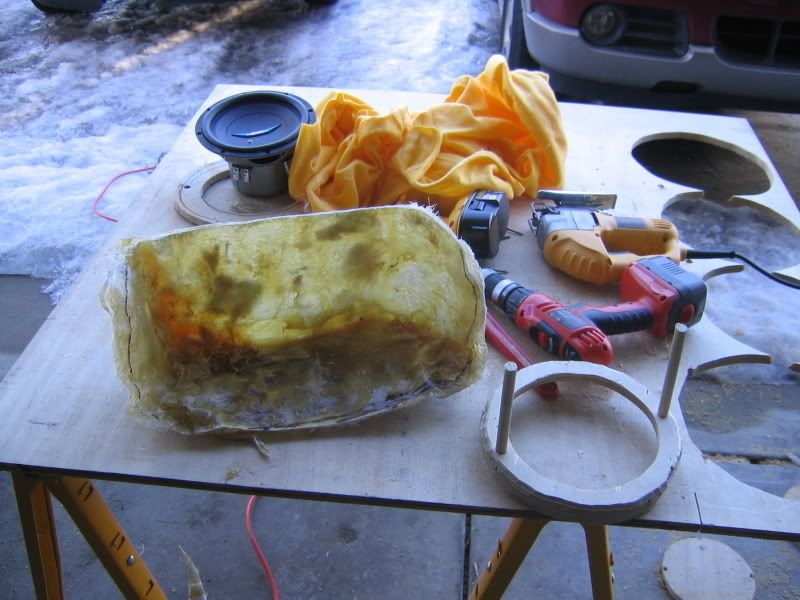
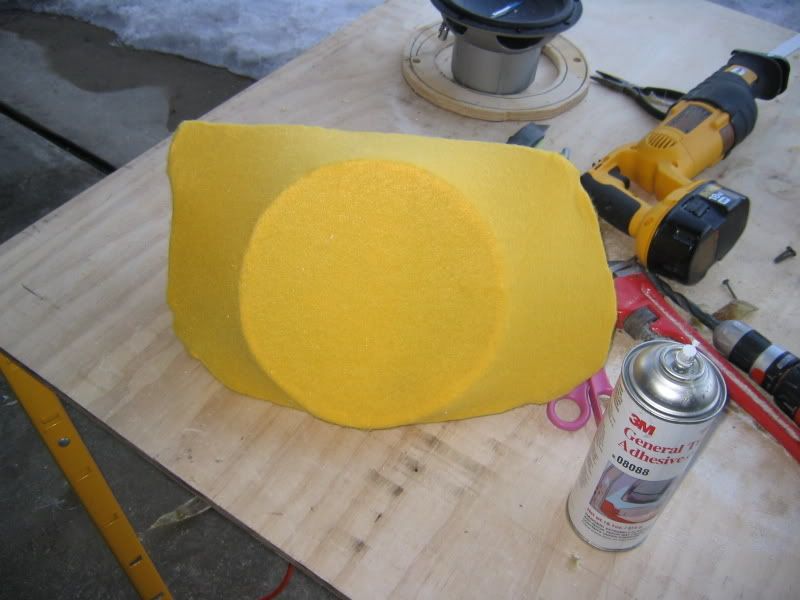
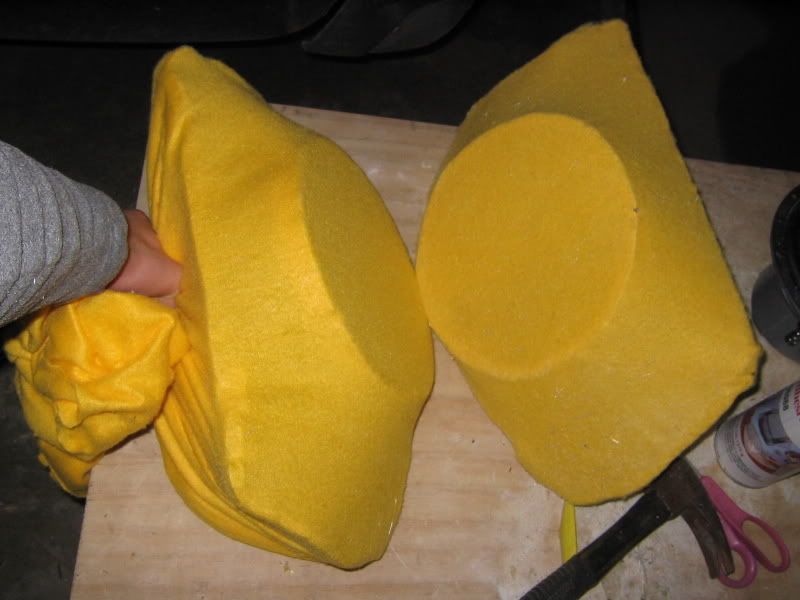
Next step was to mount the wood bracket and test fit with fleece. This is kinda hard to explain how it works, but basically you just align everything (hopefully) and then use 3m spray adhesive to glue the fleece to the mold/wood ring. Then you stretch it over everything REALLY tight and glue the other side.................MUCH easier said than done, but the pics give a decent idea of how it works out.
#40
03-11-2007, 11:21 PM
How many hours do you have into this project at this point?
What did it cost for materials?
Looking good.
What did it cost for materials?
Looking good.
#41
03-11-2007, 11:25 PM
Join Date: Sep 2006
Location: michigan
Age: 42
Posts: 331
Rep Power: 32
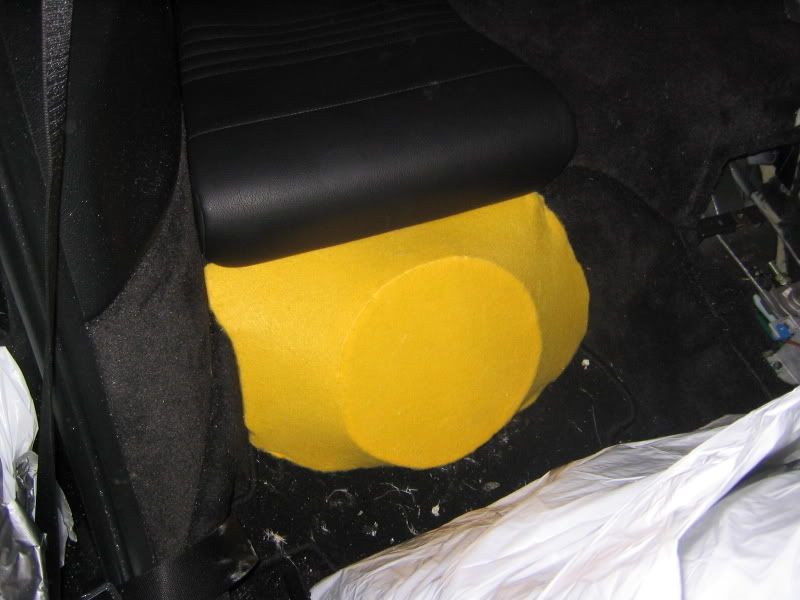
Now they get the fiberglass treatment. Basically i just saturated the fleece with a REALLY thick layer of resin and laid a few layers of glass overtop to strengthen the whole deal up. Tomarrow i'll cut the speaker holes out from the front and pray the everything didnt shift around . Then i can start using body filler to smooth everything out.
Im not 100% sure what im going to use to cover these yet. I REALLY suck at carpeting, so im leaning toward having them painted artic silver then doing the speakers grills in black fabric. Then for fun i may have my grandma embroider me some porsche logo's on the fabric in silver..
Any thoughts on how this would look??? or possibly a better idea....i suck when it comes to the final covering part
. Then i can start using body filler to smooth everything out. Im not 100% sure what im going to use to cover these yet. I REALLY suck at carpeting, so im leaning toward having them painted artic silver then doing the speakers grills in black fabric. Then for fun i may have my grandma embroider me some porsche logo's on the fabric in silver..
Any thoughts on how this would look??? or possibly a better idea....i suck when it comes to the final covering part

#43
03-12-2007, 12:02 AM
I personaly prefer the leather or vinyl look. I'm not sure painted enclosures would look good back there on the floor.
If you do decide you want the porsche logos embroidered on your grill covers, my wife has a commercial embroidery machine. I could have her whip that up in an hour or so. She loves embroidery projects.
If you do decide you want the porsche logos embroidered on your grill covers, my wife has a commercial embroidery machine. I could have her whip that up in an hour or so. She loves embroidery projects.
#45
03-12-2007, 02:02 AM
Join Date: Sep 2006
Location: michigan
Age: 42
Posts: 331
Rep Power: 32
thanks for the kind words from all . I'm really impressed with how they are coming out. I got a little worried after my little failure earlier in the day. To answer deputy's question, i've lost count of how many hours i've got into this project. I figure it as a labor of love working on my car....what else would i do on a weekend. My best guess is probably about 10-12 hours so far, with another 5 or so to go. A lot of time goes into waiting for stuff to dry and prep work.
As for cost...fiberglass resin is the biggest expense at $10 quart and i've gone through at least 5-6 so far...the glass is $4 a bag and i've used 3, bondo is $10. Plywood, dowels, painbrushes, plastic bags, ducttape, fleece, sawblades, etc I've probably got at least another $50 into. So total cost is around $125, but i dont have ANY finishing work done...that could easily double or triple the total cost. I'll probably have to have anything except carpet professionally done..
I may take you up on the embroidery thing... thanks for the offer!!
. I'm really impressed with how they are coming out. I got a little worried after my little failure earlier in the day. To answer deputy's question, i've lost count of how many hours i've got into this project. I figure it as a labor of love working on my car....what else would i do on a weekend. My best guess is probably about 10-12 hours so far, with another 5 or so to go. A lot of time goes into waiting for stuff to dry and prep work. As for cost...fiberglass resin is the biggest expense at $10 quart and i've gone through at least 5-6 so far...the glass is $4 a bag and i've used 3, bondo is $10. Plywood, dowels, painbrushes, plastic bags, ducttape, fleece, sawblades, etc I've probably got at least another $50 into. So total cost is around $125, but i dont have ANY finishing work done...that could easily double or triple the total cost. I'll probably have to have anything except carpet professionally done..
I may take you up on the embroidery thing...
thanks for the offer!!