DIY: Matte Black Hood Wrap
#1
DIY: Matte Black Hood Wrap
Gotta little road trip coming up this week/weekend. In anticipation of the trip and the crazy weather we have been having I thought it might be wise to install a little body armor just in case I hit snow and sand going over the Grapevine.
Matte Black Hood Wrap & Yellow Headlight Covers.
Got the wraps at PepBoy. The hood came by 60" x 60" and was only $49. The headlights were a rip-off by comparison. They were advertised as 20" x 48" for $29. Upon opening them up the real measurements were 23" x 23". Out of principle I took them back to complain and to let them know the product was falsely advertised. Did the return, but I made them open the new wraps and check the measurements... guess what....they too spec'd out at 23" x 23". So they gave me my original set and the new set for $29 (two for one), Yea!
So the hood is definitely a two man job, or in my case a man & wife job!!! I can't believe we didn't strangle each other. We took it on as a challenge and mastered it!!! Pretty pleased with the end result. After seeing it completed I might pop for a professional install with real 3M products.
The key to doing this is patience, a blow dryer, and to work in small increments. I did the whole application "dry". Meaning I didn't spray the surface with a water & soap base misting. Knowing this is intended to be temporary, I wanted to ensure easy removal within the next two weeks. Misting the surface adds to the adhering time and once dry can make the removal more difficult. Also, I waxed the surface with Mother's FX spray Wax (this is a No-No for long term applications), again I want the removal to be quick and easy. I use Mother's Spray when preparing my doors before applying my track day numbers as well. Which allows for simple and easy removal at the end of the day with no mess or any adhesion material left behind.

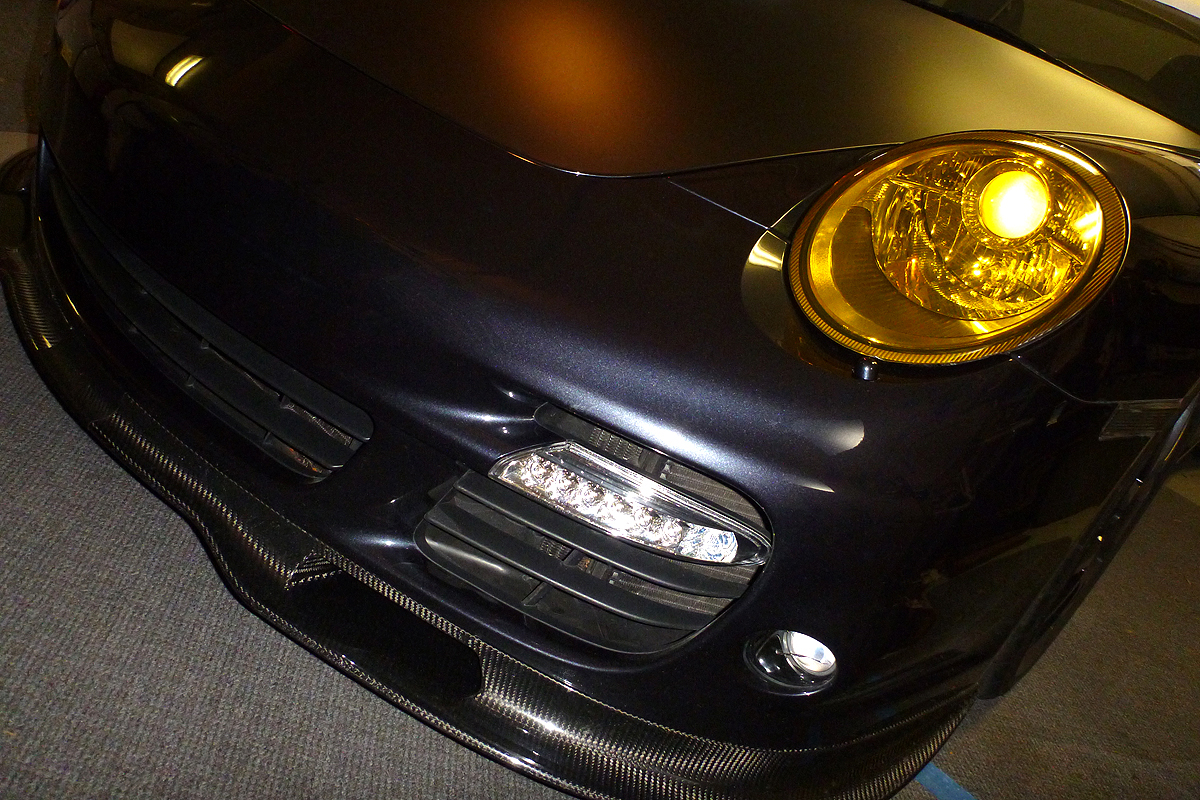
^^^ Hood done. Now on to the Headlights.

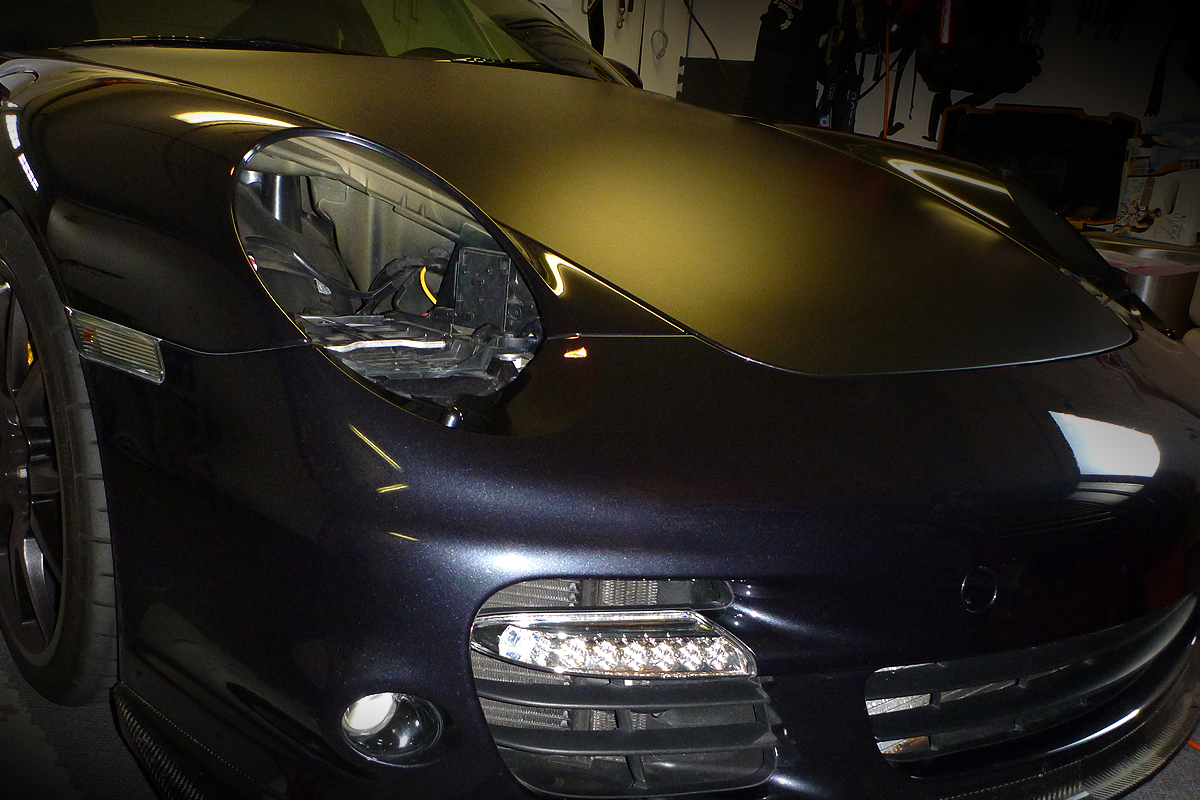
^^^ Headlights complete and back in. These are kind of a PITA to remove. Not as easy as your owners manual tends to indicate. I filed the inner hex edges of the tool to "soften" the corners up. This made it a little easier to find the Male and Female insertion points required to pop these out.

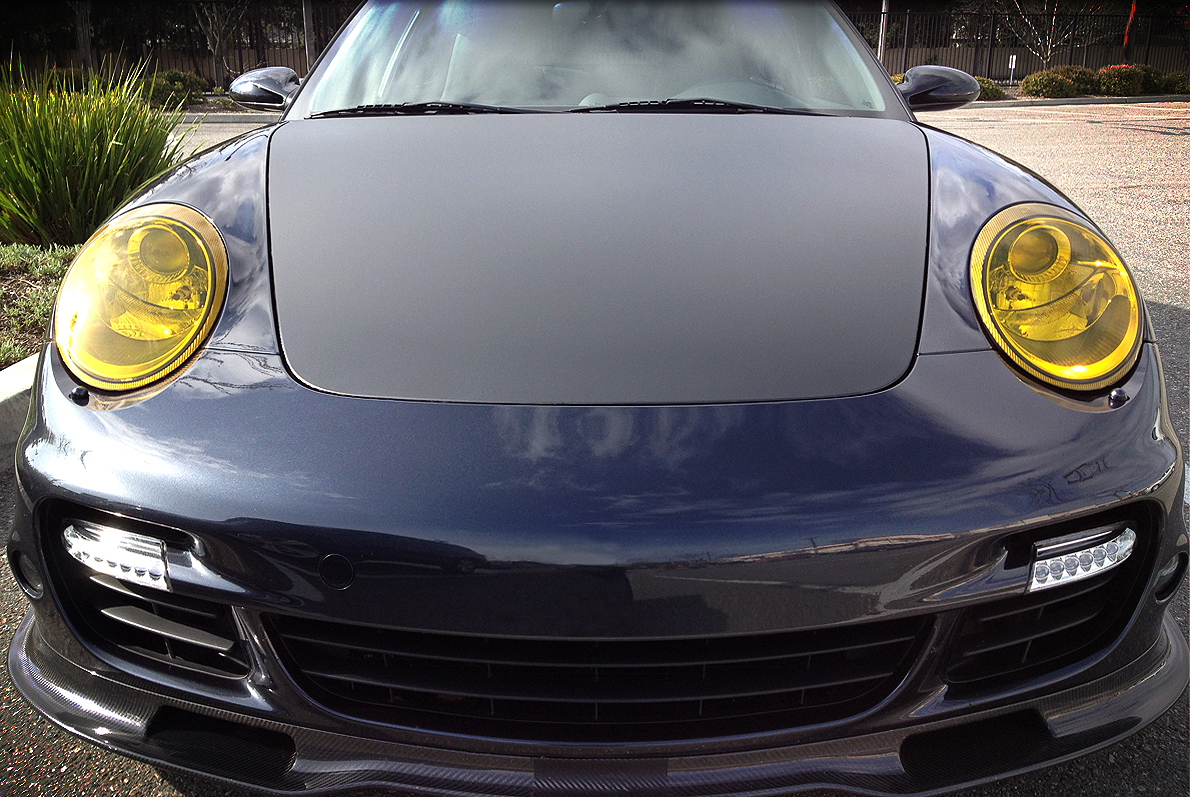
^^^ All finished and out for its first cup off coffee this morning. This image was taken by my iPhone (4S, new toy for me)...not too bad for a phone camera.
I did stop and talk to a Law Enforcement Officer today, and yes the Yellow Headlight Tints are illegal. Its just a fix-it ticket. Therefore, I may just push my luck for the next two weeks.
Off to Huntington Beach to meet up with Betim of BBi to have a VID/BBi Street CUP Half Cage installed. The design is based off BBi's Street CUP, however Betim was open to working with me (us) on a slightly modified version. Bonehead and I got together to do tandem builds and share some of the additional design and materials associated with doing so. Bonehead already has his in place.
See thread: https://www.6speedonline.com/forums/...-modified.html
Cheers, VID997
Matte Black Hood Wrap & Yellow Headlight Covers.
Got the wraps at PepBoy. The hood came by 60" x 60" and was only $49. The headlights were a rip-off by comparison. They were advertised as 20" x 48" for $29. Upon opening them up the real measurements were 23" x 23". Out of principle I took them back to complain and to let them know the product was falsely advertised. Did the return, but I made them open the new wraps and check the measurements... guess what....they too spec'd out at 23" x 23". So they gave me my original set and the new set for $29 (two for one), Yea!

So the hood is definitely a two man job, or in my case a man & wife job!!! I can't believe we didn't strangle each other. We took it on as a challenge and mastered it!!! Pretty pleased with the end result. After seeing it completed I might pop for a professional install with real 3M products.
The key to doing this is patience, a blow dryer, and to work in small increments. I did the whole application "dry". Meaning I didn't spray the surface with a water & soap base misting. Knowing this is intended to be temporary, I wanted to ensure easy removal within the next two weeks. Misting the surface adds to the adhering time and once dry can make the removal more difficult. Also, I waxed the surface with Mother's FX spray Wax (this is a No-No for long term applications), again I want the removal to be quick and easy. I use Mother's Spray when preparing my doors before applying my track day numbers as well. Which allows for simple and easy removal at the end of the day with no mess or any adhesion material left behind.

^^^ Hood done. Now on to the Headlights.

^^^ Headlights complete and back in. These are kind of a PITA to remove. Not as easy as your owners manual tends to indicate. I filed the inner hex edges of the tool to "soften" the corners up. This made it a little easier to find the Male and Female insertion points required to pop these out.

^^^ All finished and out for its first cup off coffee this morning. This image was taken by my iPhone (4S, new toy for me)...not too bad for a phone camera.

I did stop and talk to a Law Enforcement Officer today, and yes the Yellow Headlight Tints are illegal. Its just a fix-it ticket. Therefore, I may just push my luck for the next two weeks.
Off to Huntington Beach to meet up with Betim of BBi to have a VID/BBi Street CUP Half Cage installed. The design is based off BBi's Street CUP, however Betim was open to working with me (us) on a slightly modified version. Bonehead and I got together to do tandem builds and share some of the additional design and materials associated with doing so. Bonehead already has his in place.
See thread: https://www.6speedonline.com/forums/...-modified.html
Cheers, VID997
#3
Hey Bolas, Thanks! I actually still can't believe we pulled it off. It was pretty cold here this weekend considering the recommended install temperatures are 65-70ºf+. It was 42-50 with snow on our surrounding mountain tops at 2,200-2,500 feet. I noticed this morning a few of the wrap-around edges were lifting, both on the body and headlights. I just hit it with a blow dryer and rubbed them back down. Still sticking well tonight considering its currently 51º out and I waxed the surfaces before the install.
As for other colors, they had a transparent blue and of course clear. I think they had a smoked as well. One thing to note with the headlight wraps, they have an additional thin clear film over the actual film. I believe its there to prevent marring and scratching the surface while doing the install: pulling, heating, stretching, and rubbing out the air bubbles. The headlights actually took a lot more physical work than the hood.
Driving the car tonight, I can see why the amber tint is illegal. It reminded me of night skiing with amber lenses. Everything was yellow, even with the hi-beams on. I thought the HID lighting might cancel the amber effect out, not the case. Plus side, the headlight surface was still ice cold when I arrived back home, thus not baking on the adhesion. Therefore removal should be easy even with extended night driving within the next two weeks.
Last edited by VID997; 03-27-2012 at 01:46 AM.
#4
Looks like my $50 DIY wrap paid off after driving 980+ miles over the last four days!
The funny thing about it, is I heard something nail my car about 3 miles from home (at end of the trip)! Got the car back from the detailers earlier today and it looks great, other then this 6-7mm hack right in the middle of my hood. Oh well, better than seeing raw metal.
I wonder how the 3M material would have held up?

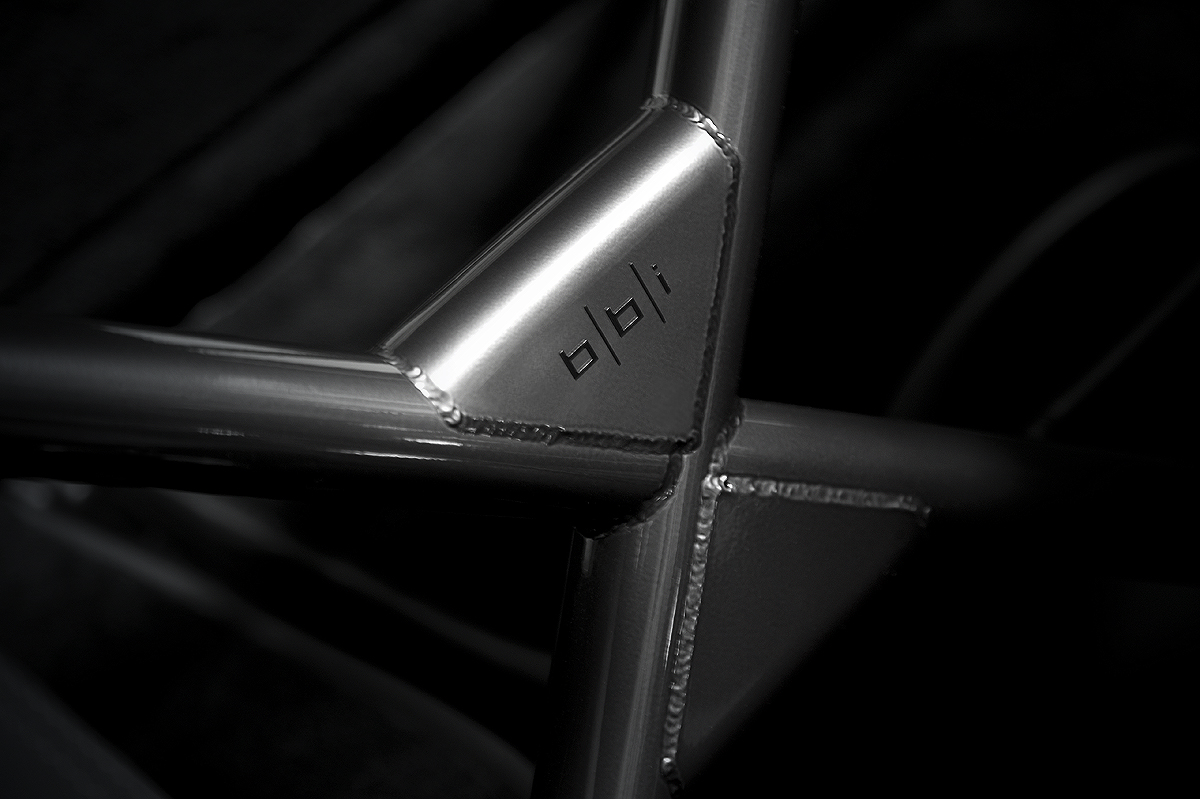
Below is a little preview of the work done at BBI on Friday:

More images and details can be view at:
https://www.6speedonline.com/forums/...re-11s-10.html
The funny thing about it, is I heard something nail my car about 3 miles from home (at end of the trip)! Got the car back from the detailers earlier today and it looks great, other then this 6-7mm hack right in the middle of my hood. Oh well, better than seeing raw metal.
I wonder how the 3M material would have held up?

Below is a little preview of the work done at BBI on Friday:

More images and details can be view at:
https://www.6speedonline.com/forums/...re-11s-10.html
Last edited by VID997; 04-03-2012 at 11:13 AM.
#7
Trending Topics
#9
Thanks, its a two stage powder coating process. First they sprayed/baked on Laser Black, once that cooled they sprayed a layer of Black Chrome and baked that on. It has a mono-tone black chrome/gunmetal chameleon effect in the cabin depending on how the light and shadows move around. I'm very happy with the end result.
#10
MY FIFTY DOLLAR WRAP UPDATE:
Okay, so its been almost thirty days since I installed my PepBoy's $49.99 DIY Matte Black Hood Wrap. Overall for its short term intended purpose it has done an excellent job providing the protection I needed for the road trip down south (as illustrated in the image above, post #4).
I had some free time today and was able to get my car detailed and the wrap is showing signs of fading and material dye inconsistencies (see image below, streaking). I have received many positive compliments and I to, really like the new look. This has been something I have wanted to do for quite sometime but always held off in-fear of coming off as a "GT2 RS" wannabe. I have another event coming up in May and I'll try and keep the generic wrap on until then. After that event I think I'll remove it and go for the real stuff with a professional install.

SIDE BAR: The car is always in the garage (meaning out of the sun). I put about 1400 miles on it since the install. 400 miles or so were put on it driving in the rain for 7 hours on the way home from LA. One track event where it sat in direct sun all day.
Okay, so its been almost thirty days since I installed my PepBoy's $49.99 DIY Matte Black Hood Wrap. Overall for its short term intended purpose it has done an excellent job providing the protection I needed for the road trip down south (as illustrated in the image above, post #4).
I had some free time today and was able to get my car detailed and the wrap is showing signs of fading and material dye inconsistencies (see image below, streaking). I have received many positive compliments and I to, really like the new look. This has been something I have wanted to do for quite sometime but always held off in-fear of coming off as a "GT2 RS" wannabe. I have another event coming up in May and I'll try and keep the generic wrap on until then. After that event I think I'll remove it and go for the real stuff with a professional install.

SIDE BAR: The car is always in the garage (meaning out of the sun). I put about 1400 miles on it since the install. 400 miles or so were put on it driving in the rain for 7 hours on the way home from LA. One track event where it sat in direct sun all day.
#11
For temporary applications I think you made a good choice. I also have seen people use a product called plasti-Dip to protect the paint for track days and long trips. is sprays on and peels right off. Pretty amazing when you see it in person. You can google or view it on utube.
Again, it is a mid range temporary soloution.
Again, it is a mid range temporary soloution.
#12
^^^I had just read about Plasti-Dip last week on another thread. One guy said he had his wheels done with it. Also, I think he mentioned it has a rubber like finish/feel.
I'll do a little more research on this stuff. Do you know if its a DIY or Professional installs?
Thanks
I'll do a little more research on this stuff. Do you know if its a DIY or Professional installs?
Thanks
#13
^^^I had just read about Plasti-Dip last week on another thread. One guy said he had his wheels done with it. Also, I think he mentioned it has a rubber like finish/feel.
I'll do a little more research on this stuff. Do you know if its a DIY or Professional installs?
Thanks
I'll do a little more research on this stuff. Do you know if its a DIY or Professional installs?
Thanks
By no means does it require a professional. To do an entire front end of a car would probably take at least 2 cans worth.
Thread
Thread Starter
Forum
Replies
Last Post
cnebrask
Automobiles For Sale
7
10-03-2024 09:19 PM


