
High Mileage '06 Carrera S Journal [Equinox]

 .
.
#123
 07-03-2012, 09:23 AM
Join Date: Dec 2011
Location: Beaumont, TX
Posts: 123
Rep Power: 26 

The "supplier" of the wing actually sends Porsche OEM mesh with it. I can only guess that they are from the GT3. Pics relevant.
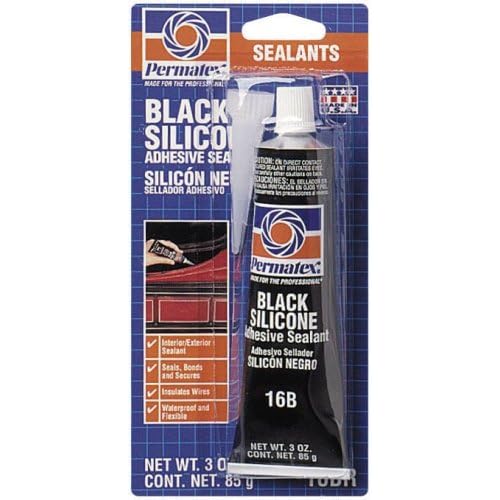
I used silicone adhesive to attach the mesh to the underside of the wing. Good for up to 450C, so I'm assuming it will be just fine.
Also - prior to installing the mesh, I used a can of spray truck bed liner and "rattle-can" sprayed the inner surface of the wing to give it a more OEM look when open. Picture of underside of wing pending.
Last edited by Equinox; 07-03-2012 at 09:26 AM.
#125
07-03-2012, 04:00 PM
Did you just use straight adhesive on the tabs of those mesh grilles? No other fastener needed?
I had been thinking about putting mesh on my intake openings (Precision Porsche GT3 rep wing) but I got frustrated trying to mold mesh (from Home Depot) that would be good enough to fit. Now that there's OEM stuff (and thanks for providing the part numbers!) with smaller tabs - I figure maybe not so hard to do??
Ron
#128
07-04-2012, 11:10 AM
Join Date: Dec 2011
Location: Beaumont, TX
Posts: 123
Rep Power: 26 Equinox,
Did you just use straight adhesive on the tabs of those mesh grilles? No other fastener needed?
I had been thinking about putting mesh on my intake openings (Precision Porsche GT3 rep wing) but I got frustrated trying to mold mesh (from Home Depot) that would be good enough to fit. Now that there's OEM stuff (and thanks for providing the part numbers!) with smaller tabs - I figure maybe not so hard to do??
Ron
Now as for you Ron,
Yes all adhesive. I first spread adhesive onto the flat solid portions of the grill mesh, making sure to also cover the small fastener hole. This allowed me to see when the adhesive made good contact with the inside face of the wing, causing it to ooze back out the back of the hole. Once I allowed this to cure, I double checked the alignment on the other side of the wing to make sure I made it fit the best it would (it's not going to be perfect, but you can get damned close. I would recommend the best setup of having the wing upside down on a saw horse, allowing you to see both sides, and gravity to hold the screens in - otherwise you may use painters tape if the wing is already installed.
Once the glue has dried, and the mesh isn't moving, finish up by gluing all the way around the edge of the mesh, creating a "gasket" where wind and water can only go through the mesh, and not the sides. This also hides any gaps, if you have any, depending on manufacturer of the wing, and allows you to hide them with your black sealant.
Have fun!
Last edited by Equinox; 07-04-2012 at 11:47 AM.
#129
07-14-2012, 09:40 PM

Thanks, I will do this shortly also. Great comments
Parts you need:
Bought a new switch module from suncoastparts.com
http://www.suncoastparts.com/product...7S_electronics
About $63.00
Tools you need:
(1) Short 5mm allen wrench
(1) Wide flat head screwdriver
*(4) Paperclips, optional, to hold open the clips to release the switch module, see below.

ABOVE: Here is what is holding it in. Two bolts, and some clips. Note that you do not have to remove the bolts, just loosen them, as the bracket coming off the door sill is open on the bottom.

ABOVE: Here is my lovely beat up door sill, with my broken trunk release switch.

ABOVE: Here is the snapped rocker switch I would like to replace.

ABOVE: Due to the tight spaces between the seat and door sill, you will need a 5mm allen wrench that is shorter than standard. This one I was lucky I had from "assembly required" furniture. Shown on the switch module for scale.

ABOVE: First step is to remove the small little rubber plugs that hide the allen head cap bolts, attaching the door sill to the car. You can remove these with your fingernail, or a plastic interior tool wedge. There are two of these.
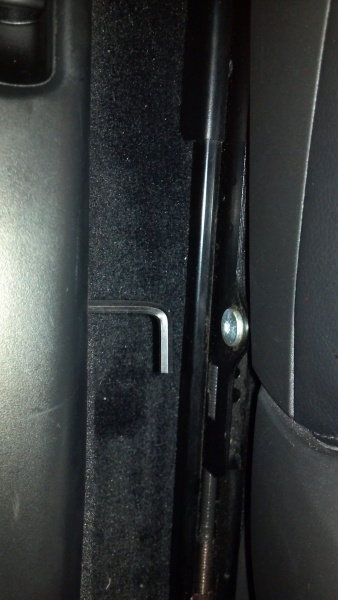
ABOVE: Here is my 5mm allen wrench in the now open hole that the plugs were hiding. Loosen both bolts several turns. No need to completely remove the bolts, as they only hold the sill when tight. (See first diagram above)

ABOVE: Once you have loosened both allen head cap bolts, pull up on the door sill to release the clips holding it in.

ABOVE: Once you pull the sill free, you can access the electrical squeeze connector under it. Just squeeze the springy portion of the clip together and slide free of the female harness.

ABOVE: Here one of the 5mm bolts that was holding the door sill down. The washer was squeezing an open "C" shaped extension off the door sill, pressing it to the jamb. When the bolt is loosened (not removed) it will allow you to pull up on the door sill, and remove it.

ABOVE: The underside of the switch module inside the door sill. Release all four clips holding the switch module, with a wide flat-head screwdriver, and push the module up and out of the door sill. You may need to wedge a paperclip in each clip as you release it, to prevent it from re-engaging. Note, the module can only come out one way, and that is towards the finished part of the door jamb.

ABOVE: Here is a close up picture of the space recently inhabited by the switch module. Note how you can see why the module only comes out one way.

ABOVE: Here is the new switch module clicked into the old door sill. It simply slides down into the recess.

ABOVE: New module with original door sill back in the car. Don't forget to put the plugs back over the bolt holes, and make sure when sliding the door sill back in, that you loosen the allen head bolts enough that your brackets will slide behind the washer. Doesn't take long.
Bought a new switch module from suncoastparts.com
http://www.suncoastparts.com/product...7S_electronics
About $63.00
Tools you need:
(1) Short 5mm allen wrench
(1) Wide flat head screwdriver
*(4) Paperclips, optional, to hold open the clips to release the switch module, see below.
ABOVE: Here is what is holding it in. Two bolts, and some clips. Note that you do not have to remove the bolts, just loosen them, as the bracket coming off the door sill is open on the bottom.
ABOVE: Here is my lovely beat up door sill, with my broken trunk release switch.
ABOVE: Here is the snapped rocker switch I would like to replace.
ABOVE: Due to the tight spaces between the seat and door sill, you will need a 5mm allen wrench that is shorter than standard. This one I was lucky I had from "assembly required" furniture. Shown on the switch module for scale.
ABOVE: First step is to remove the small little rubber plugs that hide the allen head cap bolts, attaching the door sill to the car. You can remove these with your fingernail, or a plastic interior tool wedge. There are two of these.
ABOVE: Here is my 5mm allen wrench in the now open hole that the plugs were hiding. Loosen both bolts several turns. No need to completely remove the bolts, as they only hold the sill when tight. (See first diagram above)
ABOVE: Once you have loosened both allen head cap bolts, pull up on the door sill to release the clips holding it in.
ABOVE: Once you pull the sill free, you can access the electrical squeeze connector under it. Just squeeze the springy portion of the clip together and slide free of the female harness.
ABOVE: Here one of the 5mm bolts that was holding the door sill down. The washer was squeezing an open "C" shaped extension off the door sill, pressing it to the jamb. When the bolt is loosened (not removed) it will allow you to pull up on the door sill, and remove it.
ABOVE: The underside of the switch module inside the door sill. Release all four clips holding the switch module, with a wide flat-head screwdriver, and push the module up and out of the door sill. You may need to wedge a paperclip in each clip as you release it, to prevent it from re-engaging. Note, the module can only come out one way, and that is towards the finished part of the door jamb.
ABOVE: Here is a close up picture of the space recently inhabited by the switch module. Note how you can see why the module only comes out one way.
ABOVE: Here is the new switch module clicked into the old door sill. It simply slides down into the recess.
ABOVE: New module with original door sill back in the car. Don't forget to put the plugs back over the bolt holes, and make sure when sliding the door sill back in, that you loosen the allen head bolts enough that your brackets will slide behind the washer. Doesn't take long.
#130
08-03-2012, 10:24 AM
Wow!
Thorough, inspiring conversion and descriptions. Read entire thread in one go. It gave me some inspiration for my new project 2005 C2S. With many of the same issues- weak crank, aos issue etc. especially since I don't want to touch anything on the Old man's 2011 TurboS!
We all owe you a few beers. Especially if that helps you post more!
#131
08-15-2012, 10:39 PM
Join Date: Dec 2011
Location: Beaumont, TX
Posts: 123
Rep Power: 26 Wow!
Thorough, inspiring conversion and descriptions. Read entire thread in one go. It gave me some inspiration for my new project 2005 C2S. With many of the same issues- weak crank, aos issue etc. especially since I don't want to touch anything on the Old man's 2011 TurboS!
We all owe you a few beers. Especially if that helps you post more!
Anywho. Since last, I've installed a 3M Clear Bra on the hood, fenders, headlights, front bumper, and signal lights. I didn't make a how to, as it seems pretty well documented, and I didn't have an extra set of hands to take pictures while I was busy. Note: The upper portion of the front bumper I had a local shop do for me, since it looked freakin complicated. I broke my own rule : Don't pay someone to screw something up, that you can screw up for free. He didn't do it as perfect as the parts I did, as he left a lil indented line somehow on the corner of the bumper about 3 inches long. It's subtle, but I feel like I should have just done it, and called that line, the "I saved 75 dollars line" if I had screwed it up. You find you forgive yourself quicker than some paid *******. I digress...
So basically I just used...
http://www.clearbra-kits.com/install...tallations.asp
...videos, since I bought the bra from them. Wasn't too bad, just a couple tips -
When taking the clear bra off the sticky backing, make sure to spray the clear piece first with your soap spray mixture, and then spray the sticky side as it comes off the backing. At first, I only sprayed the sticky portion of the piece, and it still stuck to the dry, non sticky side - so make sure you spray both sides of the piece so it doesn't ball up like trying to wrap Christmas presents with Scotch Tape in a Hurricane.
Next, no matter how hot it is in your garage, do not turn on a fan... it will blow dust onto your pieces, and blow them around as well. Duh.
Lastly, the hood wrap wraps around the edges of the hood, and because of this, you need to make a small triangular cut at the apex of each (2) curves nearest the headlights so it doesn't bunch. (Basically the front two corners of your hood) To cut it, doen't bother with scissors unless you just had your barber scissors sharpened; I used a fresh exacto knife, and held a plastic bondo spreader behind the film to cut against. If you don't use a fresh blade, you will just tear and bunch the urethane film instead of cut it. <- learned hard way
Cost: 305$ shipped.
I called on the phone, because their site only lists 2010 and up, he had me order online, and just put 2006 in the remarks. Also, they send you a squeegee to do all the work with.
http://www.clearbra-kits.com/store/p...&nSubmodel=727
Tools:
Two spray bottles

Johnson and Johnson Baby wash
Sharp *** knife, fresh blade,
Bondo spreader for backing behind the cuts you do
Then follow this: http://www.clearbra-kits.com/install...tion_guide.asp
Coming up next week - I'll be replacing my front, rear, brake pads AND rotors. Not sure if anyone wants a how to on that, as I'm pretty sure it's a common thing and well covered. Let me know if anyone wants one though. Also, a bonus mod! Oooh, I bet you're excited.
Sorry for neglecting the thread by the way. Just tons o' work lately.
Last edited by Equinox; 08-15-2012 at 10:50 PM.
#132
08-15-2012, 10:58 PM
Join Date: Dec 2011
Location: Beaumont, TX
Posts: 123
Rep Power: 26
RE: New brake pads and rotors install next week
http://www.renntrack.com/forums/show...or-Replacement
Looks like there's nothing to it, and just like any brake pad / rotor change. Sounds like I can do it on a six pack.
http://www.renntrack.com/forums/show...or-Replacement
Looks like there's nothing to it, and just like any brake pad / rotor change. Sounds like I can do it on a six pack.
#133
08-16-2012, 06:37 AM
RE: New brake pads and rotors install next week
http://www.renntrack.com/forums/show...or-Replacement
Looks like there's nothing to it, and just like any brake pad / rotor change. Sounds like I can do it on a six pack.
http://www.renntrack.com/forums/show...or-Replacement
Looks like there's nothing to it, and just like any brake pad / rotor change. Sounds like I can do it on a six pack.
I'll give you credit for the clear bra install, I wouldn't attempt this myself. After several failed attempts on installing clear iPhone covers, this wouldn't go over well.
#134
08-16-2012, 11:43 AM

I am inspired by this to try to do my own clear bra, but I had a few questions:
1. Why did you choose 3M over Xpel? Not sure of the major differences, but I think Xpel is self-healing - just curious what drove you toward 3M.
2. What did you do for surface prep before installing the clear bra? Any specific tricks to that from your lessons learned?
3. This probably does not apply in your case, but what are the best methods for removing an existing bra? I have full coverage on the front and hood. That may be a general question for anyone who comes across this thread and has been there before.
Thanks for all of the posting - this thread has been really enjoyable to keep up with.
Last edited by ScooterP; 08-16-2012 at 04:38 PM.