
3.8S - How to replace the alternator cable
#46
 08-11-2019, 08:04 AM


Starter cable 997 4S Tiptronic
Thanks for a great guide! Does anyone have the guide for a tiptronic? The last part connected to the gearbox seems to be different for a Tiptronic and its really tight, i have no clue how to remove the get access without dropping the tiptronic transmission. Anyone have any ideas?
#47
10-13-2019, 08:33 AM

Starter / Alternator cable on 997 W/Tiptronic
Well, I will tell you the easy way is to drop the transmission. I just abandoned the cable change out because the mount points for the cable on the TIP- trans have very limited access. I felt that I could break the old cable out but to re-secure the new cable would be next to impossible to do correctly. The condition of my cable is good no sign of over heating or corrosion and it had no voltage drop (13.5 at battery and 13.5 at starter) a bad cable can have .5 volt drop. So even though I wanted to replace the cable, I will wait for it to fail in a big way. I did replace the battery and it did help a bit with the starting both hot and cold. I am replacing the starter now and hopeful for more improvement as this car is and always has been a daily driver, 2007 997 C2S @ 85,000 mi.
#48
10-13-2019, 10:28 PM
Well, I will tell you the easy way is to drop the transmission. I just abandoned the cable change out because the mount points for the cable on the TIP- trans have very limited access. I felt that I could break the old cable out but to re-secure the new cable would be next to impossible to do correctly. The condition of my cable is good no sign of over heating or corrosion and it had no voltage drop (13.5 at battery and 13.5 at starter) a bad cable can have .5 volt drop. So even though I wanted to replace the cable, I will wait for it to fail in a big way. I did replace the battery and it did help a bit with the starting both hot and cold. I am replacing the starter now and hopeful for more improvement as this car is and always has been a daily driver, 2007 997 C2S @ 85,000 mi.
Thanks!
I didnt managed to change the cable (tip). But i replaced the starter and now it works really well both cold/hot start.
#49
10-14-2019, 06:28 AM
Same experience here, I finished up the installation of the new starter and had a much improved hot and cold start cycle.The new starter engages and turns the engine over with some real authority now.
#50
12-11-2019, 10:24 PM

Rick
Hi there,
I'm having an issue with my 2006 997 cabriolet carrerra 4. Bought car from dealer 18 months ago. First test drive the battery was dead. Boosted it but ultimately they put a new battery in it. Aftermarket new stereo. There's electrical feedback buzzing noise thru the speakers when you rev the engine.
Battery goes dead after one week or less if I do not drive it. Occasionally it takes two attempts of turning the key before it will turn over.
Do you think it could be the alternator cable causing these issues?
Rick
#51
01-03-2020, 04:33 AM

Hi there,
I'm having an issue with my 2006 997 cabriolet carrerra 4. Bought car from dealer 18 months ago. First test drive the battery was dead. Boosted it but ultimately they put a new battery in it. Aftermarket new stereo. There's electrical feedback buzzing noise thru the speakers when you rev the engine.
Battery goes dead after one week or less if I do not drive it. Occasionally it takes two attempts of turning the key before it will turn over.
Do you think it could be the alternator cable causing these issues?
Rick
I'm having an issue with my 2006 997 cabriolet carrerra 4. Bought car from dealer 18 months ago. First test drive the battery was dead. Boosted it but ultimately they put a new battery in it. Aftermarket new stereo. There's electrical feedback buzzing noise thru the speakers when you rev the engine.
Battery goes dead after one week or less if I do not drive it. Occasionally it takes two attempts of turning the key before it will turn over.
Do you think it could be the alternator cable causing these issues?
Rick
#52
01-05-2020, 01:17 PM

rough idling
Thanks a lot for the info. I used it to replace my starter, alternator and alternator/starter/ battery + ve cable on my 997.1 C2S. The car now has really bad rough idle but it runs alright above 1000 rpm. Check workshop/engine light came on after a quick drive to gas station?
any suggestions. should I recheck the intake manifold and the vacuum line to the air intake? please help
any suggestions. should I recheck the intake manifold and the vacuum line to the air intake? please help
#53
01-06-2020, 10:14 PM
Thanks a lot for the info. I used it to replace my starter, alternator and alternator/starter/ battery + ve cable on my 997.1 C2S. The car now has really bad rough idle but it runs alright above 1000 rpm. Check workshop/engine light came on after a quick drive to gas station?
any suggestions. should I recheck the intake manifold and the vacuum line to the air intake? please help
any suggestions. should I recheck the intake manifold and the vacuum line to the air intake? please help
Hello anyone .. please help!!!
#54
05-23-2021, 01:24 AM

Folks,
Thanks to Equinox I managed to replace the infamous alternator/Starter cable on my 2006 C4S this past weekend. It took me about 5 hours, taking my time, exploring and cleaning up parts. It is a hell of a job, and I would not recommend this to anyone who has never entertained serious mechanical work on a car.
Equinox in his great diary, gave a tons of details on that delicate procedure. I will not repeat what he explained and simply present my way of approaching the replacement by concentrating solely on the cable and not on the Air/Oil Separator (AOS). Also, my car required some slightly different tools sizes and I will indicate that as well.
Thus, this is written as a tribute to Equinox, a great Porsche mechanic and I will be eternally grateful for a lot of his insights. I have used 3 or 4 of Equinox's pictures and I hope he will not mind it too much.
The replacement cable can be obtained from Suncoast or your local stealer for the meager (for a Porsche part...) $100.00. Porsche must feel really bad, to make it so cheap.
1) First step is to place the rear wheels of your Porsche on ramps or use jack-stands to raise the rear wheels. Of course, use the handbrake and place the gearbox in park or in 1st gear (all wheel drive) and block your front wheels. I like the plastic ramps, the heavy duty ones, purchased at the local Auto Zone shop. The clearance is tight when I crawl under the car with my slider but I feel better and safer than placing the car on jack-stands.
2) Disconnect the battery and isolate the ground terminal.
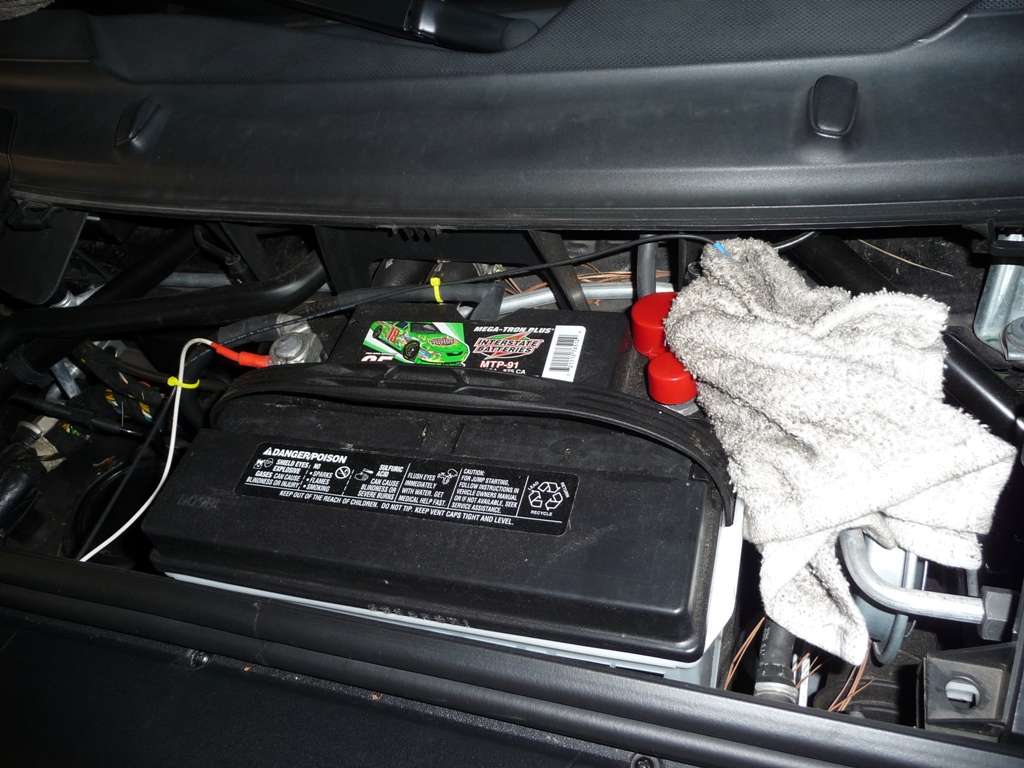
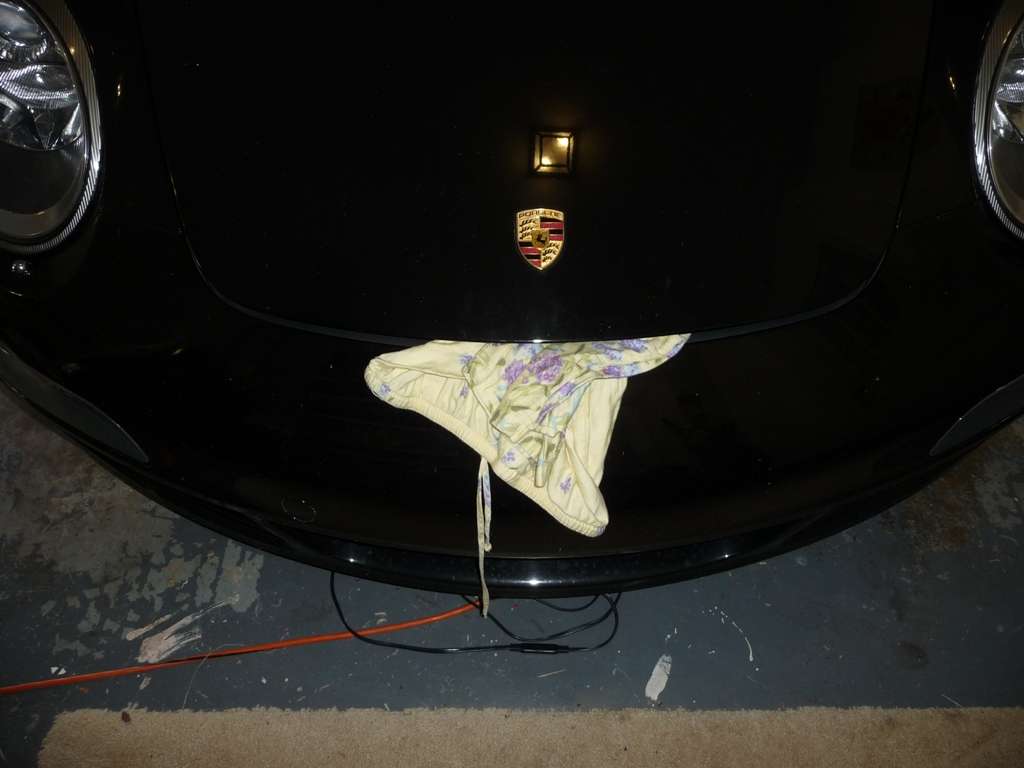
Now that the battery is no longer connected, it may be a good idea to prevent the full closure of the front trunk. A mishap can happen and will complicate the procedure. I use one of my wife's pajama as the cotton fabric is very soft.
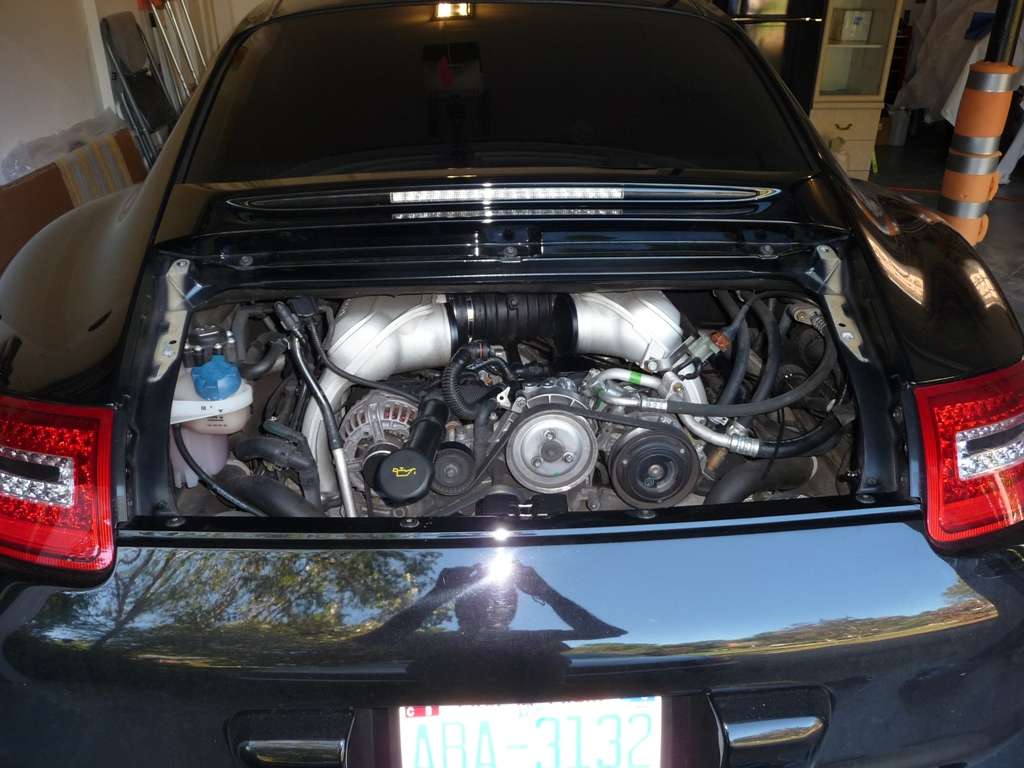
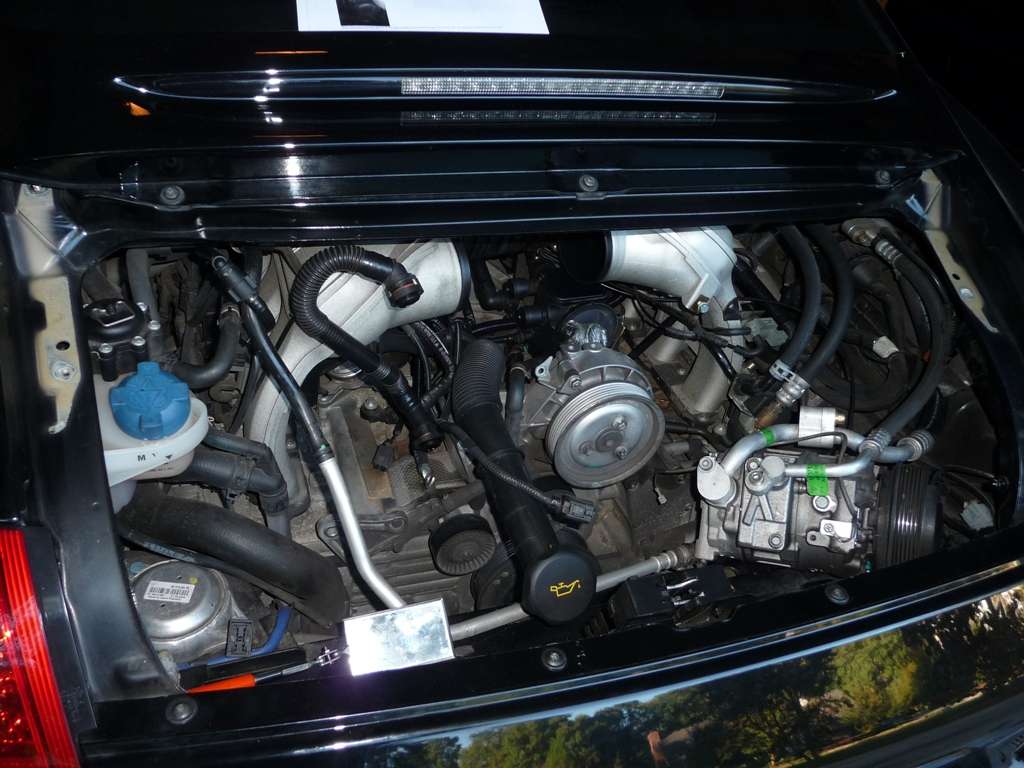
3) Now, we can move to the back of the car. I like my ease and comfort, and honestly unless you have very long arms and do not mind smashing your face against the engine lid, it is more comfortable to simply remove it. Use 10 mm open and closed wrenches for that purpose. The most difficult thing is to part the connector located on the right side of the car, behind the rear right tail light, in the engine compartment. The pig tail is very short and really difficult to reach and to uncouple. The gas spring is removed after taking the air filter away, by removing the half circle shaped piece of steel on the chassis side, with a small flat screwdriver. Be careful not to loose it.
Achtung!!!! The lid is really heavy and you may want to be careful when lifting it.
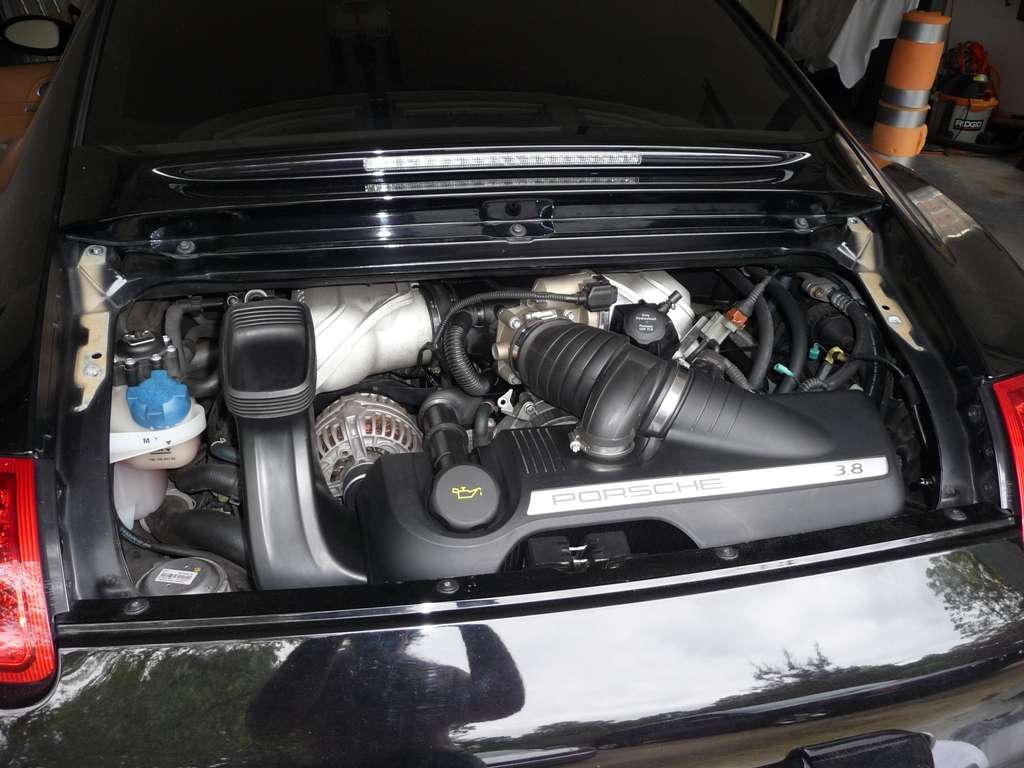
4) Now is the time to remove the air filter (actually, it had to be done first, before removing the lid) and the serpentine belt and this has been covered in another thread and thus will not be repeated here. For details see https://www.6speedonline.com/forums/...-one-hour.html
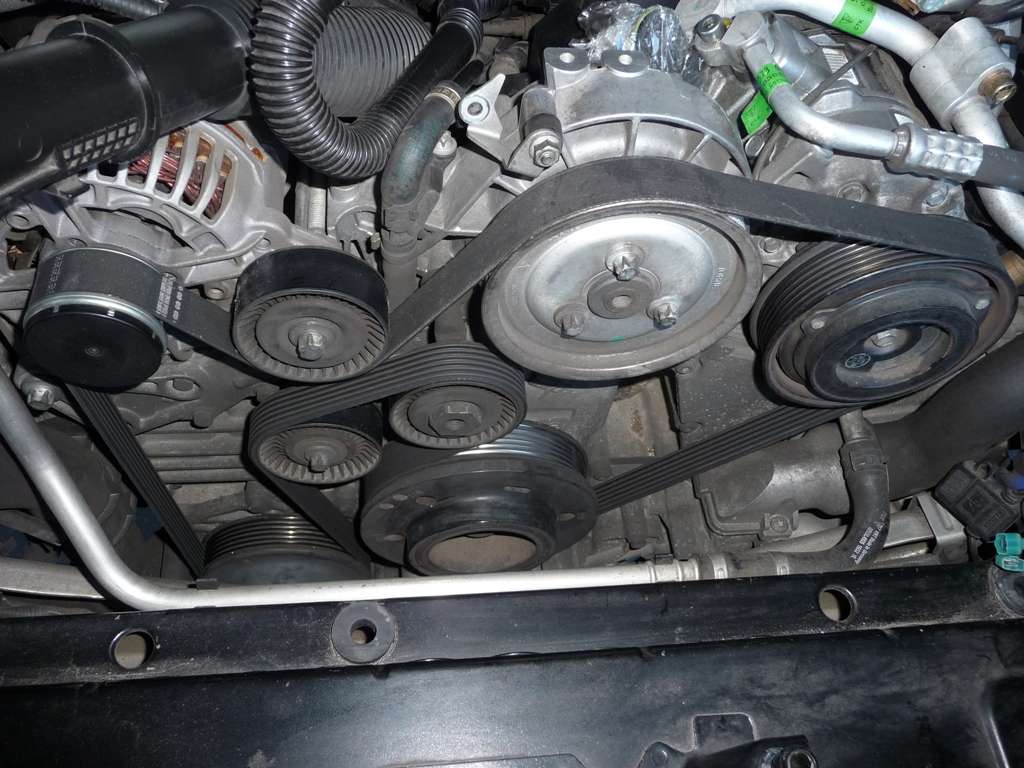
The following picture is to remind the weak brains (like mine) how to re-assemble the serpentine belt. It is just odd how quickly we forget.... at our age.
5) First remove the throttle body and the plenum. For that, you will need an E12 socket and your favorite 7 mm closed wrench (I do not like screwdrivers on the hose clamps). Carefully, disconnect the servo connector on top of the throttle body and remove all four E12 bolts. Store preciously the body in a safe place. Now is a good time to clean it and verify that there is no oil on it. Mine was very dry, indicating a good working AOS. I did not try to push the flap open and resisted the curiosity. You can see on both sides, anyway. Then, loosen up the four hose clamps holding the plenum, with your 7 mm wrench. Push the rubber rings on each side, towards the manifolds so that the plenum in the middle can be easily removed. Before pulling like an animal, slide your hand underneath and behind and verify that there is nothing else attached to the rubber plenum. My C4S 2006 had nothing and it was very straight forward.
6) Using your slimmest fingers, turn the collar of the steering pump filler box counter clockwise. It is hard to reach. It should unlock and you just have to pull the whole steering fluid box up to remove it. Doing so will spill some of the steering oil (that precious Pentosin, hard to find in regular auto shops) on your engine. It may be a good idea to have a rag handy when doing that maneuver. Now things are getting clearer..... It is also a good idea to place some kind of cap on top of the steering pump opening. If something falls into it, it is going to ruin your day. I use shrink wrap and two rubber bands from my Newspapers carrier.
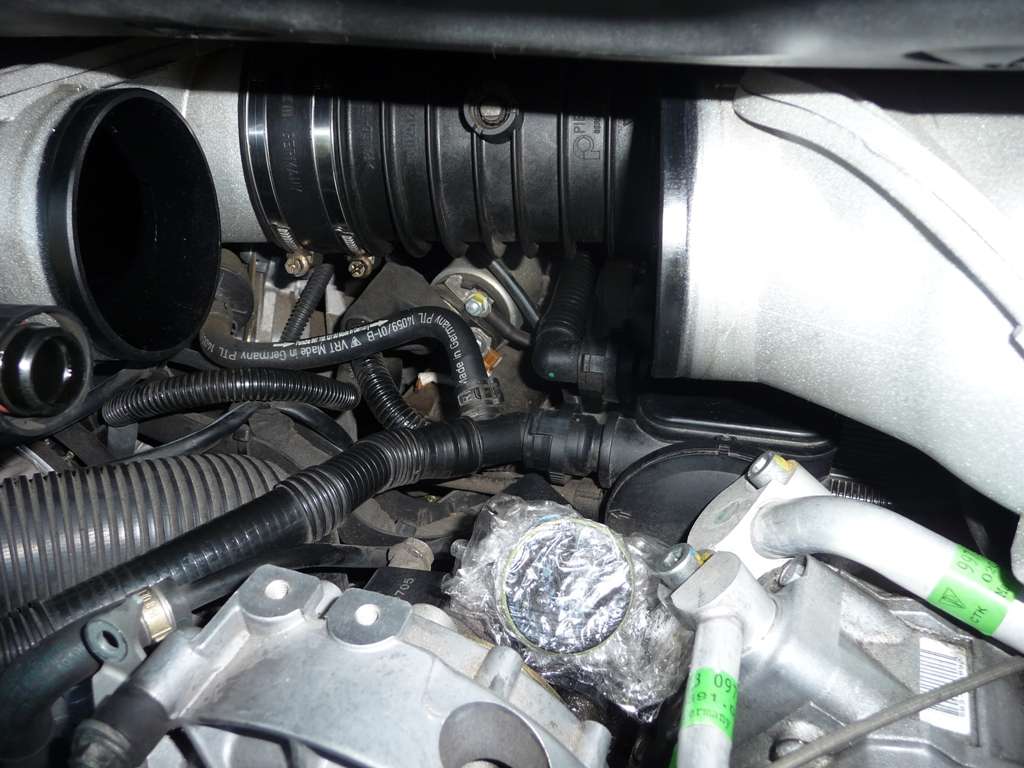
7) Let's gain as much room as possible and remove as many pipes and wires from the middle. The most irritating hose is the oil filler neck: it is always in the middle of what you do. We are now going to work on the alternator.

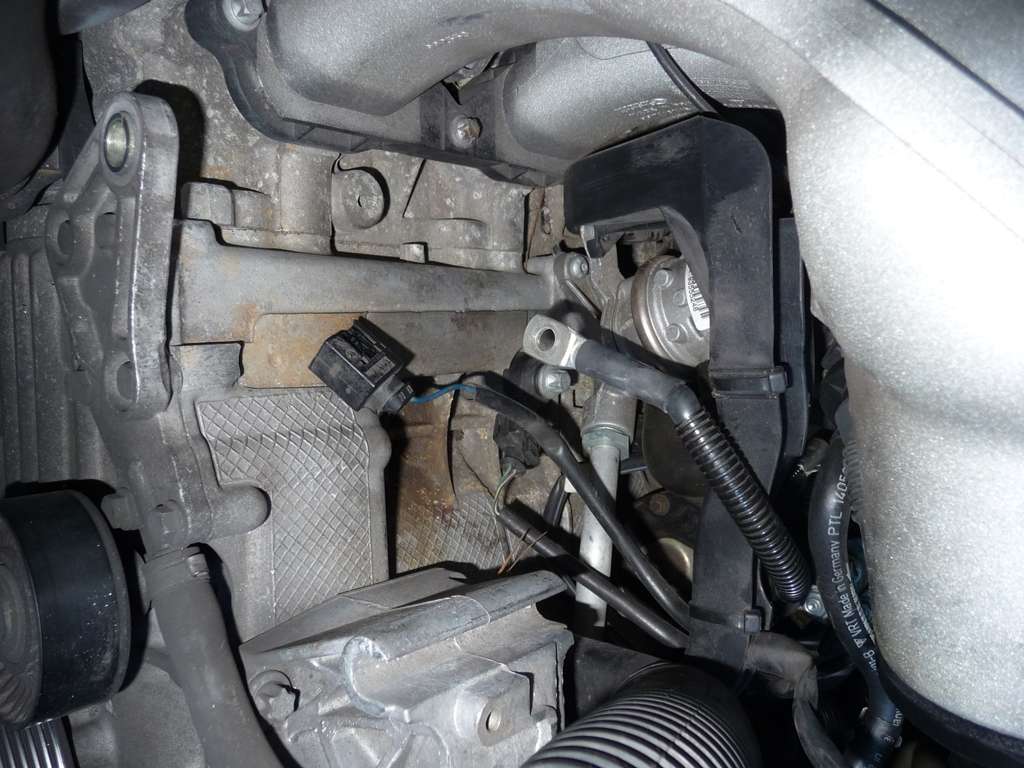
Using an E-16 socket remove the lower left bolt holding the alternator. Then remove the top right bolt coupled with a pulley. At this stage the alternator is free and you can disconnect the main wire with a 13 mm socket and carefully remove the lower electrical connector (a light squeeze should do it). It may be necessary to pry carefully the alternator out of the holder using a large screwdriver. Pry near the ends of the alternator and not in the middle. Store the alternator with your throttle body, far away from the war zone..... These are very expensive parts and you do not want to damage them.
Without the alternator, there is more room as shown below:
8) Now is the time to get to the starter:
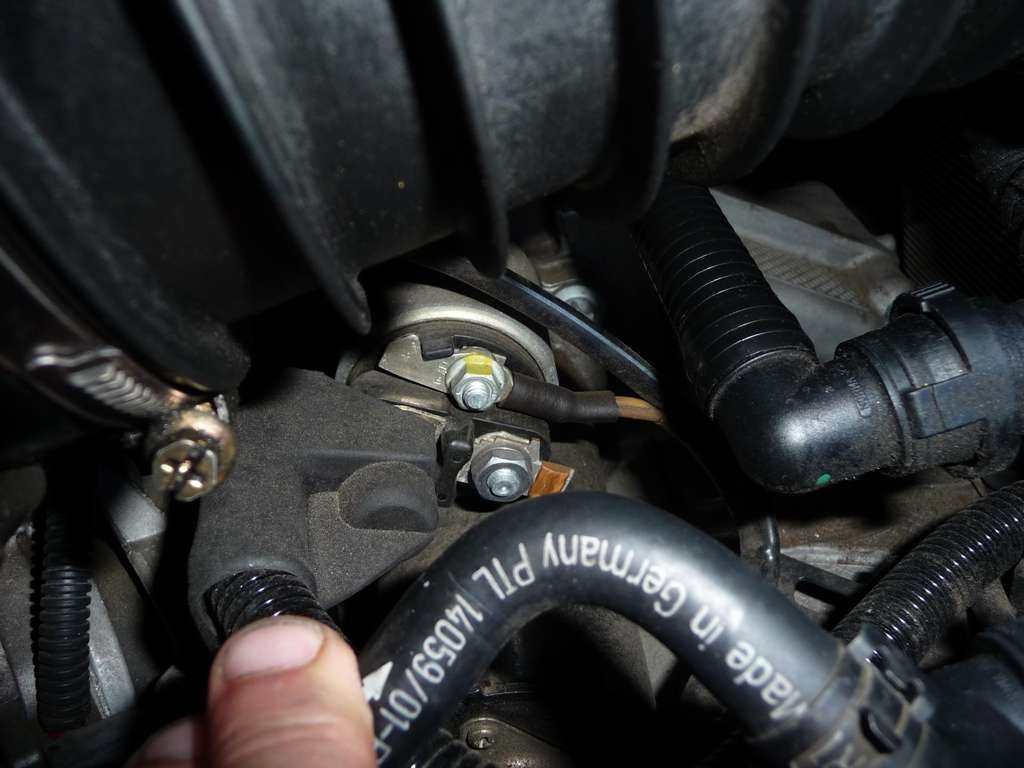
Using your mighty strength, pull on the rubber boot covering the two cables. Then, and this is very important, disconnect the two plastic tubes located on the left side of the AOS box. Using your steel fingers, press real hard on the clips and pull carefully the two tubes out. These tubes will prevent you from gaining access to the starter and may get damaged when you try to remove the 13 mm nut from the starter. I used a 13 mm wrench to unlock the starter nut.
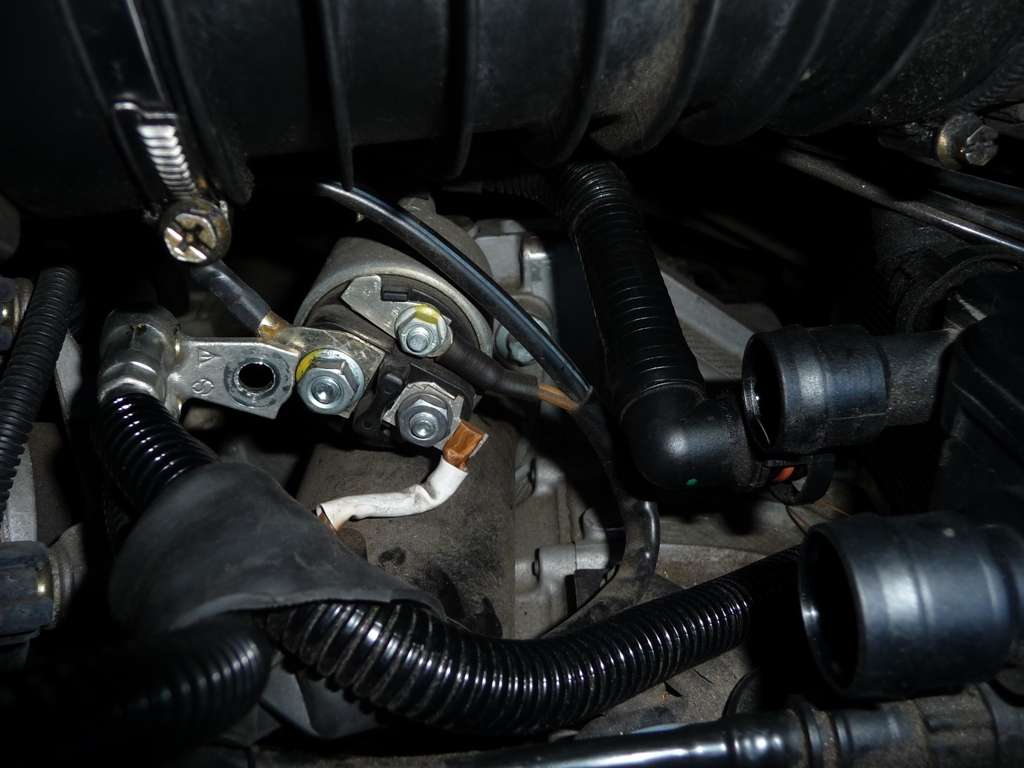
Re-install the nut on the starter. At least this is one that you will not loose. Technically, the alternator cable could be pulled from underneath the car and all would be fine. But it is never so easy in the Porsche realm. Those @#$%^ of German engineers have installed one of their bullet proof clip right behind the AOS box. That clip holds the cable to the plastic gutter/channel routing all electrical connections to and through the engine. Your finger tips can touch it, you can guess it is there, but you cannot do anything about it. It took me half an hour of negotiations in an attempt to open it and I had a sample of the clip to study, as two are provided with the replacement cable. Finally, a sharp chisel and a good whack took care of the bloody part. The reason for all these troubles was that I did not want to go to the next step....and I should have....
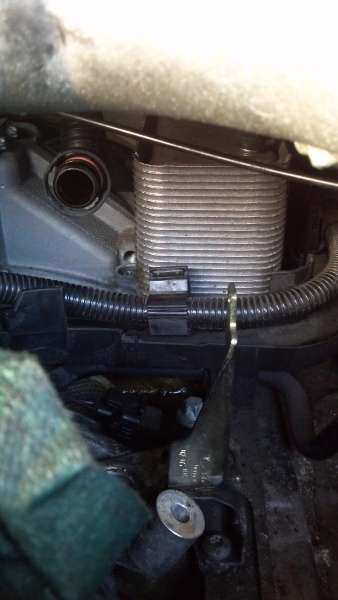
9) Removing the A/C compressor unit. That one is tricky and without Equinox I would have given up. The A/C unit holds by two E-12 bolts and a very secret E-14 bolt behind the can, absolutely invisible from any sides of the car. You have to know that it is there and find it. It is an act of faith, pure blind faith. The following pictures were taken by Equinox and depicts the evil genius of the German engineers:

This bolt is reached as shown below, and is located on the left side of the A/C compressor, towards the top of the can.
You will need a wobble (+/- 6 degrees) extension with your E-14 female torx attached to it. I use Facom for most of my tools and Facom sells such 3/8 inch extension for 12 Euros or about $15.00. It is a must have. Craftsman and others have this wobble extension, I am sure.
You will also need need to disconnect the compressor wire (long brown wire on the top) from the harness. The connector is located on the right manifold, near the electrical channel and looks like a small clear plastic box with a single connector in it. The wire goes through the first arch of the right manifold.
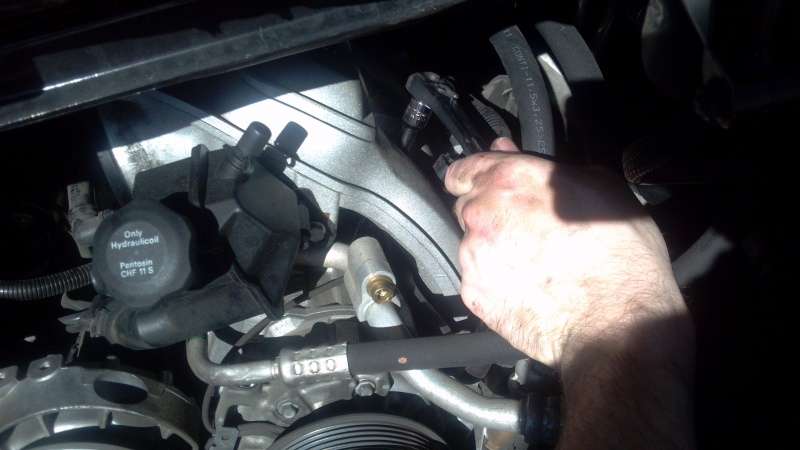
After pulling out carefully the compressor, let it rest on the side of the rear tail light. The lines are flexible enough that you can move it around. At this stage, you can feel the infamous clip that is holding the cable. The picture below taken by Equinox show the ugly clip, since Equinox removed the AOS box. In our case, the AOS is still there, untouched. By the way, you will not be able to remove the A/C compressor, if any length of the large E-14 Torx bolt is still in its hole. With tiny fingers, and a lot of patience, you have to lift that big bolt (it is impossible to remove it, it is too long) out of its location.
10) Let's back up a little bit and admire the disaster: there sits your $90K prize, completely hacked and in pieces..... A sinking feeling starts to grow in your stomach and your brain remembers the 800 number of AAA. They will have to come with a bed truck to take it to the nearest Porsche dealer..... The neighbors will be laughing and you will be the fool on the block. What a mess......
Since you are now kneeling on the floor with your dirty hands joined in supplication, let's take advantage of that position to fall completely on the ground and crawl under the car like a worm to discover the underworld:
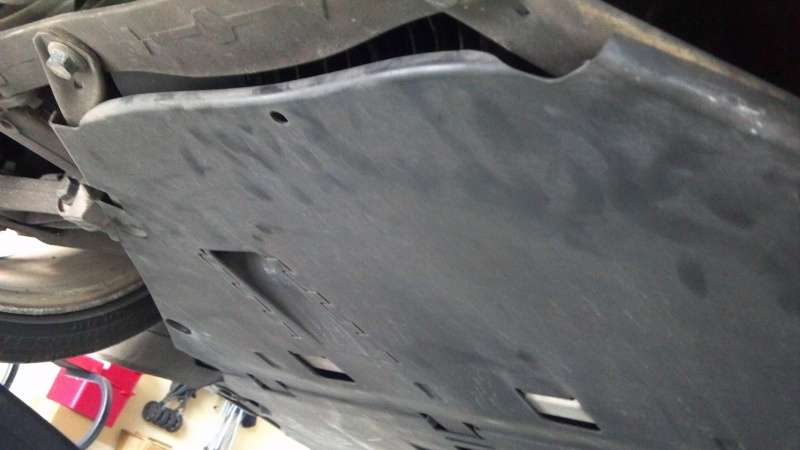
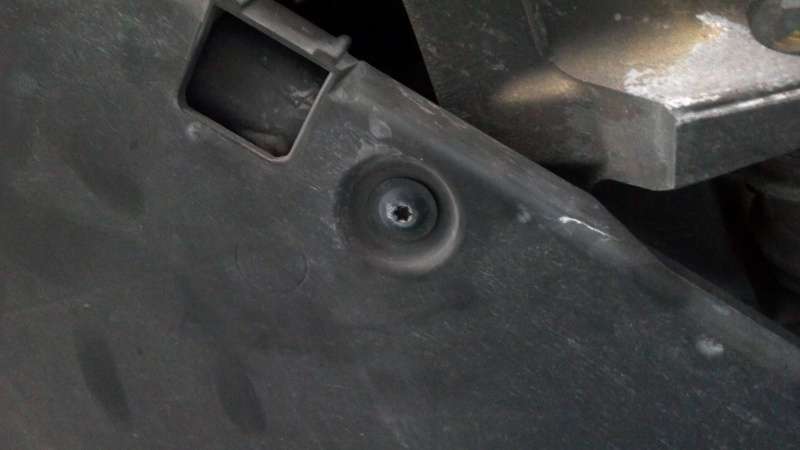
Before diving, in a survival reflex, your hands will have grabbed a TORX 20 screwdriver, a 10 mm and a 13 mm wrenches. Sliding on your back, remove the four Torx-20 screws holding the tray. They are recessed and look like this:
Remove the tray under the engine and slide it to the side. Despite the dust and soot falling on your face and into your eyes, you now have a clear view of the other end of the cable, attached to the gear box:
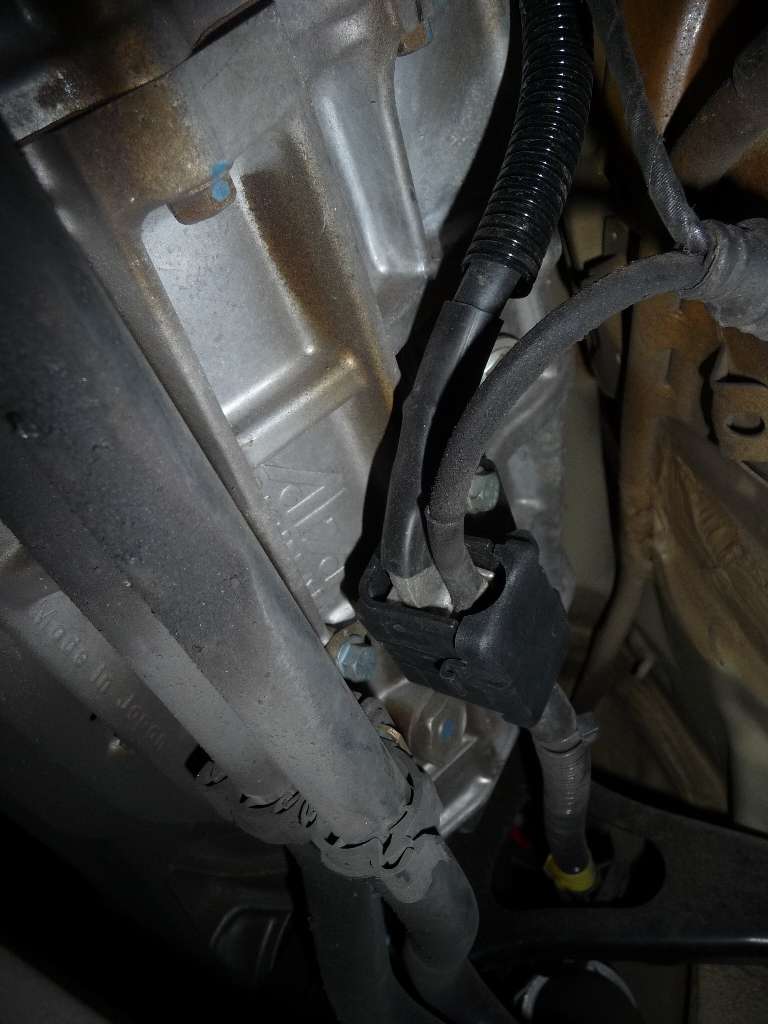
Pry open the box (from underneath) and it will reveal the Connection between the infamous cable and the battery cable. Use a 13 mm wrench to remove the bolt:

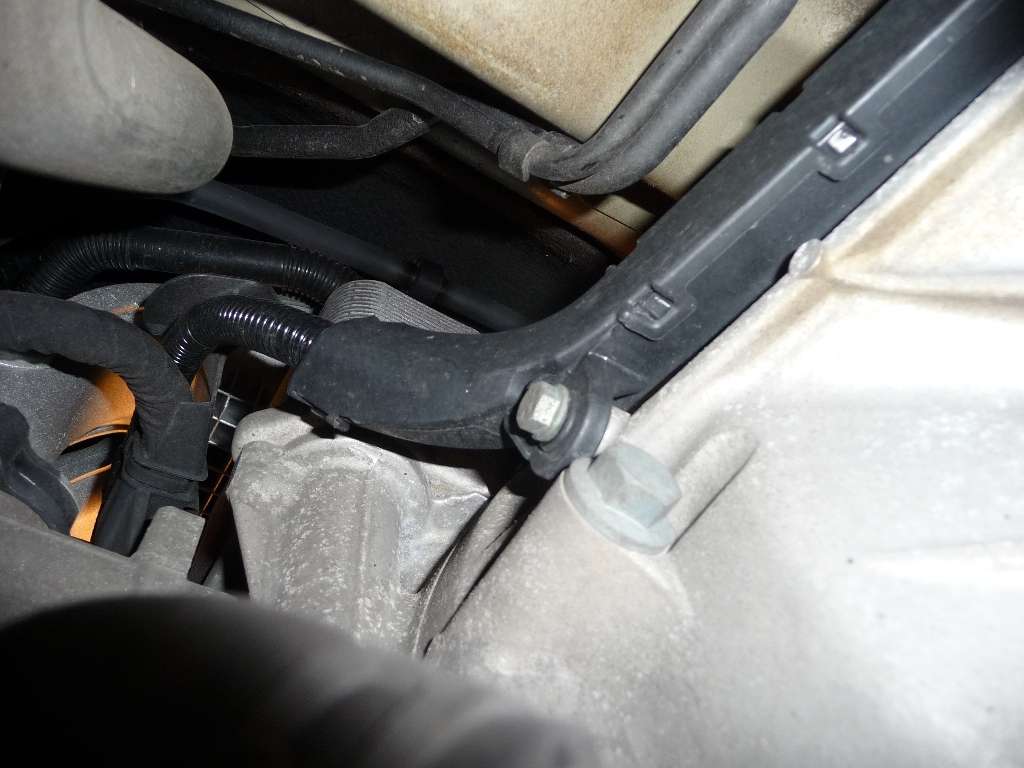
The plastic box itself can be removed by taking off the two bolts located above it, with your 10 mm wrench.
Crawling towards the rear of the car, you still have to remove two more bolts of 10 mm: Below is the second bolt. The first one is very easy to find, if you follow the cable from the junction.
Once this is done and once you have managed to open the two clips holding the cable in the engine compartment (one is behind the AOS box, the second one is after the bend on the way down under), you can try pulling the cable from underneath. It is a good idea to put some tape around the Y of the starter end, in order to ease the extraction of the deceased part. Some help may be required (wife, girl friend, boy friend, ....etc). I find it easier to remove the cable from below, because of the plastic stiffeners used to clamp it to the gearbox.
Now is the time to take a break. Beer, food, nap or a hug with your sweetheart: You worked hard and you deserve a treat.
To install the new and improved cable, I found it easier to go back under the car and feed the cable up into the engine bay. Prior to this, I put some tape (or elastic bands) to keep the two ends of the Y together. Unless, you have some help on the receiving side, you are going to need a few trips back and forth between the surface and the underworld. The cable is stiff but can be bent to follow the plastic gutter/channel.
First, reconnect the big end to the starter, being careful about how you route the sucker. Make sure all flows harmoniously.
Then using a new clip, insert it to the plastic tab protruding next to where the cable disappear in the underworld. Close the clip and seal its fate.
You will remember that the second plastic tab behind the AOS was whacked brutally and thus is no longer usable. Instead, we will use wire ties. I installed 4 of them along the path of the cable. The trick is to make sure that the cable stays in the gutter/channel and never comes in contact to the metal parts of the engine.
Re-connect the two plastic hoses to the AOS. Let's not forget them as it will be very annoying later on.
When happy with the routing of the cable, push the rubber boot above the starter connection and grab your alternator. Struggle to re-install it. I ended up filing a little bit the top holder and that made my life so much easier. As you will see, the assembly is very tight, where the pulley and the bolt go. By Filing the holder on the engine and/or the soft metal side of the alternator, you create some extra play that allows you to insert the alternator in a much easier way. Now is a good time to reconnect the small and single wire at the bottom and the unused end of the new alternator cable (13 mm wrench). Use your E-16 Torx female socket to lock the whole assembly in place. Again, take your time and check the routing of the cables. Check twice, assemble once.
Next comes the re-assembly of the A/C compressor. Again, to re-insert, you will need to lift the E-14 long back bolt all the way up and make sure that the two front E-12 bolts line up fine. If they do, then just drop the E-14 rear bolt and it will fall in place in its hole. Then using your wobble extension and an E-14 socket, lock it in place. Finish with the two bolts in the front (E-12).
Of course, the brown wire will have been routed carefully and connected to its receptacle. Otherwise, the summer will be very hot in the ****pit of your 911.
Next comes the Steering Fluid tank. Just insert, and lock the ring clockwise.
Finally the plenum and the throttle body. You know what to do by now.
The serpentine belt is next. Again, a picture is provided for your comfort and peace of mind:
Then, we end up re-installing the air filter and resonator box. Et voila:
Clean up your hands, grab the ignition keys and jump on the seat: First turn, it growls!!!!!! Yeah......!!!!! Relief.
The engine Lid can be re-installed later on being careful to not scratch the paint. Insert the bolts and adjust the position of the lid before locking them with your 10 mm wrenches.
That concludes our session. I will report on the behavior when the engine is hot later on. First I need to find some Pentosin to refill to the prescribed level the steering fluid tank.
I hope you enjoyed this tutorial and will make good use of it. It seemed daunting at first, but I don't regret it and feel more confident now about tackling other engine related tasks. Not that I am looking for it.....
Yves
Ok, I ran a few errands today and cranked a few times the engine while hot. It works like a champ. Smooth and firm start, not the croaking noise of an agonizing asthmatic like I used to get after taking gas for instance. Definitely a major improvement for me and the peace of mind to know that if I have to restart the engine immediately, it will happen right away. Additional bonus: confidence in my skills to maintain the 997.... Hey that is important too.
Thanks to Equinox I managed to replace the infamous alternator/Starter cable on my 2006 C4S this past weekend. It took me about 5 hours, taking my time, exploring and cleaning up parts. It is a hell of a job, and I would not recommend this to anyone who has never entertained serious mechanical work on a car.
Equinox in his great diary, gave a tons of details on that delicate procedure. I will not repeat what he explained and simply present my way of approaching the replacement by concentrating solely on the cable and not on the Air/Oil Separator (AOS). Also, my car required some slightly different tools sizes and I will indicate that as well.
Thus, this is written as a tribute to Equinox, a great Porsche mechanic and I will be eternally grateful for a lot of his insights. I have used 3 or 4 of Equinox's pictures and I hope he will not mind it too much.
The replacement cable can be obtained from Suncoast or your local stealer for the meager (for a Porsche part...) $100.00. Porsche must feel really bad, to make it so cheap.
1) First step is to place the rear wheels of your Porsche on ramps or use jack-stands to raise the rear wheels. Of course, use the handbrake and place the gearbox in park or in 1st gear (all wheel drive) and block your front wheels. I like the plastic ramps, the heavy duty ones, purchased at the local Auto Zone shop. The clearance is tight when I crawl under the car with my slider but I feel better and safer than placing the car on jack-stands.
2) Disconnect the battery and isolate the ground terminal.
Now that the battery is no longer connected, it may be a good idea to prevent the full closure of the front trunk. A mishap can happen and will complicate the procedure. I use one of my wife's pajama as the cotton fabric is very soft.
3) Now, we can move to the back of the car. I like my ease and comfort, and honestly unless you have very long arms and do not mind smashing your face against the engine lid, it is more comfortable to simply remove it. Use 10 mm open and closed wrenches for that purpose. The most difficult thing is to part the connector located on the right side of the car, behind the rear right tail light, in the engine compartment. The pig tail is very short and really difficult to reach and to uncouple. The gas spring is removed after taking the air filter away, by removing the half circle shaped piece of steel on the chassis side, with a small flat screwdriver. Be careful not to loose it.
Achtung!!!! The lid is really heavy and you may want to be careful when lifting it.
4) Now is the time to remove the air filter (actually, it had to be done first, before removing the lid) and the serpentine belt and this has been covered in another thread and thus will not be repeated here. For details see https://www.6speedonline.com/forums/...-one-hour.html
The following picture is to remind the weak brains (like mine) how to re-assemble the serpentine belt. It is just odd how quickly we forget.... at our age.
5) First remove the throttle body and the plenum. For that, you will need an E12 socket and your favorite 7 mm closed wrench (I do not like screwdrivers on the hose clamps). Carefully, disconnect the servo connector on top of the throttle body and remove all four E12 bolts. Store preciously the body in a safe place. Now is a good time to clean it and verify that there is no oil on it. Mine was very dry, indicating a good working AOS. I did not try to push the flap open and resisted the curiosity. You can see on both sides, anyway. Then, loosen up the four hose clamps holding the plenum, with your 7 mm wrench. Push the rubber rings on each side, towards the manifolds so that the plenum in the middle can be easily removed. Before pulling like an animal, slide your hand underneath and behind and verify that there is nothing else attached to the rubber plenum. My C4S 2006 had nothing and it was very straight forward.
6) Using your slimmest fingers, turn the collar of the steering pump filler box counter clockwise. It is hard to reach. It should unlock and you just have to pull the whole steering fluid box up to remove it. Doing so will spill some of the steering oil (that precious Pentosin, hard to find in regular auto shops) on your engine. It may be a good idea to have a rag handy when doing that maneuver. Now things are getting clearer..... It is also a good idea to place some kind of cap on top of the steering pump opening. If something falls into it, it is going to ruin your day. I use shrink wrap and two rubber bands from my Newspapers carrier.
7) Let's gain as much room as possible and remove as many pipes and wires from the middle. The most irritating hose is the oil filler neck: it is always in the middle of what you do. We are now going to work on the alternator.
Using an E-16 socket remove the lower left bolt holding the alternator. Then remove the top right bolt coupled with a pulley. At this stage the alternator is free and you can disconnect the main wire with a 13 mm socket and carefully remove the lower electrical connector (a light squeeze should do it). It may be necessary to pry carefully the alternator out of the holder using a large screwdriver. Pry near the ends of the alternator and not in the middle. Store the alternator with your throttle body, far away from the war zone..... These are very expensive parts and you do not want to damage them.
Without the alternator, there is more room as shown below:
8) Now is the time to get to the starter:
Using your mighty strength, pull on the rubber boot covering the two cables. Then, and this is very important, disconnect the two plastic tubes located on the left side of the AOS box. Using your steel fingers, press real hard on the clips and pull carefully the two tubes out. These tubes will prevent you from gaining access to the starter and may get damaged when you try to remove the 13 mm nut from the starter. I used a 13 mm wrench to unlock the starter nut.
Re-install the nut on the starter. At least this is one that you will not loose. Technically, the alternator cable could be pulled from underneath the car and all would be fine. But it is never so easy in the Porsche realm. Those @#$%^ of German engineers have installed one of their bullet proof clip right behind the AOS box. That clip holds the cable to the plastic gutter/channel routing all electrical connections to and through the engine. Your finger tips can touch it, you can guess it is there, but you cannot do anything about it. It took me half an hour of negotiations in an attempt to open it and I had a sample of the clip to study, as two are provided with the replacement cable. Finally, a sharp chisel and a good whack took care of the bloody part. The reason for all these troubles was that I did not want to go to the next step....and I should have....
9) Removing the A/C compressor unit. That one is tricky and without Equinox I would have given up. The A/C unit holds by two E-12 bolts and a very secret E-14 bolt behind the can, absolutely invisible from any sides of the car. You have to know that it is there and find it. It is an act of faith, pure blind faith. The following pictures were taken by Equinox and depicts the evil genius of the German engineers:
This bolt is reached as shown below, and is located on the left side of the A/C compressor, towards the top of the can.
You will need a wobble (+/- 6 degrees) extension with your E-14 female torx attached to it. I use Facom for most of my tools and Facom sells such 3/8 inch extension for 12 Euros or about $15.00. It is a must have. Craftsman and others have this wobble extension, I am sure.
You will also need need to disconnect the compressor wire (long brown wire on the top) from the harness. The connector is located on the right manifold, near the electrical channel and looks like a small clear plastic box with a single connector in it. The wire goes through the first arch of the right manifold.
After pulling out carefully the compressor, let it rest on the side of the rear tail light. The lines are flexible enough that you can move it around. At this stage, you can feel the infamous clip that is holding the cable. The picture below taken by Equinox show the ugly clip, since Equinox removed the AOS box. In our case, the AOS is still there, untouched. By the way, you will not be able to remove the A/C compressor, if any length of the large E-14 Torx bolt is still in its hole. With tiny fingers, and a lot of patience, you have to lift that big bolt (it is impossible to remove it, it is too long) out of its location.
10) Let's back up a little bit and admire the disaster: there sits your $90K prize, completely hacked and in pieces..... A sinking feeling starts to grow in your stomach and your brain remembers the 800 number of AAA. They will have to come with a bed truck to take it to the nearest Porsche dealer..... The neighbors will be laughing and you will be the fool on the block. What a mess......
Since you are now kneeling on the floor with your dirty hands joined in supplication, let's take advantage of that position to fall completely on the ground and crawl under the car like a worm to discover the underworld:
Before diving, in a survival reflex, your hands will have grabbed a TORX 20 screwdriver, a 10 mm and a 13 mm wrenches. Sliding on your back, remove the four Torx-20 screws holding the tray. They are recessed and look like this:
Remove the tray under the engine and slide it to the side. Despite the dust and soot falling on your face and into your eyes, you now have a clear view of the other end of the cable, attached to the gear box:
Pry open the box (from underneath) and it will reveal the Connection between the infamous cable and the battery cable. Use a 13 mm wrench to remove the bolt:
The plastic box itself can be removed by taking off the two bolts located above it, with your 10 mm wrench.
Crawling towards the rear of the car, you still have to remove two more bolts of 10 mm: Below is the second bolt. The first one is very easy to find, if you follow the cable from the junction.
Once this is done and once you have managed to open the two clips holding the cable in the engine compartment (one is behind the AOS box, the second one is after the bend on the way down under), you can try pulling the cable from underneath. It is a good idea to put some tape around the Y of the starter end, in order to ease the extraction of the deceased part. Some help may be required (wife, girl friend, boy friend, ....etc). I find it easier to remove the cable from below, because of the plastic stiffeners used to clamp it to the gearbox.
Now is the time to take a break. Beer, food, nap or a hug with your sweetheart: You worked hard and you deserve a treat.
To install the new and improved cable, I found it easier to go back under the car and feed the cable up into the engine bay. Prior to this, I put some tape (or elastic bands) to keep the two ends of the Y together. Unless, you have some help on the receiving side, you are going to need a few trips back and forth between the surface and the underworld. The cable is stiff but can be bent to follow the plastic gutter/channel.
First, reconnect the big end to the starter, being careful about how you route the sucker. Make sure all flows harmoniously.
Then using a new clip, insert it to the plastic tab protruding next to where the cable disappear in the underworld. Close the clip and seal its fate.
You will remember that the second plastic tab behind the AOS was whacked brutally and thus is no longer usable. Instead, we will use wire ties. I installed 4 of them along the path of the cable. The trick is to make sure that the cable stays in the gutter/channel and never comes in contact to the metal parts of the engine.
Re-connect the two plastic hoses to the AOS. Let's not forget them as it will be very annoying later on.
When happy with the routing of the cable, push the rubber boot above the starter connection and grab your alternator. Struggle to re-install it. I ended up filing a little bit the top holder and that made my life so much easier. As you will see, the assembly is very tight, where the pulley and the bolt go. By Filing the holder on the engine and/or the soft metal side of the alternator, you create some extra play that allows you to insert the alternator in a much easier way. Now is a good time to reconnect the small and single wire at the bottom and the unused end of the new alternator cable (13 mm wrench). Use your E-16 Torx female socket to lock the whole assembly in place. Again, take your time and check the routing of the cables. Check twice, assemble once.
Next comes the re-assembly of the A/C compressor. Again, to re-insert, you will need to lift the E-14 long back bolt all the way up and make sure that the two front E-12 bolts line up fine. If they do, then just drop the E-14 rear bolt and it will fall in place in its hole. Then using your wobble extension and an E-14 socket, lock it in place. Finish with the two bolts in the front (E-12).
Of course, the brown wire will have been routed carefully and connected to its receptacle. Otherwise, the summer will be very hot in the ****pit of your 911.
Next comes the Steering Fluid tank. Just insert, and lock the ring clockwise.
Finally the plenum and the throttle body. You know what to do by now.
The serpentine belt is next. Again, a picture is provided for your comfort and peace of mind:
Then, we end up re-installing the air filter and resonator box. Et voila:
Clean up your hands, grab the ignition keys and jump on the seat: First turn, it growls!!!!!! Yeah......!!!!! Relief.
The engine Lid can be re-installed later on being careful to not scratch the paint. Insert the bolts and adjust the position of the lid before locking them with your 10 mm wrenches.
That concludes our session. I will report on the behavior when the engine is hot later on. First I need to find some Pentosin to refill to the prescribed level the steering fluid tank.
I hope you enjoyed this tutorial and will make good use of it. It seemed daunting at first, but I don't regret it and feel more confident now about tackling other engine related tasks. Not that I am looking for it.....
Yves
Ok, I ran a few errands today and cranked a few times the engine while hot. It works like a champ. Smooth and firm start, not the croaking noise of an agonizing asthmatic like I used to get after taking gas for instance. Definitely a major improvement for me and the peace of mind to know that if I have to restart the engine immediately, it will happen right away. Additional bonus: confidence in my skills to maintain the 997.... Hey that is important too.


Thread
Thread Starter
Forum
Replies
Last Post