Bentley Continental GT/GTC/Flying Spur DIY Thread
#33
PDF link
My apologies, but I removed the link to the Bentley PDF, as very difficult to obtain more info, and not at lot of interest or input.
However, I would be happy to email the 40 page PDF (2.2Mb), to anyone interested.
PMs are already sent to gliozzi and ExoticCarDriver.
Kind regards,
Geo.
However, I would be happy to email the 40 page PDF (2.2Mb), to anyone interested.
PMs are already sent to gliozzi and ExoticCarDriver.
Kind regards,
Geo.
#36
My apologies, but I removed the link to the Bentley PDF, as very difficult to obtain more info, and not at lot of interest or input.
However, I would be happy to email the 40 page PDF (2.2Mb), to anyone interested.
PMs are already sent to gliozzi and ExoticCarDriver.
Kind regards,
Geo.
However, I would be happy to email the 40 page PDF (2.2Mb), to anyone interested.
PMs are already sent to gliozzi and ExoticCarDriver.
Kind regards,
Geo.
Try to send the PDF files to 740267999@qq.com plz.
Let me know if system still refuse deliver your email.
Thanks

#37
Bentley PDF
#39
Found what seems to be a great place for Bentley OEM service parts: http://boutique.pomcltd.com/SearchResults.asp?Cat=56
#40
I did an oil change on my 2004 Bentley GT this weekend and it was relatively easy.
Parts needed:
13 liters of 0W-40 Oil
36mm socket
19mm socket
T30 torx socket
flat head screw driver
container for oil
oil filter (Part #07C115562E)
drain Plug (Part #N90813201)
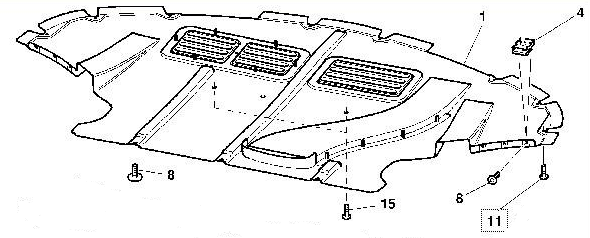
I drove my car on some ramps to gain access to the splash guard. You will need the T30 to remove most of the screws on the splash guard. There are 3 in front of the front wheels that need to be removed. I was able to remove these without removing the tires. There are also some screws on the rear of the splash guard that need to be removed using a flat head screw driver.
Splash Guard

Next I drained the oil from from the oil pan. The drain plug is on the left side of the car. Be prepared for 13 liters of oil. I used a 19mm socket to remove the drain plug. I then replaced it with a new drain plug from the dealer.
Drain Plug

The next step is to remove the oil filter bowl. The oil filter is on the right side of the car. I used a 36mm socket to remove this bowl. Remove the old oil filter and replace it with a new one. You also to remove the old o-ring on the oil filter bowl and replace it with the new one that comes with the oil filter. Be sure to coat the o-ring with a little oil to help in removing it next time.
Oil Filter Bowl

Now all you have to put the slash guard back on and fill the car with oil.
Parts needed:
13 liters of 0W-40 Oil
36mm socket
19mm socket
T30 torx socket
flat head screw driver
container for oil
oil filter (Part #07C115562E)
drain Plug (Part #N90813201)
I drove my car on some ramps to gain access to the splash guard. You will need the T30 to remove most of the screws on the splash guard. There are 3 in front of the front wheels that need to be removed. I was able to remove these without removing the tires. There are also some screws on the rear of the splash guard that need to be removed using a flat head screw driver.
Splash Guard
Next I drained the oil from from the oil pan. The drain plug is on the left side of the car. Be prepared for 13 liters of oil. I used a 19mm socket to remove the drain plug. I then replaced it with a new drain plug from the dealer.
Drain Plug
The next step is to remove the oil filter bowl. The oil filter is on the right side of the car. I used a 36mm socket to remove this bowl. Remove the old oil filter and replace it with a new one. You also to remove the old o-ring on the oil filter bowl and replace it with the new one that comes with the oil filter. Be sure to coat the o-ring with a little oil to help in removing it next time.
Oil Filter Bowl
Now all you have to put the slash guard back on and fill the car with oil.
#44
Just to let you all know; I have at last upgraded the pdf, but it is now over 4Mb.
My thanks to all who have contributed information, but I would still like to see more DIY articles, etc.
If I can collect any more Bentley GT/GTC/FC info, I'll continue periodic PDF updates.
I am happy to send out the new PDF to anyone who makes a request to my email address :
gmacgruer@sympatico.ca
I would also be happy to place the PDF here, if a moderator would give permission for larger file size.
Kind regards to all,
George
Last edited by Geo3; 04-02-2012 at 05:06 PM. Reason: spelling
#45
Sorry...but I didn't notice the dipstick tube.


