
Clear indicator lights


#7
 01-14-2013 | 06:45 AM
Registered User
Joined: Oct 2011
Posts: 859
From: Southern California
Rep Power: 49

I used the fishing line method and the first one takes like 25 min to figure out. The second one takes like 5 minutes. It's really about putting fishing line underneath and doing a few yanks slowly and forcefully. Snaps right on after. It really is easy once you know, but search the forums.
Trending Topics
#10
01-15-2013 | 08:30 AM

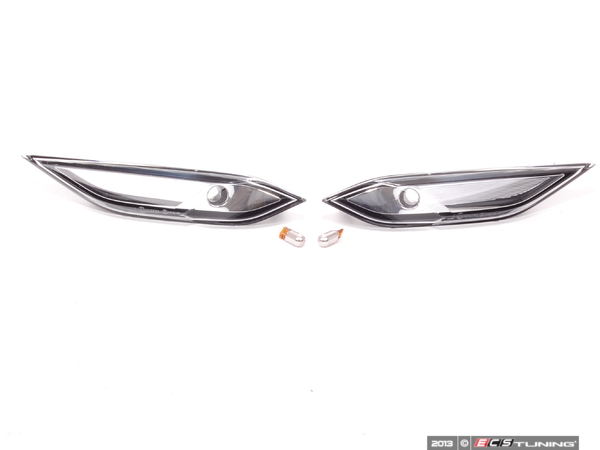
Unfortunately, we don't have pictures with them installed but we do have the Clear Euro Side Markers like the ones shown below, ready do go in a kit 
#13
01-16-2013 | 08:04 AM
Are the orange bulbs easily available? Assuming once in a while they need to be replaced.
#14
01-17-2013 | 04:49 PM
Registered User
Joined: Feb 2011
Posts: 76
From: SF Bay Area
Rep Power: 18
Installation is quite easy and certainoly a DIY. Three ways to install:
1. Follow Owner's Manual procedure about changing side marker light bulbs by removing wheel well guard.
2. Use fishing line method as described in other posts.
3. Use a plastic or carbon fiber interior trim tool. This is the method I used so I'll describe it a bit more in detail. The trim tools can be found in most auto parts stores or from vendors on the web. MACarbon has a nice universal set I've used on all my cars.
The trim tool needs to be a rather straight and flat one, not an angled one. Also, look at your new clear markers and study where the clips are located. This will help you in understanding where you will need to position your trim tool in order to disengage the clips.
Starting at the front of the side marker, slide the trim tool underneath the marker and using your other hand, press firmly on the back of the marker. This will create just a bit more gap to slide the trim tool a little farther toward the center of the marker. Use the trim tool as a lever and slowly but firmly pry the front end of the marker out away from the vehicle. It is a snug fit so some force is needed. Be sure to pry outwards, away from the vehicle. Eventually the front clip will disengage and the marker front will pop free.
Now you will need to slowly work the back clips out. Hold the front of the marker away from the vehicle and work the back of it in and out while pulling away from the vehicle - the trim tool may still be useful to exert more force on the back of the marker. The back clip will disengage as well. You may still have the third guide clip of the marker attached to the vehicle, but it will disengage very easily now. Be careful not to pull the whole assembly too far away from the vehicle since the electrical wire and bulb are still connected.
Finally pull the bulb housing away from the marker (some may have a twist connection, but mine was a simple straight pull).
Replace the clear bulb with your new orange bulb and plug back into the marker housing. If you have alignment markings on the marker and bulb housing, make sure they are aligned. This helps with ensuring a proper seal.
Replace the marker by inserting the back end marker clips into the appropriate slots first. Slowly rotate the marker forward and insert the clip into the front slots. Press firmly on the marker to ensure all clips catch and "click". If you do not have a flush mount with the body panel then the clips have not set properly; push on the marker more firmly until they set.
Repeat for the other side. Total time is probably 10 minutes for both.
Last edited by stronbl; 01-17-2013 at 04:54 PM. Reason: spelling errors
#15
01-18-2013 | 08:32 AM

Thread Starter
|
Registered User
Joined: Dec 2009
Posts: 816
From: dallas
Rep Power: 50
Installation is quite easy and certainoly a DIY. Three ways to install:
1. Follow Owner's Manual procedure about changing side marker light bulbs by removing wheel well guard.
2. Use fishing line method as described in other posts.
3. Use a plastic or carbon fiber interior trim tool. This is the method I used so I'll describe it a bit more in detail. The trim tools can be found in most auto parts stores or from vendors on the web. MACarbon has a nice universal set I've used on all my cars.
The trim tool needs to be a rather straight and flat one, not an angled one. Also, look at your new clear markers and study where the clips are located. This will help you in understanding where you will need to position your trim tool in order to disengage the clips.
Starting at the front of the side marker, slide the trim tool underneath the marker and using your other hand, press firmly on the back of the marker. This will create just a bit more gap to slide the trim tool a little farther toward the center of the marker. Use the trim tool as a lever and slowly but firmly pry the front end of the marker out away from the vehicle. It is a snug fit so some force is needed. Be sure to pry outwards, away from the vehicle. Eventually the front clip will disengage and the marker front will pop free.
Now you will need to slowly work the back clips out. Hold the front of the marker away from the vehicle and work the back of it in and out while pulling away from the vehicle - the trim tool may still be useful to exert more force on the back of the marker. The back clip will disengage as well. You may still have the third guide clip of the marker attached to the vehicle, but it will disengage very easily now. Be careful not to pull the whole assembly too far away from the vehicle since the electrical wire and bulb are still connected.
Finally pull the bulb housing away from the marker (some may have a twist connection, but mine was a simple straight pull).
Replace the clear bulb with your new orange bulb and plug back into the marker housing. If you have alignment markings on the marker and bulb housing, make sure they are aligned. This helps with ensuring a proper seal.
Replace the marker by inserting the back end marker clips into the appropriate slots first. Slowly rotate the marker forward and insert the clip into the front slots. Press firmly on the marker to ensure all clips catch and "click". If you do not have a flush mount with the body panel then the clips have not set properly; push on the marker more firmly until they set.
Repeat for the other side. Total time is probably 10 minutes for both.
1. Follow Owner's Manual procedure about changing side marker light bulbs by removing wheel well guard.
2. Use fishing line method as described in other posts.
3. Use a plastic or carbon fiber interior trim tool. This is the method I used so I'll describe it a bit more in detail. The trim tools can be found in most auto parts stores or from vendors on the web. MACarbon has a nice universal set I've used on all my cars.
The trim tool needs to be a rather straight and flat one, not an angled one. Also, look at your new clear markers and study where the clips are located. This will help you in understanding where you will need to position your trim tool in order to disengage the clips.
Starting at the front of the side marker, slide the trim tool underneath the marker and using your other hand, press firmly on the back of the marker. This will create just a bit more gap to slide the trim tool a little farther toward the center of the marker. Use the trim tool as a lever and slowly but firmly pry the front end of the marker out away from the vehicle. It is a snug fit so some force is needed. Be sure to pry outwards, away from the vehicle. Eventually the front clip will disengage and the marker front will pop free.
Now you will need to slowly work the back clips out. Hold the front of the marker away from the vehicle and work the back of it in and out while pulling away from the vehicle - the trim tool may still be useful to exert more force on the back of the marker. The back clip will disengage as well. You may still have the third guide clip of the marker attached to the vehicle, but it will disengage very easily now. Be careful not to pull the whole assembly too far away from the vehicle since the electrical wire and bulb are still connected.
Finally pull the bulb housing away from the marker (some may have a twist connection, but mine was a simple straight pull).
Replace the clear bulb with your new orange bulb and plug back into the marker housing. If you have alignment markings on the marker and bulb housing, make sure they are aligned. This helps with ensuring a proper seal.
Replace the marker by inserting the back end marker clips into the appropriate slots first. Slowly rotate the marker forward and insert the clip into the front slots. Press firmly on the marker to ensure all clips catch and "click". If you do not have a flush mount with the body panel then the clips have not set properly; push on the marker more firmly until they set.
Repeat for the other side. Total time is probably 10 minutes for both.
why did you use the tool vs the line method? I found the line method to be easier, quicker (4mins) and w/ no chance for sratching the paint.