
All invited to watch a forum member's 930 perfected
#1
 03-18-2008, 10:48 AM


All invited to watch a forum member's 930 perfected
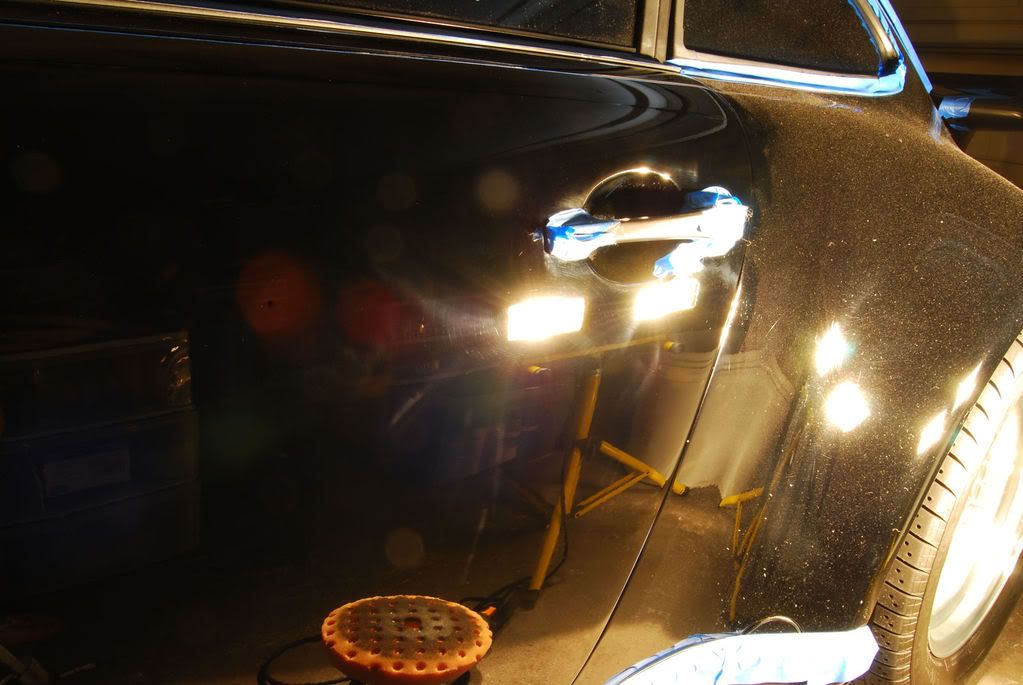
This 1983 Porsche 930 Turbo belongs to 6speedonline forum member JON913D. It has original paint that is deeply marred and scratched from 25 years of age and use. JON913D is the former owner of Perfection Auto which serviced Orlando and South Florida (and used to compete against me). Fortunately Jon (Springer) is joining the Bella Macchina team to further strenghten our team.
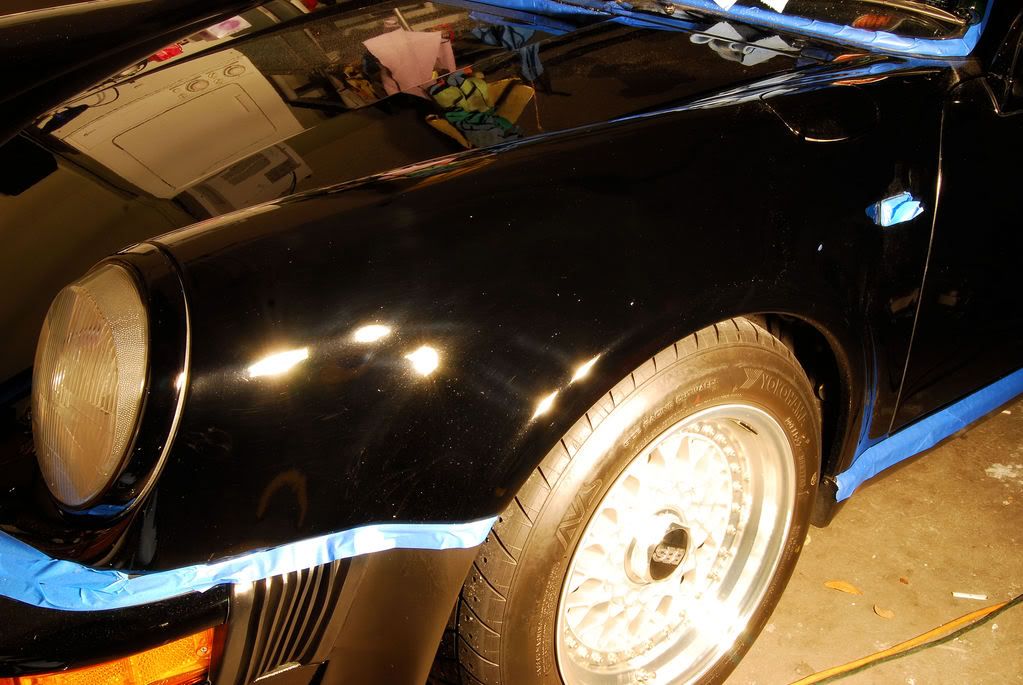
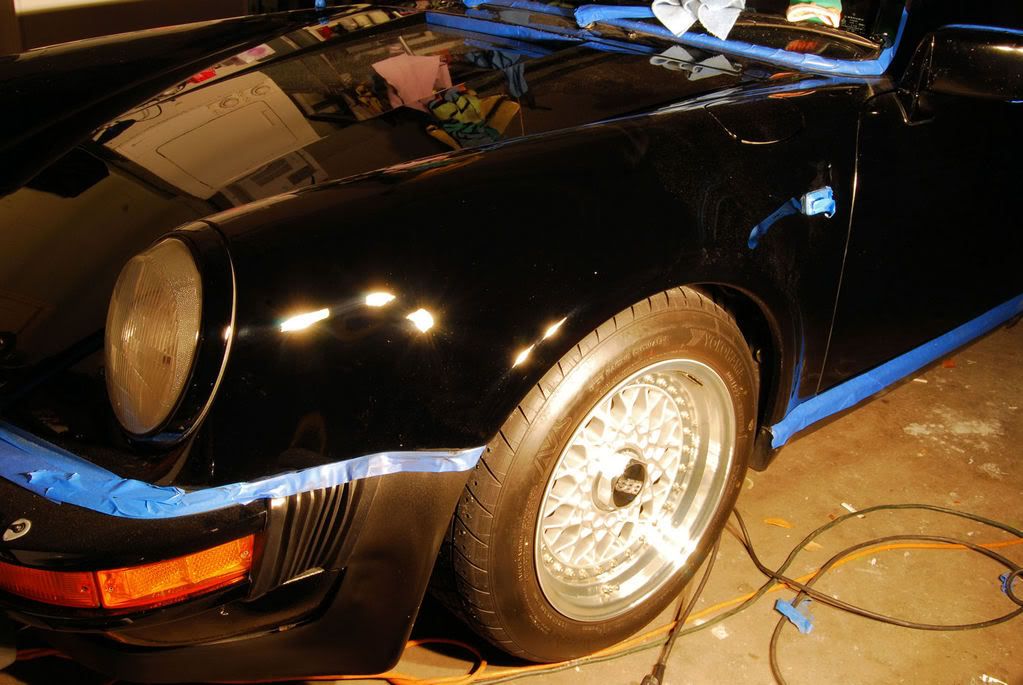
This Porsche is sweet for several reasons. It is a Euro (gray market) car so it is lighter then a state-side model, and has a lower stance. The air-cooled flat 6 has been tuned to near the 400 horsepower mark.
Jon and I started by washing the car with Meguiar’s DC wash. After washing, claying the car showed no removal of contaminants. However, it was in need of a new life. And seeing how this car will represent us at car shows, I know I have to make it perfect.
In general, you must be very careful when removing paint from a 25 year old car. It takes a lot of experience and right tools. Before polishing, paint thickness readings where taken in predetermined areas to help gauge the paint depth and to determine how much the paint could be re-leveled. On average the single stage paint was 6.5 mils, with some variation ranging between 6.3-7.2.
This car is just too cool not to be perfect, or as close as safely possible. There is a large number of R.I.D.S. (Random Isolated Deep Scratches), swirls, mircomarring, and severe water etching and spotting.
I started by taping half of the door and working one side. This base line allows me to try a myriad of different polishes, compounds, pads, and techniques to find the safest way to remove the defects while maintaining maximum paint depth.
I sampled the following polishes:
Meguiars' M105 Ultra Cut Compound
3M Perfect-It 3000 Extra Cut
Menzerna PG Power Gloss Leveling Compound
Menzerna PO83 Super Intensive Polish
Menzerna PO91 Intensive Polish
1Z Intensive Paste
Menzerna PO106ff Nano Polish
3M Perfect-It 3000 Ultra Fina-SE
As you can see by the extensive amounts of different polishes used (in conjunction with many different pads), this paint was a little tricky because it was so soft. In general it is easier to “correct” softer paint and remove severe defects, but finishing the paint to a hologram free flawless finish can be difficult. After some experimentation, the ideal combination proved to be…
3M Perfect-It 3000 Extra Cut on a twisted wool pad (I used The Edge) for several passes until the deep defects where removed. This left the surface “looking” worse, but in reality the deeper marring, water staining and etching, and scratches had been removed and replaced with very shallow “hazing”. This was followed with Menzerna PO83, using a Lake Country Purple Foamed Wool pad to remove the wool marring and begin to restore gloss into the paint.
When heavy compounds and aggressive pads are needed to remove extreme defects on soft paint, they can leave “wool ringing” which is marring inflicted from the fibers of the wool pad as they spin across the soft paint. The combination of PO83 and purple wool was able to take these out in one shot.
To remove the light hazing from the ultra fine purple wool, PO83 was once again used to refine the finish. Super Intensive Polish is an amazing polish in its ability to not only remove defects but to lightly burnish the paint to a high gloss. By switching the aggressiveness of the pad, the action of the polish can be greatly manipulated.
To finally jewel the paint and burnish it to a perfect shine with out the use of oils, glazes, or fillers, I elected on 3M Ultra Fina-SE. Used in conjunction with a soft, Lake Country Gray CCS pad, this combination proved very effective at removing the very light pad abrasions caused by the LC White Pad on the soft paint.
Pictures…
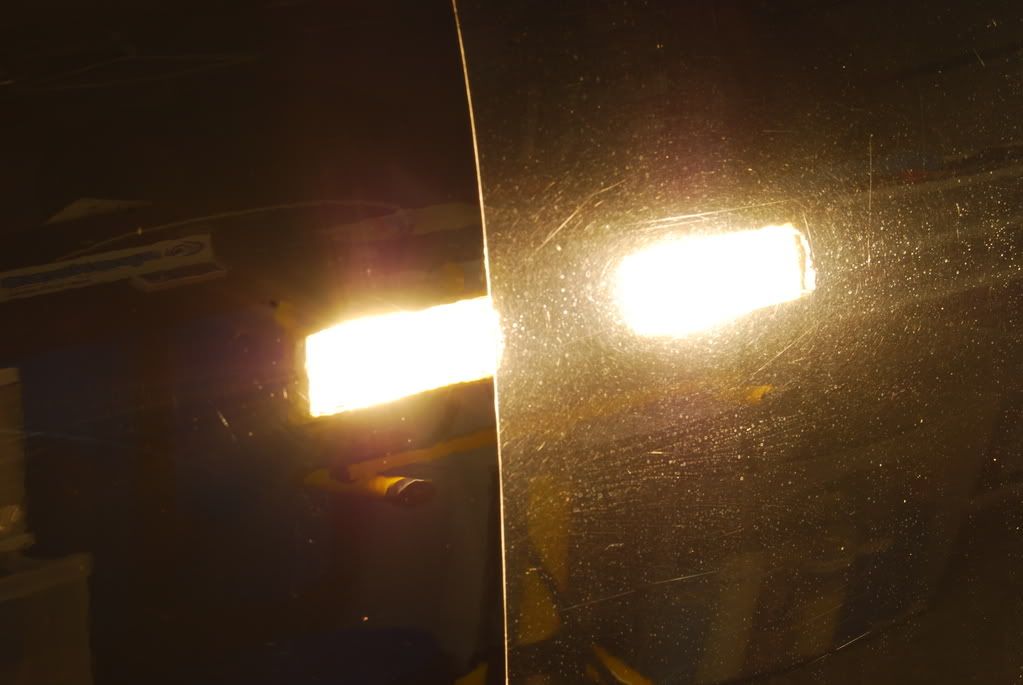
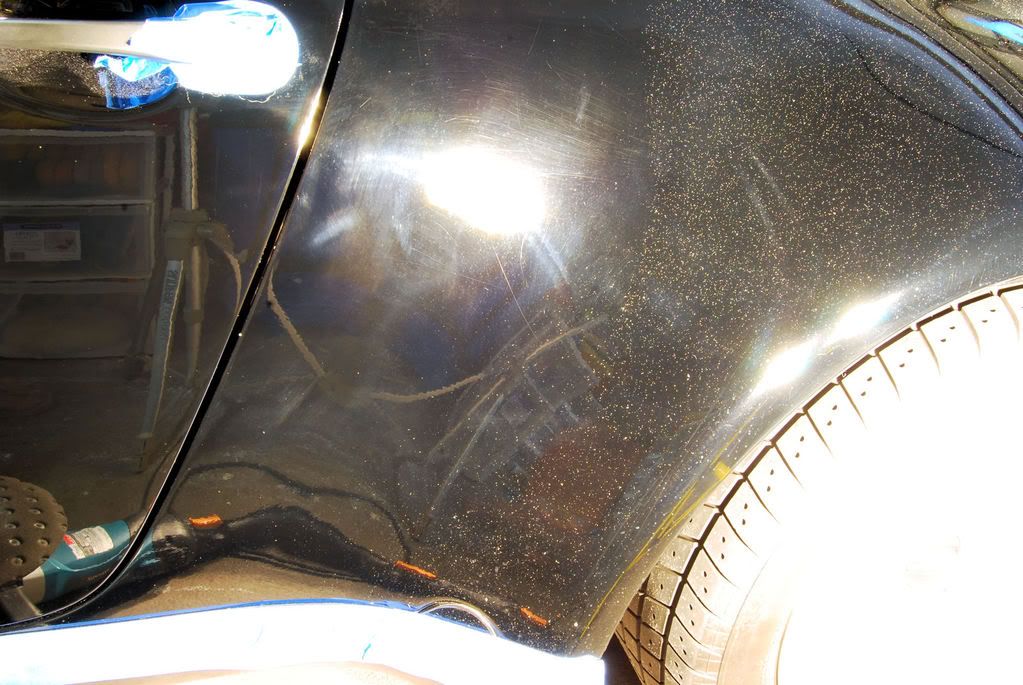
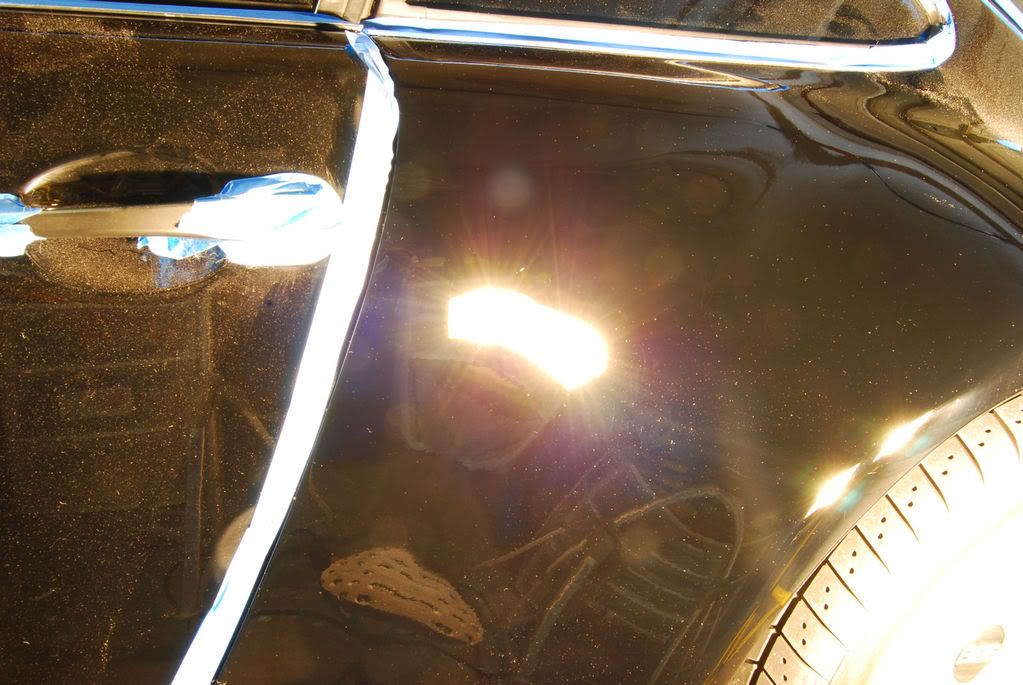
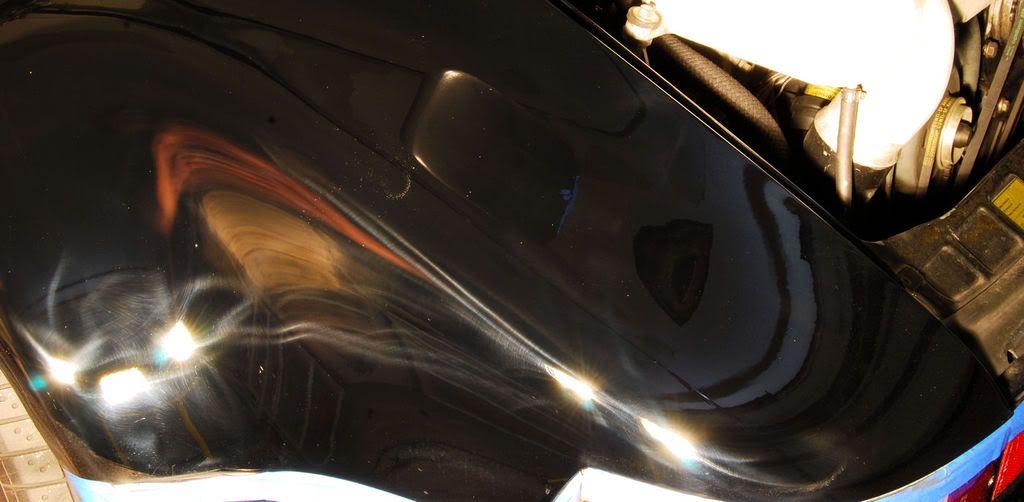
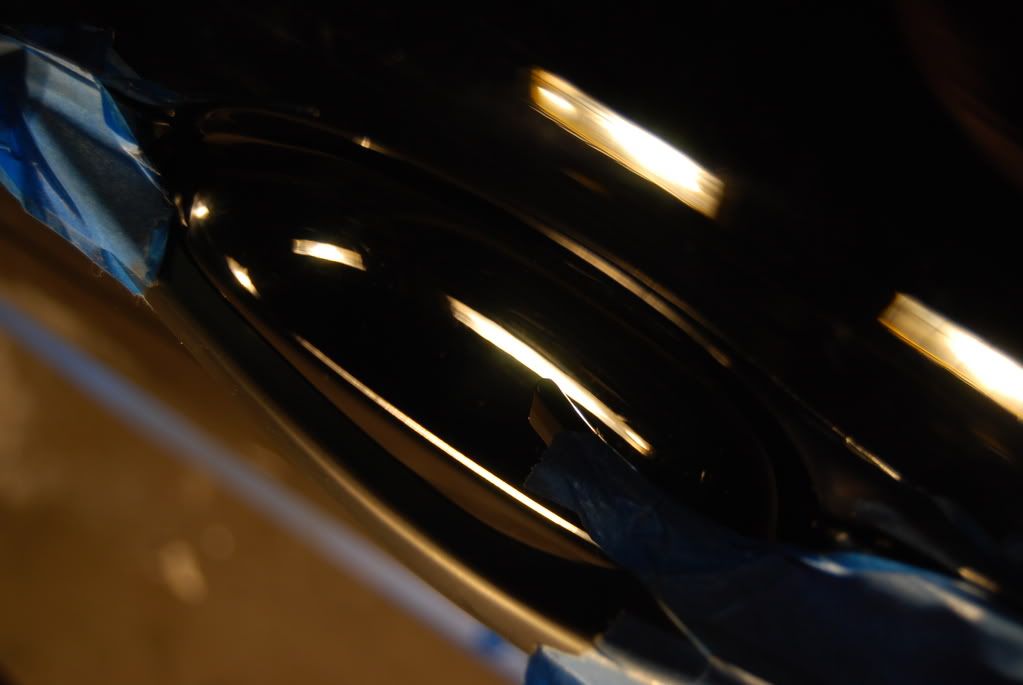
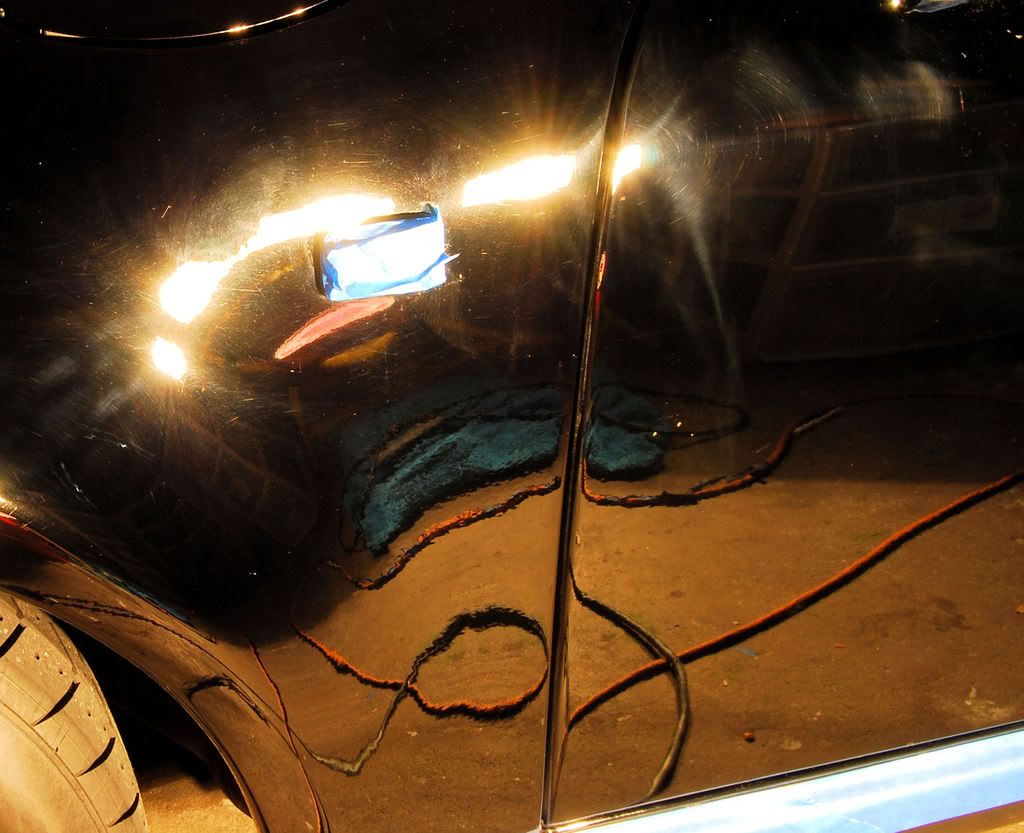
Here is a 50/50 where I taped off half of the driver side door in my search for perfection. The results, while dramatic on the screen, are much more so in person. You can also clearly see the water scaling, etching, micro marring, wash induced marring, RIDS, ands scratches on the uncorrected side. (Those dots are not dust!)

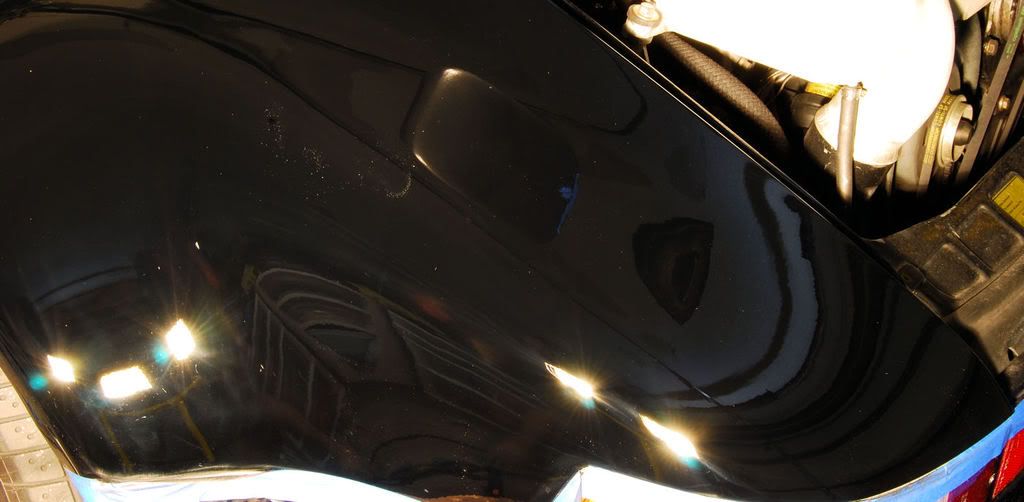
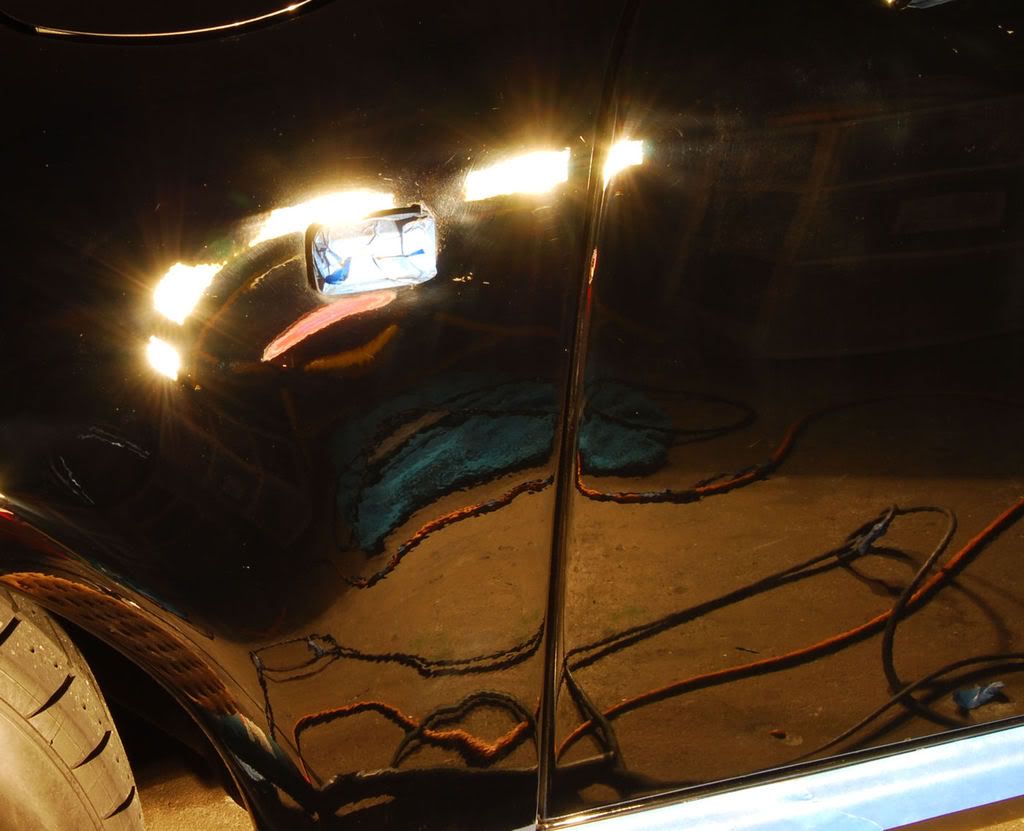
Same picture zoomed out…
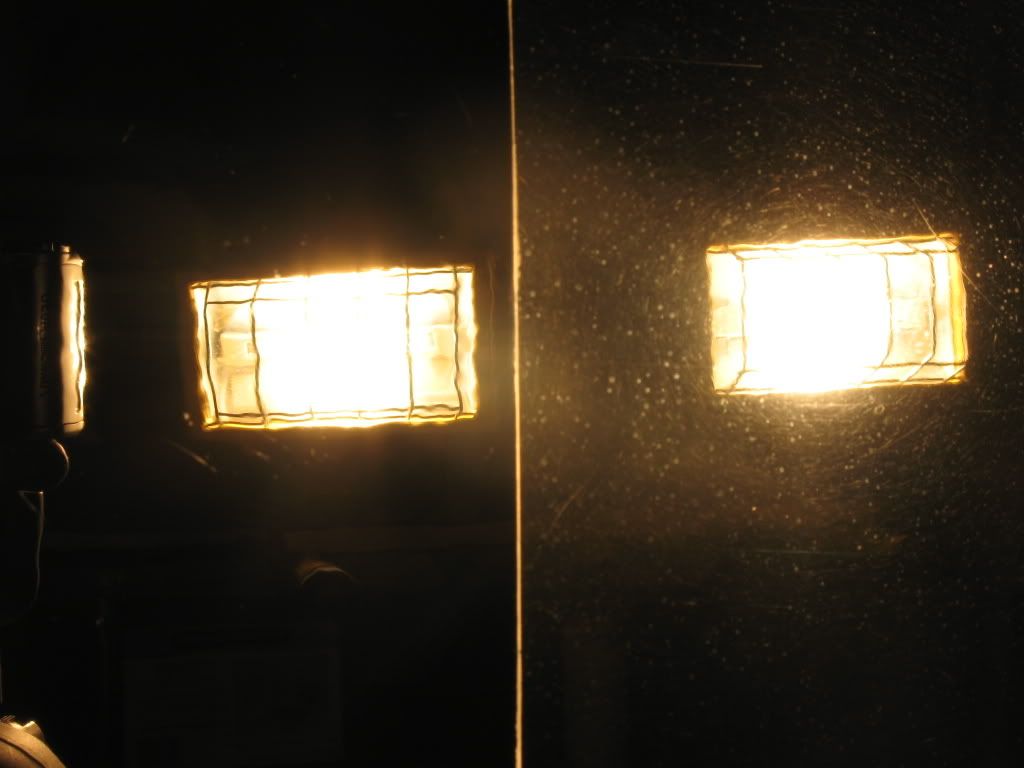
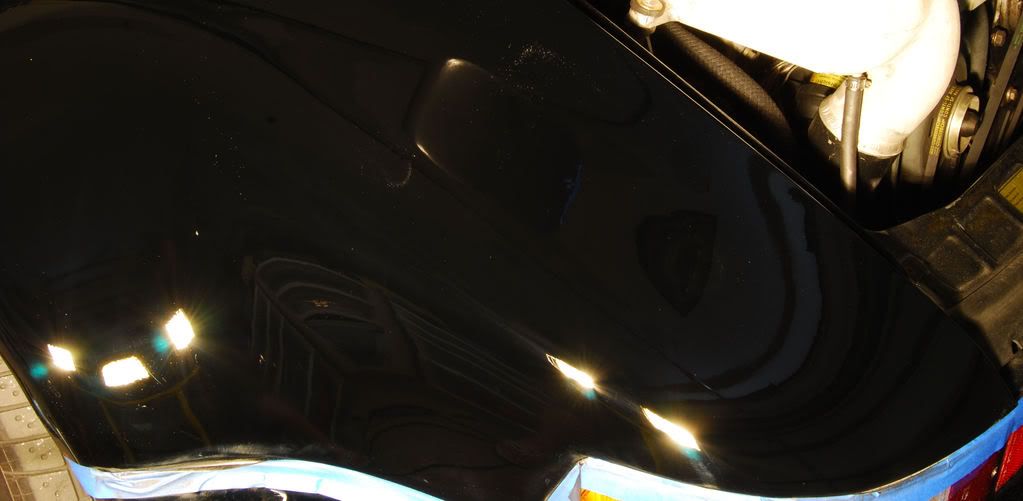
Another look
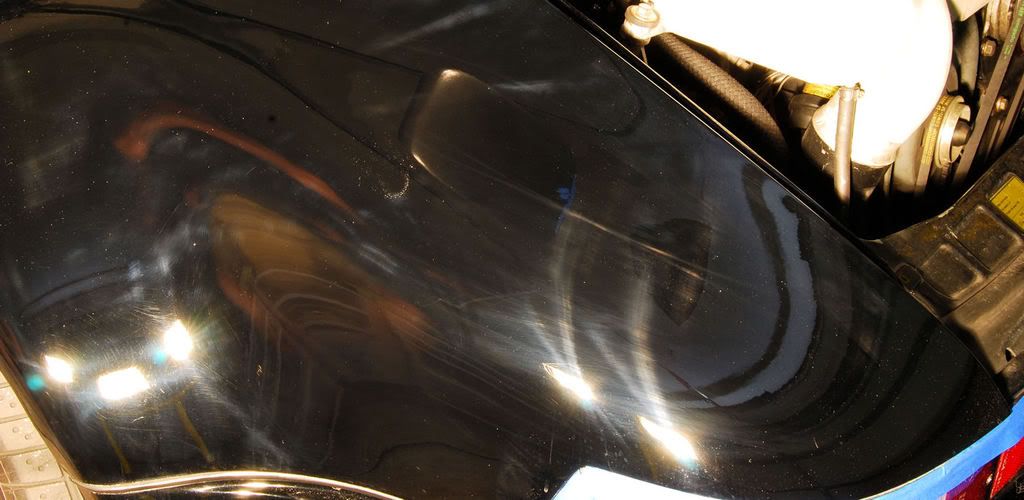
Continuing on this morning, I started by corrected the back half of the driver side door and the front of the rear fender.
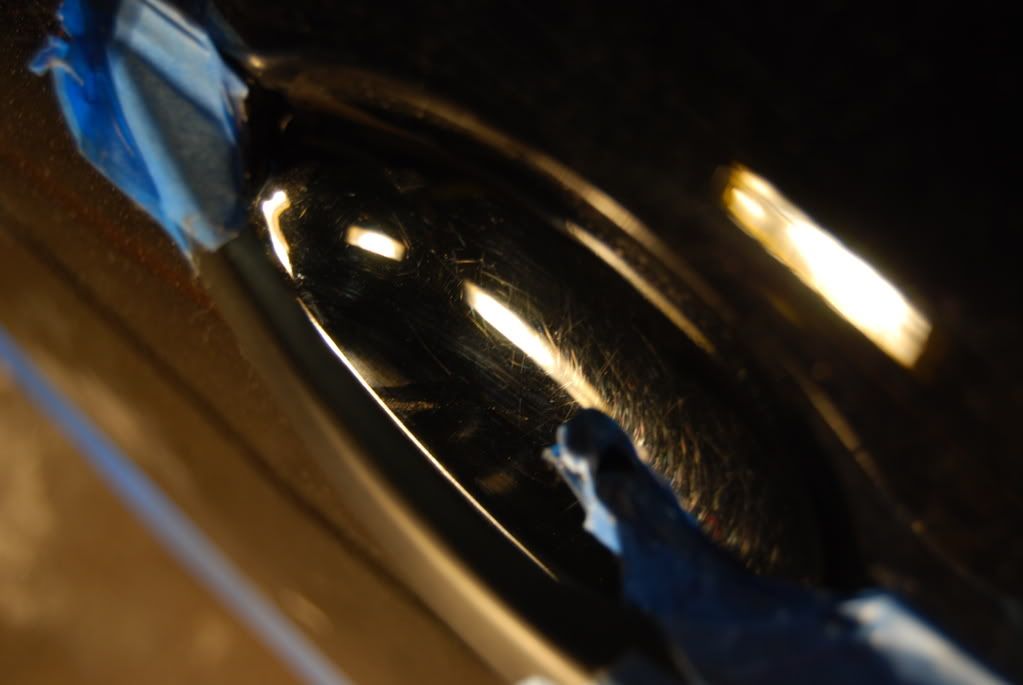
After compounding, the paint surface looks worse (though this marring is generally easily removed).
Refining the finish with PO83 and the LC Purple Wool pad at 1500 rpms on my Makita.
After PO83/White Pad and 3M Ultra Fina/Gray Pad

Rear QP before…
Rear QP after…
This thread will be a work in progress, so I invite everybody to come on in and watch as progress is slowly made around the Porsche. I hope to have it finished by late tomorrow night, but when aiming for perfection, it is almost impossible to give an accurate estimate to the time required. The difference between 95 percent and 100 percent is atleast three fold.
This Porsche is sweet for several reasons. It is a Euro (gray market) car so it is lighter then a state-side model, and has a lower stance. The air-cooled flat 6 has been tuned to near the 400 horsepower mark.
Jon and I started by washing the car with Meguiar’s DC wash. After washing, claying the car showed no removal of contaminants. However, it was in need of a new life. And seeing how this car will represent us at car shows, I know I have to make it perfect.
In general, you must be very careful when removing paint from a 25 year old car. It takes a lot of experience and right tools. Before polishing, paint thickness readings where taken in predetermined areas to help gauge the paint depth and to determine how much the paint could be re-leveled. On average the single stage paint was 6.5 mils, with some variation ranging between 6.3-7.2.
This car is just too cool not to be perfect, or as close as safely possible. There is a large number of R.I.D.S. (Random Isolated Deep Scratches), swirls, mircomarring, and severe water etching and spotting.
I started by taping half of the door and working one side. This base line allows me to try a myriad of different polishes, compounds, pads, and techniques to find the safest way to remove the defects while maintaining maximum paint depth.
I sampled the following polishes:
Meguiars' M105 Ultra Cut Compound
3M Perfect-It 3000 Extra Cut
Menzerna PG Power Gloss Leveling Compound
Menzerna PO83 Super Intensive Polish
Menzerna PO91 Intensive Polish
1Z Intensive Paste
Menzerna PO106ff Nano Polish
3M Perfect-It 3000 Ultra Fina-SE
As you can see by the extensive amounts of different polishes used (in conjunction with many different pads), this paint was a little tricky because it was so soft. In general it is easier to “correct” softer paint and remove severe defects, but finishing the paint to a hologram free flawless finish can be difficult. After some experimentation, the ideal combination proved to be…
3M Perfect-It 3000 Extra Cut on a twisted wool pad (I used The Edge) for several passes until the deep defects where removed. This left the surface “looking” worse, but in reality the deeper marring, water staining and etching, and scratches had been removed and replaced with very shallow “hazing”. This was followed with Menzerna PO83, using a Lake Country Purple Foamed Wool pad to remove the wool marring and begin to restore gloss into the paint.
When heavy compounds and aggressive pads are needed to remove extreme defects on soft paint, they can leave “wool ringing” which is marring inflicted from the fibers of the wool pad as they spin across the soft paint. The combination of PO83 and purple wool was able to take these out in one shot.
To remove the light hazing from the ultra fine purple wool, PO83 was once again used to refine the finish. Super Intensive Polish is an amazing polish in its ability to not only remove defects but to lightly burnish the paint to a high gloss. By switching the aggressiveness of the pad, the action of the polish can be greatly manipulated.
To finally jewel the paint and burnish it to a perfect shine with out the use of oils, glazes, or fillers, I elected on 3M Ultra Fina-SE. Used in conjunction with a soft, Lake Country Gray CCS pad, this combination proved very effective at removing the very light pad abrasions caused by the LC White Pad on the soft paint.
Pictures…
Here is a 50/50 where I taped off half of the driver side door in my search for perfection. The results, while dramatic on the screen, are much more so in person. You can also clearly see the water scaling, etching, micro marring, wash induced marring, RIDS, ands scratches on the uncorrected side. (Those dots are not dust!)
Same picture zoomed out…
Another look
Continuing on this morning, I started by corrected the back half of the driver side door and the front of the rear fender.
After compounding, the paint surface looks worse (though this marring is generally easily removed).
Refining the finish with PO83 and the LC Purple Wool pad at 1500 rpms on my Makita.
After PO83/White Pad and 3M Ultra Fina/Gray Pad
Rear QP before…
Rear QP after…
This thread will be a work in progress, so I invite everybody to come on in and watch as progress is slowly made around the Porsche. I hope to have it finished by late tomorrow night, but when aiming for perfection, it is almost impossible to give an accurate estimate to the time required. The difference between 95 percent and 100 percent is atleast three fold.
#2
03-18-2008, 11:20 AM

Great pics Todd - thanks for getting those online. I'm excited to be part of the team and back in the game!
I knew we'd find the right combo eventually to get the original paint looking its best
Jon
I knew we'd find the right combo eventually to get the original paint looking its best
Jon
#4
03-18-2008, 04:36 PM
I continued by moving to the rear fender. The rear fenders are extremely marred (it appears wash induced) but did suffer from the wash induced marring.
Before
After two passes of Menzerna PO83/SIP on a Lake Country Purple Wool pad at around 1700 RPMS.
After Menzerna SIP/PO83 and a beveled edge LC white CCS pad. The polish was worked very long to refine it and break down the abrsaives for a near perfect shine. IMO, polishes should always be worked into the paint, to ensure proper abrasive breakdown. The less you leave behind, the closer (and less aggressive you will have to go) you are to perfeciton.
After final jeweling of the paint surface...


#7
03-18-2008, 06:08 PM
uote=BOXER4;1742279]wow, amazing.....you brought it back from the dead....Looks like new paint[/quote]
Thanks Boxer!
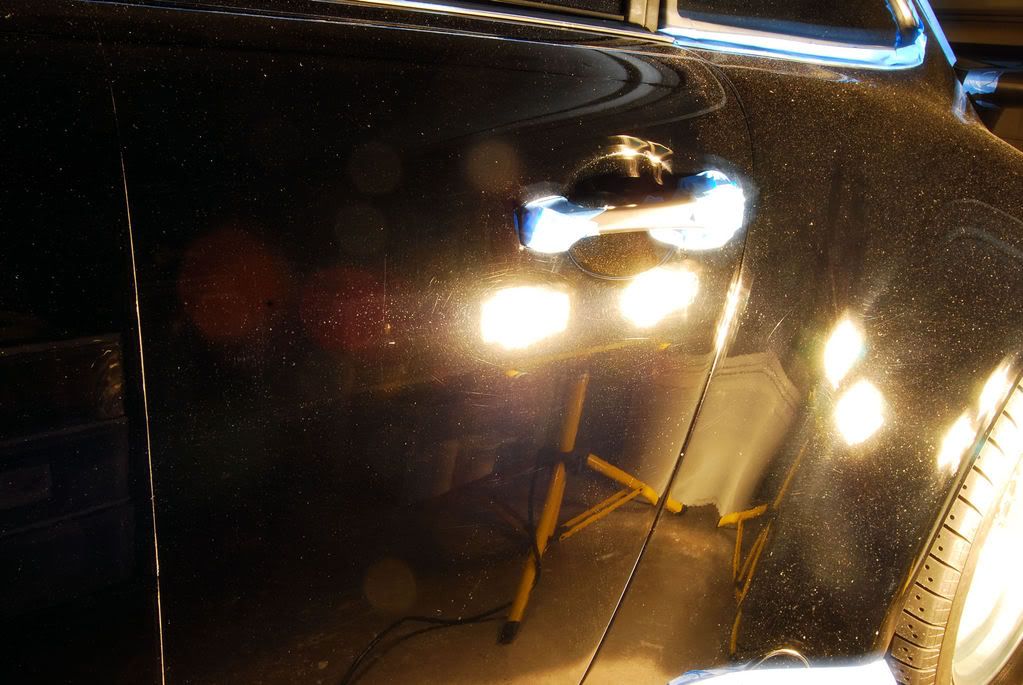
Progress is slow at this point, being that I am doing this on my "off day". Went back out the garage and decided to attack the door handle insets. These where heavily scratched, but only accessable by hand.
I settled on a block of green "German" foam and Menzerna PO83 by hand to work in the tight area as much as possible. Each side took about 45 minutes to re-level the paint and eliminate the scatches. Then the I "final" polished the insets with a Meguiars' Applicator Pad (soft foam) and Meguiars ScratchX to remove any micromarring.
Before
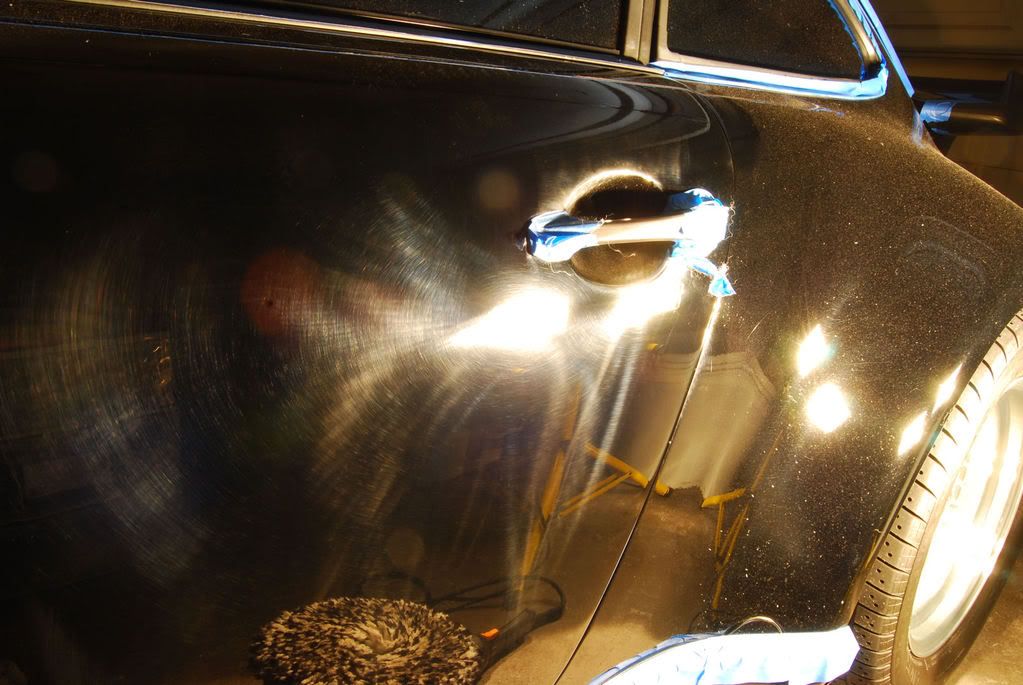
After
At this point, I need to take out the 4 inch spot pads to do the front fender as well as get in some the very tight areas that still have marring, as well as around the blinkers, and around the outside of the door handle
Thanks Boxer!
Progress is slow at this point, being that I am doing this on my "off day". Went back out the garage and decided to attack the door handle insets. These where heavily scratched, but only accessable by hand.
I settled on a block of green "German" foam and Menzerna PO83 by hand to work in the tight area as much as possible. Each side took about 45 minutes to re-level the paint and eliminate the scatches. Then the I "final" polished the insets with a Meguiars' Applicator Pad (soft foam) and Meguiars ScratchX to remove any micromarring.
Before
After
At this point, I need to take out the 4 inch spot pads to do the front fender as well as get in some the very tight areas that still have marring, as well as around the blinkers, and around the outside of the door handle
Trending Topics
#9
03-19-2008, 07:22 AM

I'm glad you posted the pics of the door handle cups. That is where the "detailing" begins. Most detailers post pics of the glamorous work like buffing the hood; but the grunt work like doing the cups by hand until your fingers get numb is what defines a true detailer. Nice work!
Matt
Matt
#10
03-19-2008, 11:36 AM
Working towards the front….
The front fender required about 3 hours of correction this morning, to remove roughly 95-99 percent of the scratches. It was slow going, negotiating around the tight corners and curves of the 930’s body style. There was also significant scratching on the top of the fender, running down the side that took quite a while to properly massage out of the paint. Even then, there was some significant scratches that I had to concede to. Even though the goal is perfection, it is never worth risking original paint or compromising the integrity of the original paint by removing too much.
Here is the front section of the driver side fender before.
After re-leveling the paint with Meguiars M105 and Meguiars So1o Yellow Wool, followed by Menzerna PO83 on a purple wool pad.

After refining the finish further with Menzerna SIP on a white CCS polishing pad.
Here is a cropped view of the before.

Here is a cropped view of the after.
Next up is the rear of the fender where it adjoins the driver side door.
Before
Getting better!
After SIP/White Pad

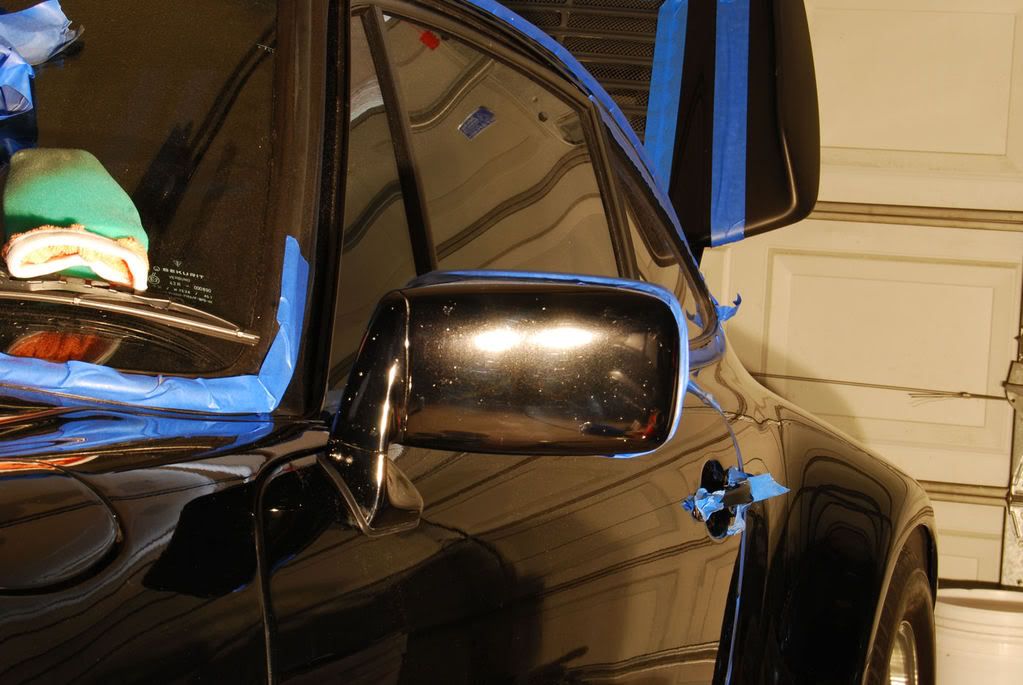
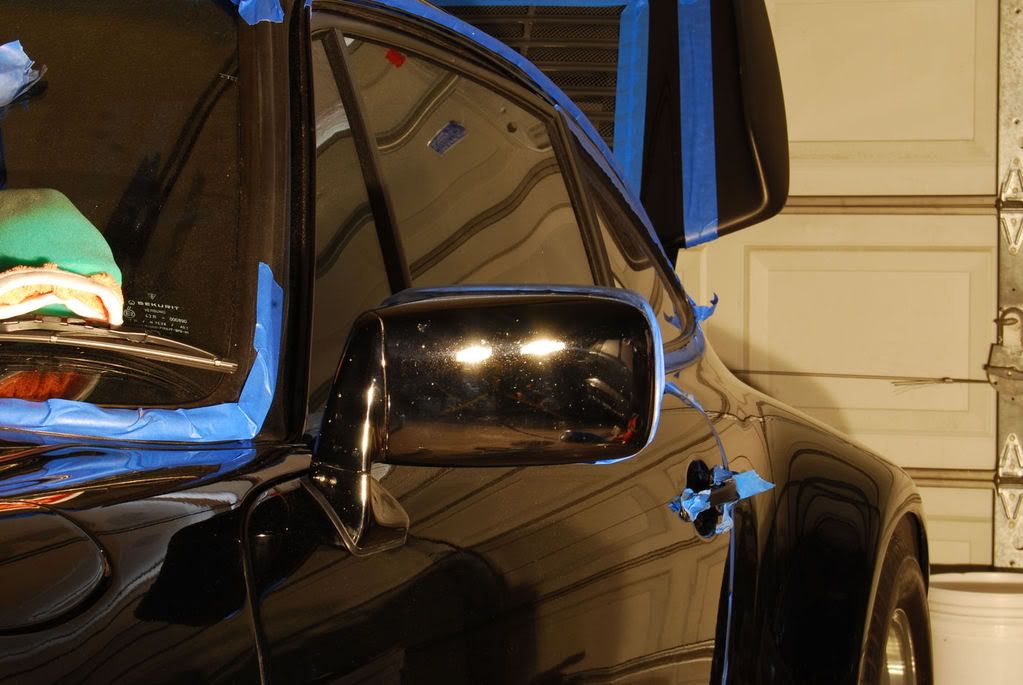
Some areas needed further work with the 4 inch pads, so I decided to work on the mirror. Unfortunately, the mirror has a lot of road rash, so while I could improve the looks of it by removing the haze and swirls, it will never look perfect. But it will be brought to its highest potential.
The front fender required about 3 hours of correction this morning, to remove roughly 95-99 percent of the scratches. It was slow going, negotiating around the tight corners and curves of the 930’s body style. There was also significant scratching on the top of the fender, running down the side that took quite a while to properly massage out of the paint. Even then, there was some significant scratches that I had to concede to. Even though the goal is perfection, it is never worth risking original paint or compromising the integrity of the original paint by removing too much.
Here is the front section of the driver side fender before.
After re-leveling the paint with Meguiars M105 and Meguiars So1o Yellow Wool, followed by Menzerna PO83 on a purple wool pad.
After refining the finish further with Menzerna SIP on a white CCS polishing pad.
Here is a cropped view of the before.
Here is a cropped view of the after.
Next up is the rear of the fender where it adjoins the driver side door.
Before
Getting better!
After SIP/White Pad
Some areas needed further work with the 4 inch pads, so I decided to work on the mirror. Unfortunately, the mirror has a lot of road rash, so while I could improve the looks of it by removing the haze and swirls, it will never look perfect. But it will be brought to its highest potential.
Last edited by ToddHelme; 03-19-2008 at 11:39 AM.
#11
03-19-2008, 11:40 AM
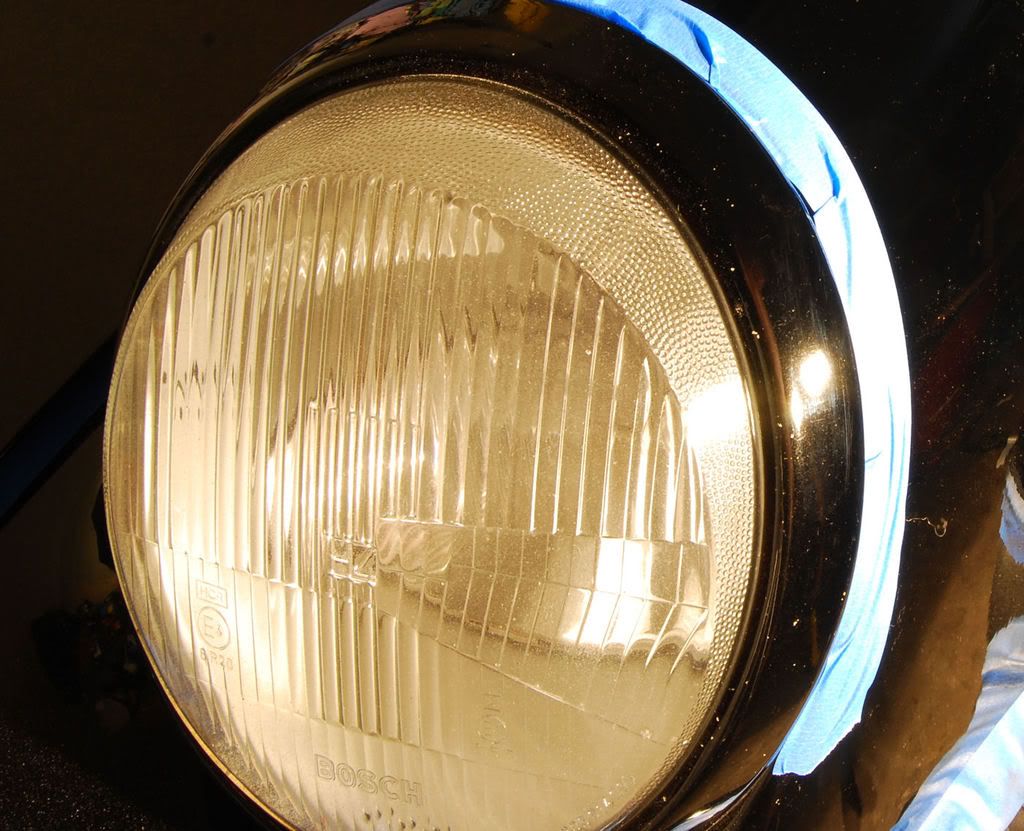
Continuing with the 4 inch spot pads, I worked around the headlight rings. Again, the road rash was so severe, that even polished, these will never be perfect. But the fun of detailing for me is making sure every square inch is at its highest potential!


#14
03-21-2008, 04:04 PM

I love this detail more than others for the fact that your after pics show exactly how it is. I see so many detail pics where the befores look horrible and the afters look like they were resprayed, when in person you can easily notice certain things left behind that obviously are incapable of removal.
To go on a little further, the reason i say this is because I had a detail where the front of the car was improved but didn't come out nice due to deep RIDS, and road rash from rocks and such. The client then told me how come another detailer's pictures look soo much better than my work in person. I told him cameras hide a lot but that certainly left a sour taste in my mouth, especially when soo many detailers claim perfection on each vehicle they detail.
I'm full of rants today, sorry, back on topic.
GREAT JOB once again.
#15
03-21-2008, 04:07 PM
Registered User
Join Date: Aug 2007
Location: Eastside, WA (6speed is my vacation home)
Posts: 6,724
Rep Power: 406 

my favorite! you gotta love those 930's!
can't wait to see the final product!
can't wait to see the final product!