Full Write Up, 1966 Pontiac Lemans Show Car, Fully Sanded and Polished
#16
 08-01-2008, 10:12 AM

Join Date: Mar 2008
Location: Dallas
Posts: 312
Rep Power: 29 
After that first step in the testing process I basically narrowed it down to Meg's M105 as the heavy cutter to remove the sanding marks with, it seemed to cut the deepest as well as had the best looking finish. But I still wanted to see what the Gloss It line had in it so more testing with Gloss It.
Now what I'm wanting to do is remove the holograms and see what's truely left underneath the heavy cutting compounds and for this I'm going to use a medium cut polish and see what is left over as far as sanding marks and swirls are concerned. Also to note this is PPG paint and clear coat but cut with what thinners and hardeners I don't know, so at this point I have no idea how hard or soft the clear is at all.
To do this I used the LC white pad and dobbed the polishes all around then spritz with water, then quickly spread them at 600 then up to 1500 to work it in and break it down then back down to 900 to jewel. All the medium polishes were used with this exact same process to see where they all stood when it comes to finishing down.
I basically excluded the SIP panel since I did not plan on using it on the rest of the car for the intial heavy cutting so it's down to the M105 and Gloss It line....
So to start off with I went back to the Gloss It line and used there own medium cut polish called Gloss It Evolution Cut.
I used the Evolution cut to refine the Extreme Cut and see what it would show me.
Gloss It Evolution Cut over the Extreme Cut panel.

I was impressed with the fact that most of the sanding marks looked like they were gone but the final finish still had much holograms in it.

To top the M105 I first tried Menz SIP then I also tried Gloss It Evolution Cut.
First SIP over M105

The finished looked nice but I'm still not happy with the cutting ability of both together to get 100% of the sanding marks removed as you can see so this is still not enough.

Gloss It Evolution Cut over M105

I thought the M105 and Gloss It Evolution Cut had a slightly better cut and nearly the same finish as the M105/SIP combo so I think the M105 and Gloss It Evo Cut is the winner between these two.

But even though I've narrowed it down again, as you can clearly see in the pics the swirls are still very very evident and so I am thinking at this point it's not a two step at all, but obviously needs two heavy compound passes to remove the sanding mark and swirls before I can go to a medium cut polish to refine, so back to square one.
Now I need to rethink my game plan. So for this I decide to throw Menz Power Gloss into the mix and see what happens.
Now the next test is between Menz PG/SIP and Meg's M105/Gloss It Evo Cut.
We'll see who wins this one.....
__________________
Now what I'm wanting to do is remove the holograms and see what's truely left underneath the heavy cutting compounds and for this I'm going to use a medium cut polish and see what is left over as far as sanding marks and swirls are concerned. Also to note this is PPG paint and clear coat but cut with what thinners and hardeners I don't know, so at this point I have no idea how hard or soft the clear is at all.
To do this I used the LC white pad and dobbed the polishes all around then spritz with water, then quickly spread them at 600 then up to 1500 to work it in and break it down then back down to 900 to jewel. All the medium polishes were used with this exact same process to see where they all stood when it comes to finishing down.
I basically excluded the SIP panel since I did not plan on using it on the rest of the car for the intial heavy cutting so it's down to the M105 and Gloss It line....
So to start off with I went back to the Gloss It line and used there own medium cut polish called Gloss It Evolution Cut.
I used the Evolution cut to refine the Extreme Cut and see what it would show me.
Gloss It Evolution Cut over the Extreme Cut panel.
I was impressed with the fact that most of the sanding marks looked like they were gone but the final finish still had much holograms in it.
To top the M105 I first tried Menz SIP then I also tried Gloss It Evolution Cut.
First SIP over M105
The finished looked nice but I'm still not happy with the cutting ability of both together to get 100% of the sanding marks removed as you can see so this is still not enough.
Gloss It Evolution Cut over M105
I thought the M105 and Gloss It Evolution Cut had a slightly better cut and nearly the same finish as the M105/SIP combo so I think the M105 and Gloss It Evo Cut is the winner between these two.
But even though I've narrowed it down again, as you can clearly see in the pics the swirls are still very very evident and so I am thinking at this point it's not a two step at all, but obviously needs two heavy compound passes to remove the sanding mark and swirls before I can go to a medium cut polish to refine, so back to square one.
Now I need to rethink my game plan. So for this I decide to throw Menz Power Gloss into the mix and see what happens.
Now the next test is between Menz PG/SIP and Meg's M105/Gloss It Evo Cut.
We'll see who wins this one.....
__________________
#17
08-01-2008, 10:17 AM
Join Date: Mar 2008
Location: Dallas
Posts: 312
Rep Power: 29
Okay, now we're ALMOST getting somewhere.
Here's the next battle and I don't even know who to put my money on yet.
I'm throwing in a new factor into the equation so here goes.
My next test will be with Menz PG and SIP against Meg's M105 and Gloss It Evo Cut.
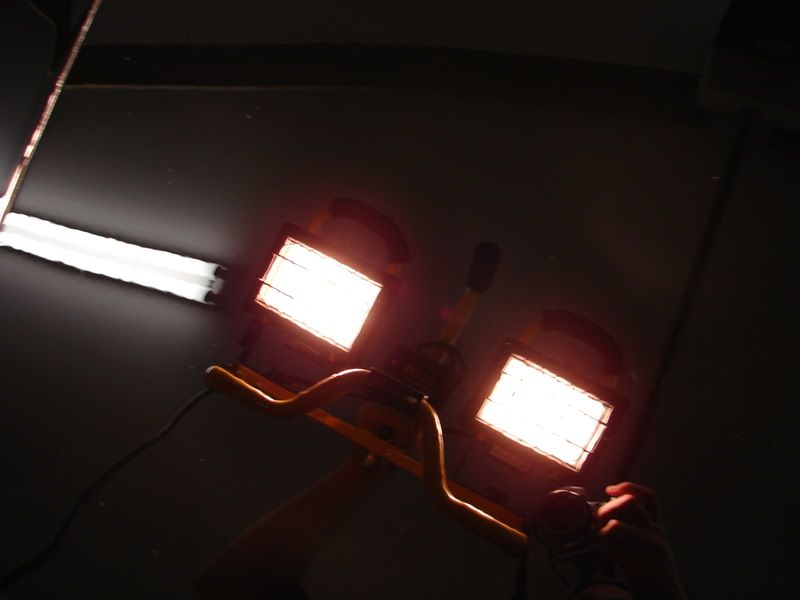
Here's the new test panel.

The unbias judge called 500W halogens.
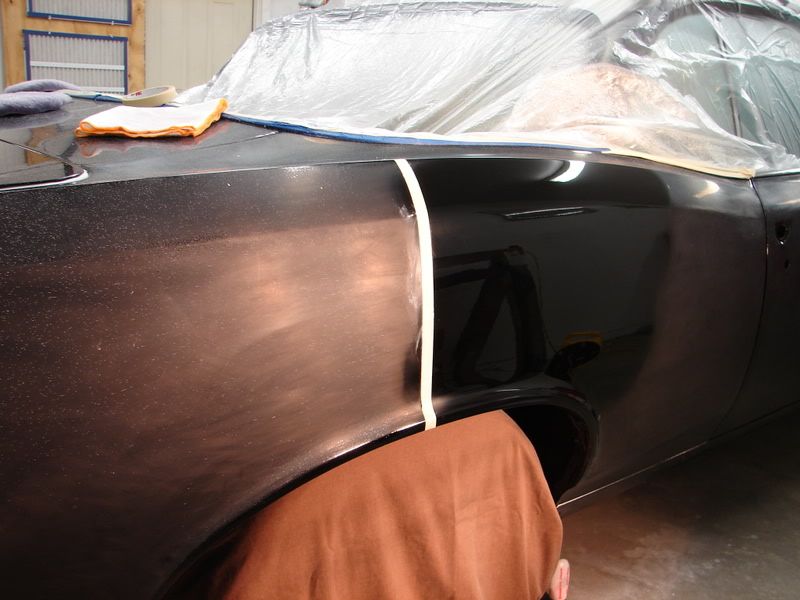
The victom, custom painted 66 Lemans passenger rear panel
Let's see what happens....
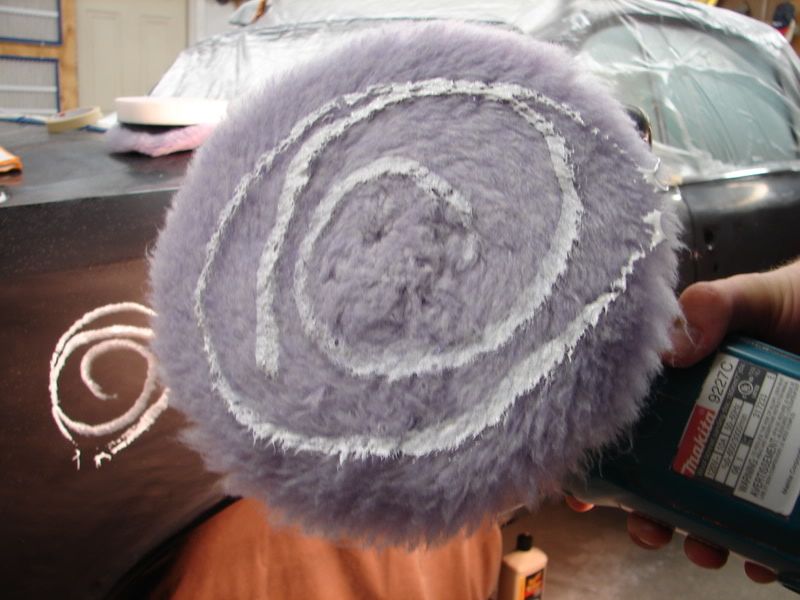
First off M105 on a LC purple foamed wool pad. I put it on extra heavy cause I know it doesn't have a very long working life so I like to put it on real thick as you can see in this pic. fyi
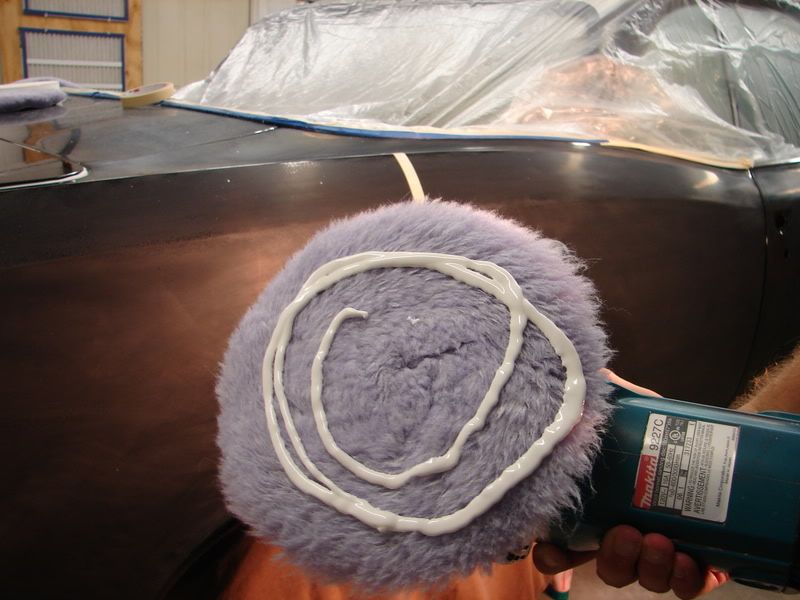
Dobbing it around and then a spritz with water.
Working it in as before, spread quickly at 600rpms, then up to 1700 to break it down with slow passes working it in slowly then once broke down, turn speed down to 1100 then 700-900 to jewel a little.
Spreading it around.
Working it in and breaking it down, then jeweling.
__________________
Here's the next battle and I don't even know who to put my money on yet.
I'm throwing in a new factor into the equation so here goes.
My next test will be with Menz PG and SIP against Meg's M105 and Gloss It Evo Cut.
Here's the new test panel.
The unbias judge called 500W halogens.
The victom, custom painted 66 Lemans passenger rear panel
Let's see what happens....
First off M105 on a LC purple foamed wool pad. I put it on extra heavy cause I know it doesn't have a very long working life so I like to put it on real thick as you can see in this pic. fyi
Dobbing it around and then a spritz with water.
Working it in as before, spread quickly at 600rpms, then up to 1700 to break it down with slow passes working it in slowly then once broke down, turn speed down to 1100 then 700-900 to jewel a little.
Spreading it around.
Working it in and breaking it down, then jeweling.
__________________
#18
08-01-2008, 10:18 AM
Join Date: Mar 2008
Location: Dallas
Posts: 312
Rep Power: 29
Final results. I consider that entire step as One Pass.
Not bad, if you look closely you can still see some holograms near the bottle just over the lip of the fender.

Now with the Gloss It Evo. Cut over top M105 to finish down a bit more. Same process as before, white LC pad, dob it, spritz it, spread it at 600, then up to 1500 then jewel at 1100 and 900rpms.
Still some swirls left behind but very very nice finish. This will be hard to beat.

Onto the other combo of Menz PG and SIP with exact same technique and process as above.
Menz Power Gloss put on moderately thick, but not quite as thick as the M105
Working it in. The Menz PG seems to have a longer work in life so I could play with it a bit more which I find more effective when removing defects.

As expected the PG does not finish down as well as the M105 but does seem to have a bit more bite and I can work it in longer so it's a tough decision between the two heavy hitters.

Now for the SIP and white pad with the same process as the above test with the Evo Cut.

Wow, nice results between both combo's.

As you can see in both tests the finish down was great, but there was still some fine deeper scratches that neither combo was seeming to really get under to correct 100% so I will try one more combo.
Also it should be noted that some panels had worse and deeper sanding marks then others as there was 3 different people sanding the car and the car only had a few runs to remove so please know that I can see much better with my eyes then what the camera is showing you so even if one picture looks better then another and I tell you otherwise it's cause I visually inspect the whole section where the camera only shows you a small portion of that section.
Now for the final test which ended up being the winner I chose to do something different and combine my two heavy hitters and see what happens....
Now for Menz PG and Meg's M105.....

Results were better, deeper cut and great finish so I went with this combo. I didn't document it like the others but I used the same process.
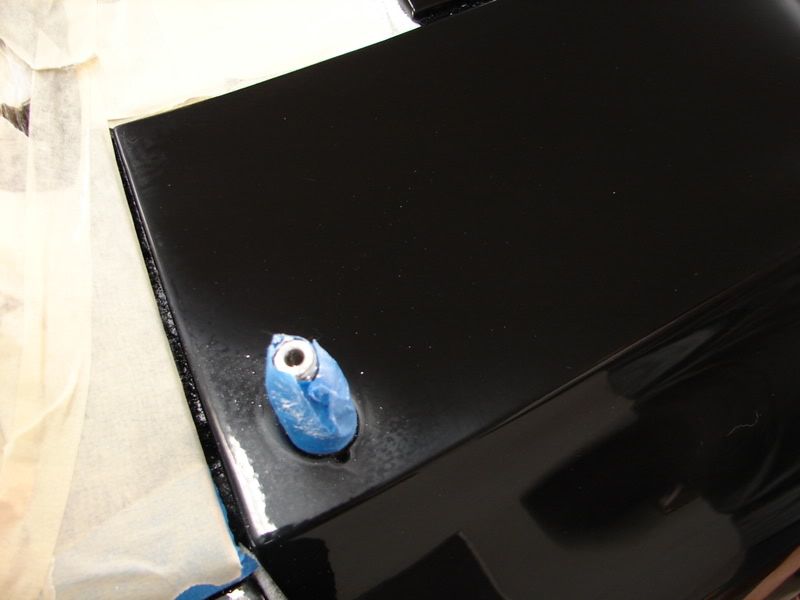
Even though there's a couple deeper swirls in this pic the over all section had little to no sanding marks or swirls in it. Plus I knew I would have to finish the whole car down with Menz Final Polish II anyways.

I think we have a winner after 3 hours of testing.....
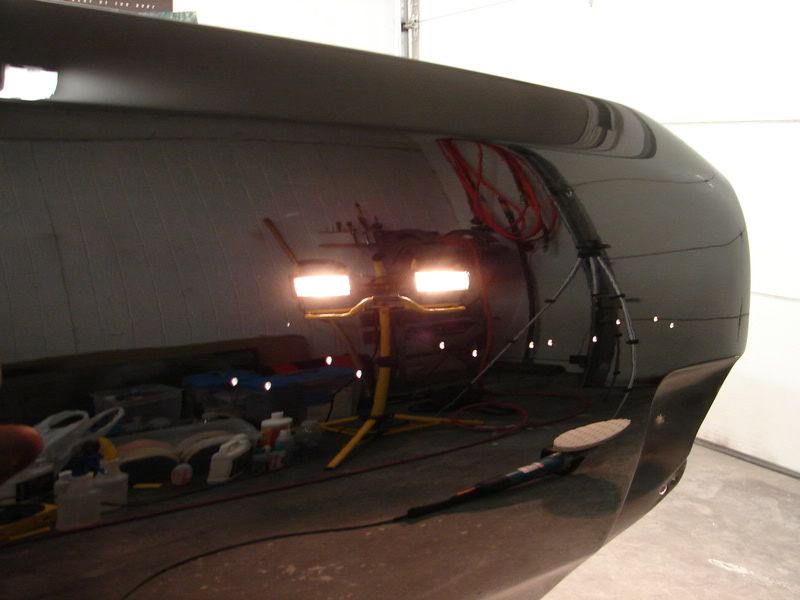
Menz PG with a LC purple foamed wool pad at 1700 and Megs' M105 with a LC white pad at 1500, jeweled and then finish down with Menz FPII with a LC black pad at 1100-1200 and jeweled at 700-900rpms.
Now to start on the car.....
Not bad, if you look closely you can still see some holograms near the bottle just over the lip of the fender.
Now with the Gloss It Evo. Cut over top M105 to finish down a bit more. Same process as before, white LC pad, dob it, spritz it, spread it at 600, then up to 1500 then jewel at 1100 and 900rpms.
Still some swirls left behind but very very nice finish. This will be hard to beat.
Onto the other combo of Menz PG and SIP with exact same technique and process as above.
Menz Power Gloss put on moderately thick, but not quite as thick as the M105
Working it in. The Menz PG seems to have a longer work in life so I could play with it a bit more which I find more effective when removing defects.
As expected the PG does not finish down as well as the M105 but does seem to have a bit more bite and I can work it in longer so it's a tough decision between the two heavy hitters.
Now for the SIP and white pad with the same process as the above test with the Evo Cut.
Wow, nice results between both combo's.
As you can see in both tests the finish down was great, but there was still some fine deeper scratches that neither combo was seeming to really get under to correct 100% so I will try one more combo.
Also it should be noted that some panels had worse and deeper sanding marks then others as there was 3 different people sanding the car and the car only had a few runs to remove so please know that I can see much better with my eyes then what the camera is showing you so even if one picture looks better then another and I tell you otherwise it's cause I visually inspect the whole section where the camera only shows you a small portion of that section.
Now for the final test which ended up being the winner I chose to do something different and combine my two heavy hitters and see what happens....
Now for Menz PG and Meg's M105.....
Results were better, deeper cut and great finish so I went with this combo. I didn't document it like the others but I used the same process.
Even though there's a couple deeper swirls in this pic the over all section had little to no sanding marks or swirls in it. Plus I knew I would have to finish the whole car down with Menz Final Polish II anyways.
I think we have a winner after 3 hours of testing.....
Menz PG with a LC purple foamed wool pad at 1700 and Megs' M105 with a LC white pad at 1500, jeweled and then finish down with Menz FPII with a LC black pad at 1100-1200 and jeweled at 700-900rpms.
Now to start on the car.....
#19
08-01-2008, 10:20 AM
Join Date: Mar 2008
Location: Dallas
Posts: 312
Rep Power: 29
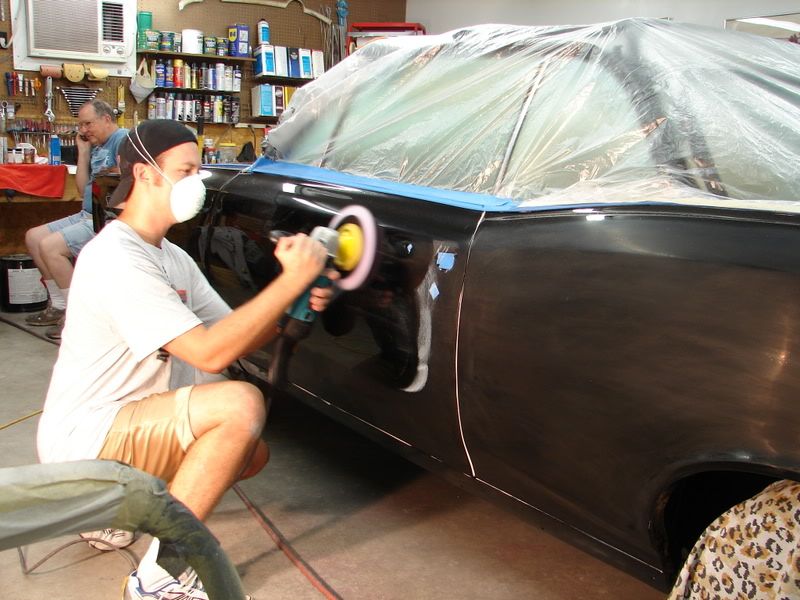
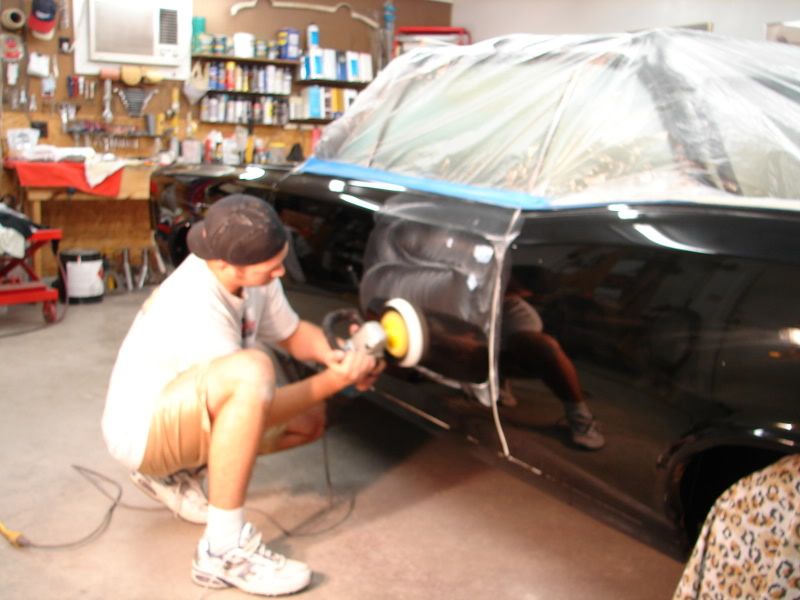
Okay, now that I've got the testing done I can start to polish the whole car.
I would have to repolish all the tester panels as well, so the trunk got it again as well as the side panel.
It should also be noted that my final choice of pad/polish combo's worked great as the Menz left behind plenty of lubricant so that when I went back over it all with the Meg's M105 I could really work the M105 in for a long time due to the left over lubes from the Menz, I was very very happy with this.
With that in mind I would suggest when using M105 to slightly cut it with another polish that has a lot of lubes in it so you can get a waaaaay longer working life out of the M105.
Also some of the pics are staged pics of me as you'll see cause the pad with not be moving at all.
But in some of the pics you may notice the wool pads not perfectly flat on the panel as that is one of the tricks to using a thin wool pad like that is to every so slightly tilt it so that it is not perfectly flat, this seems to keep it from jumping and skipping alot.
With foam pads this is not the case and you want to keep them very flat as all the heat builds up in the outter areas of the pad so tilting it can cause you to burn the paint very easily.
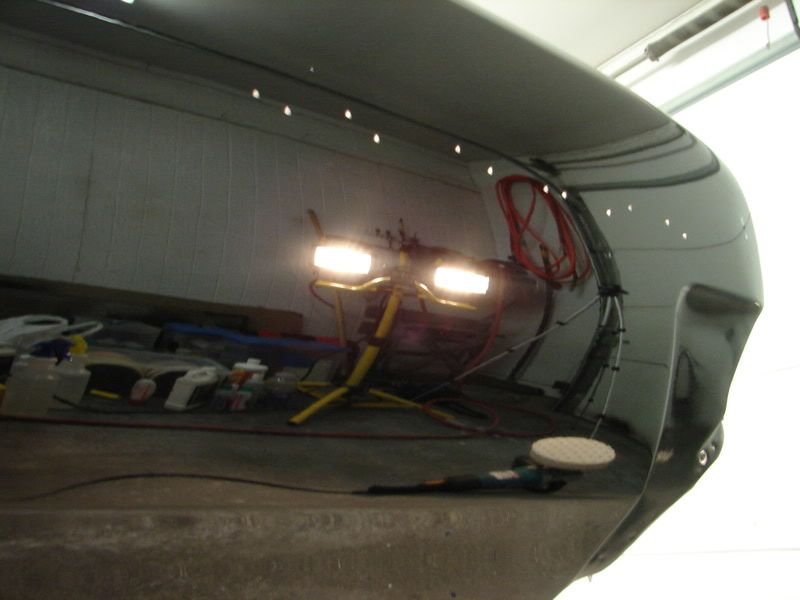
Here's a pic of the rest of the panel completed with PG/wool and M105/white.

If you look at the pad I'm using in each picture you'll know what step I'm on in the process.
Please note that in delicate areas such as this a whole different process is required as you can not spin the rotary at high rpms in tight angled areas such as this or you will cut threw the paint.
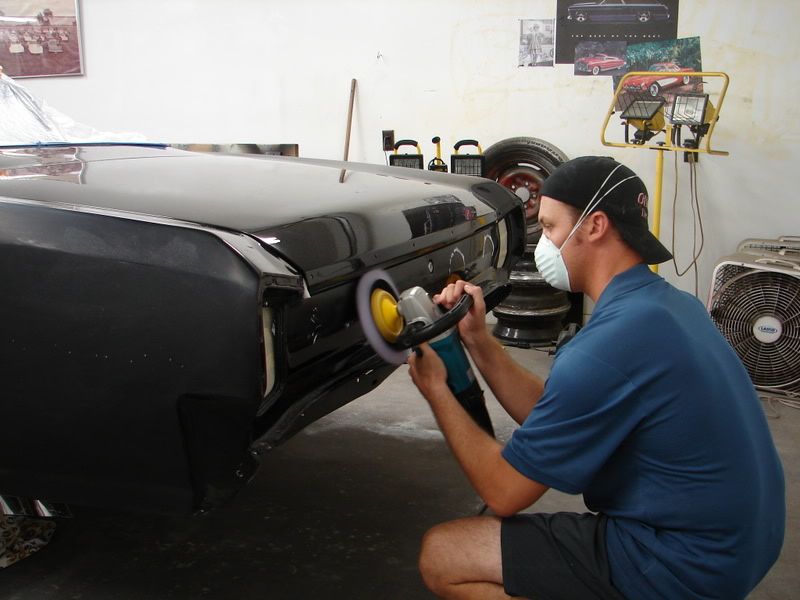
For this area I will use M105 only with a white pad at like 1100rpms, then jewel it a whole lot at 900--700 rpms and it will typically take about 2-3 passes with this process to get perfect.

Here are the results from day one.

I would have to repolish all the tester panels as well, so the trunk got it again as well as the side panel.
It should also be noted that my final choice of pad/polish combo's worked great as the Menz left behind plenty of lubricant so that when I went back over it all with the Meg's M105 I could really work the M105 in for a long time due to the left over lubes from the Menz, I was very very happy with this.
With that in mind I would suggest when using M105 to slightly cut it with another polish that has a lot of lubes in it so you can get a waaaaay longer working life out of the M105.
Also some of the pics are staged pics of me as you'll see cause the pad with not be moving at all.
But in some of the pics you may notice the wool pads not perfectly flat on the panel as that is one of the tricks to using a thin wool pad like that is to every so slightly tilt it so that it is not perfectly flat, this seems to keep it from jumping and skipping alot.
With foam pads this is not the case and you want to keep them very flat as all the heat builds up in the outter areas of the pad so tilting it can cause you to burn the paint very easily.
Here's a pic of the rest of the panel completed with PG/wool and M105/white.
If you look at the pad I'm using in each picture you'll know what step I'm on in the process.
Please note that in delicate areas such as this a whole different process is required as you can not spin the rotary at high rpms in tight angled areas such as this or you will cut threw the paint.
For this area I will use M105 only with a white pad at like 1100rpms, then jewel it a whole lot at 900--700 rpms and it will typically take about 2-3 passes with this process to get perfect.
Here are the results from day one.
#20
08-01-2008, 10:22 AM
Join Date: Mar 2008
Location: Dallas
Posts: 312
Rep Power: 29
Day two starts bright and early at 8:30 picking up right where I left off....
I am using the exact same process for the whole car only spending a little extra time on the area that need it.
To note the side panels were in way better shape then the trunk and did not require as much as they seemed to clean up much better and faster then the top surfaces for some reason.
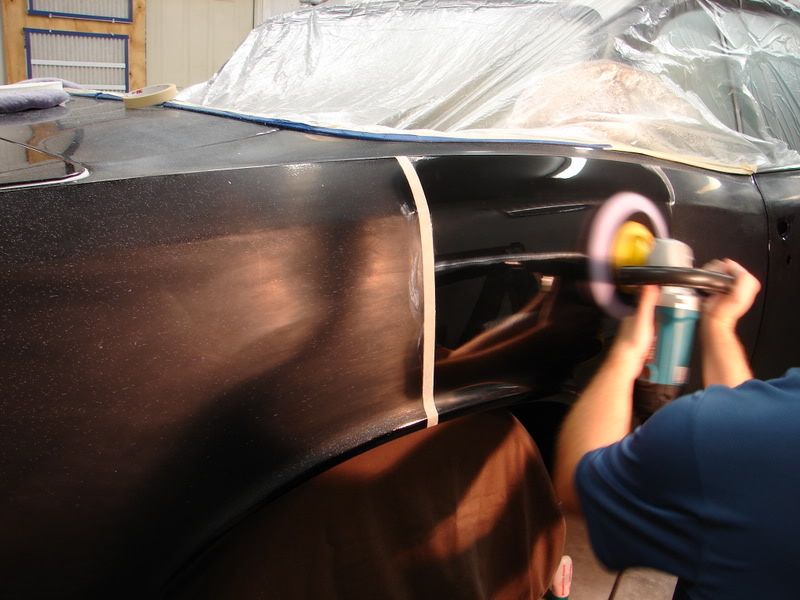
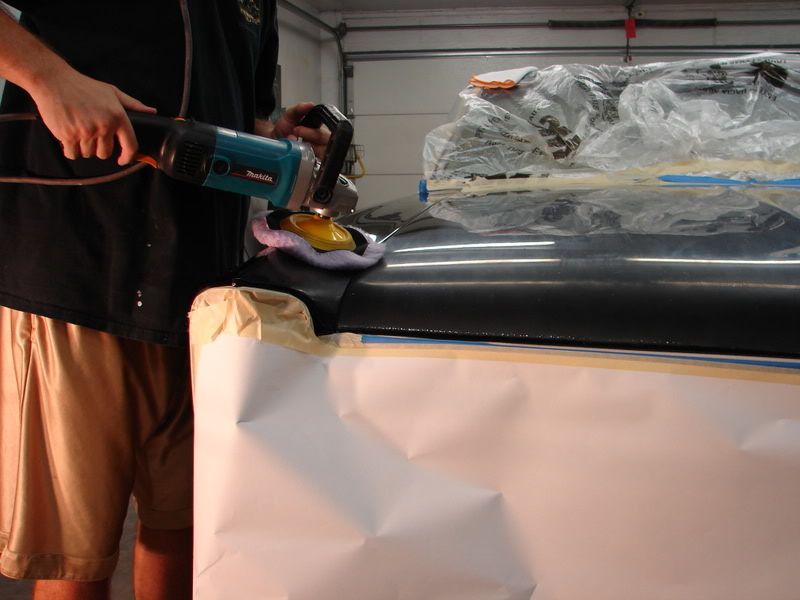
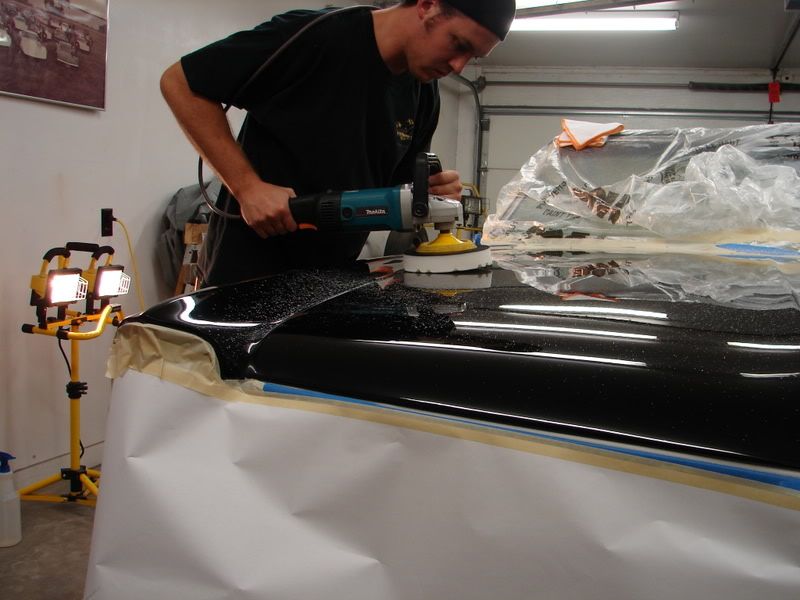
Passenger side door almost done with the first pass of PG with foamed wool pad at 1700rpms.
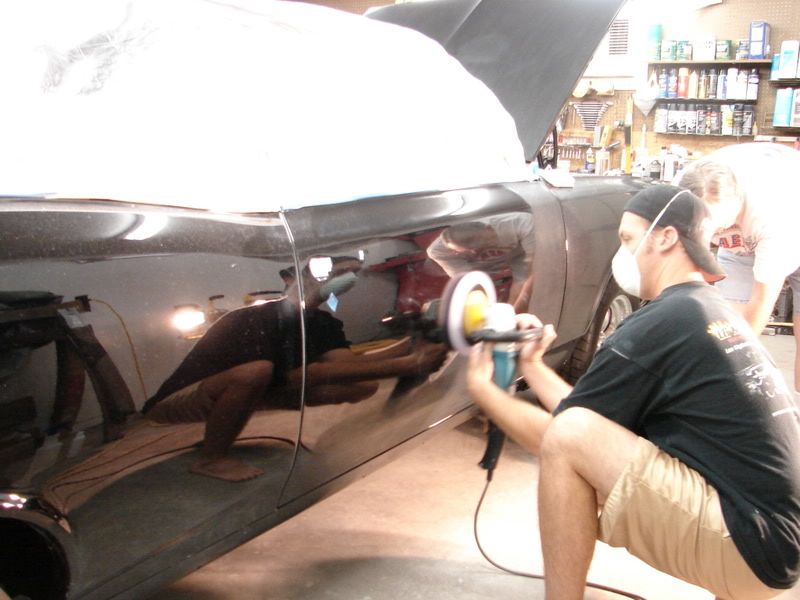
Front fender about to get transformed.
Spreading the PG
Working and about to break down the PG

Broke down and now jeweling the PG
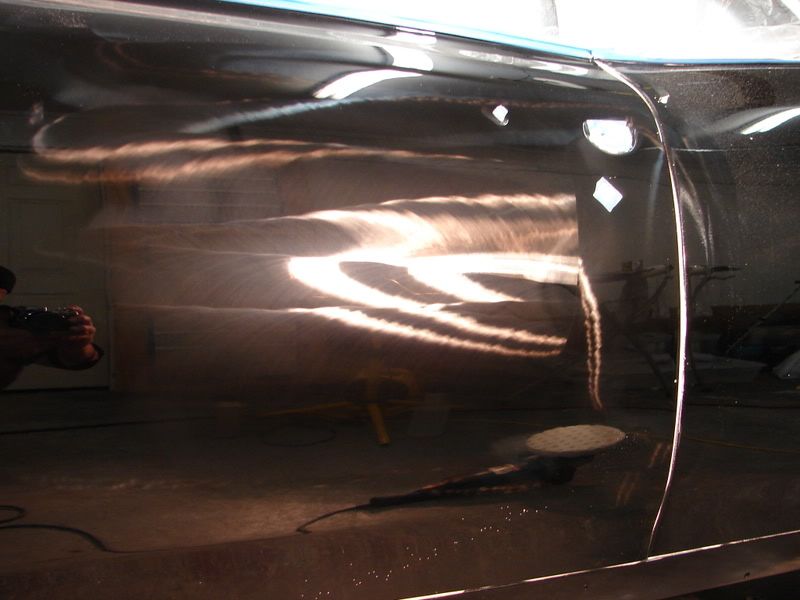
You can see the black paint starting to show through.

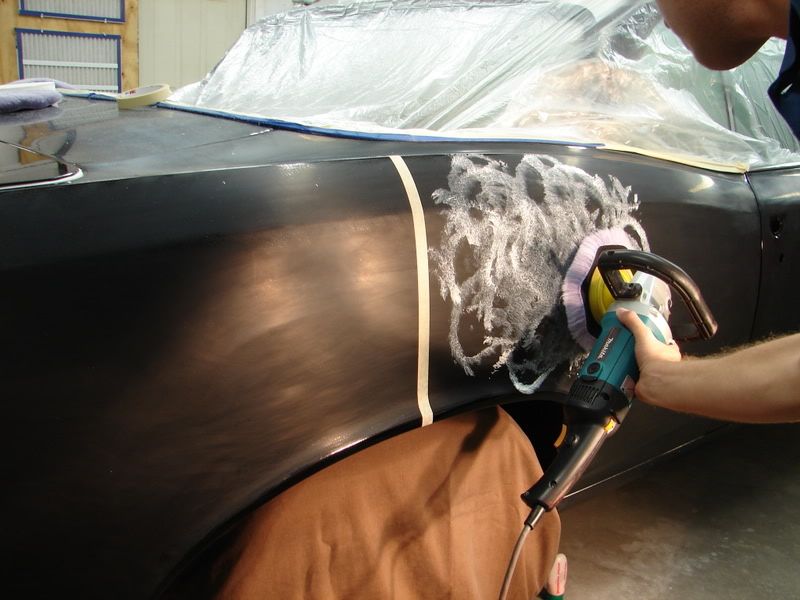
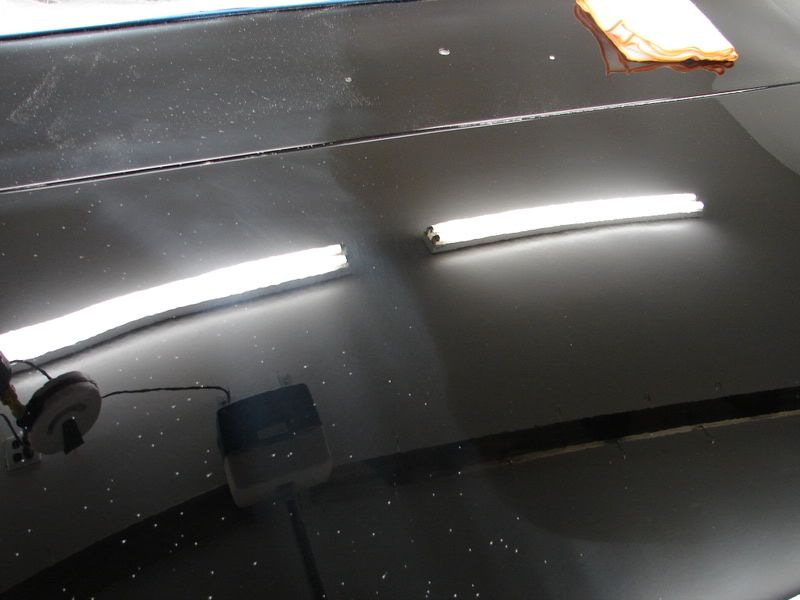
Panel after PG with holograms that the M105 will easily take out.

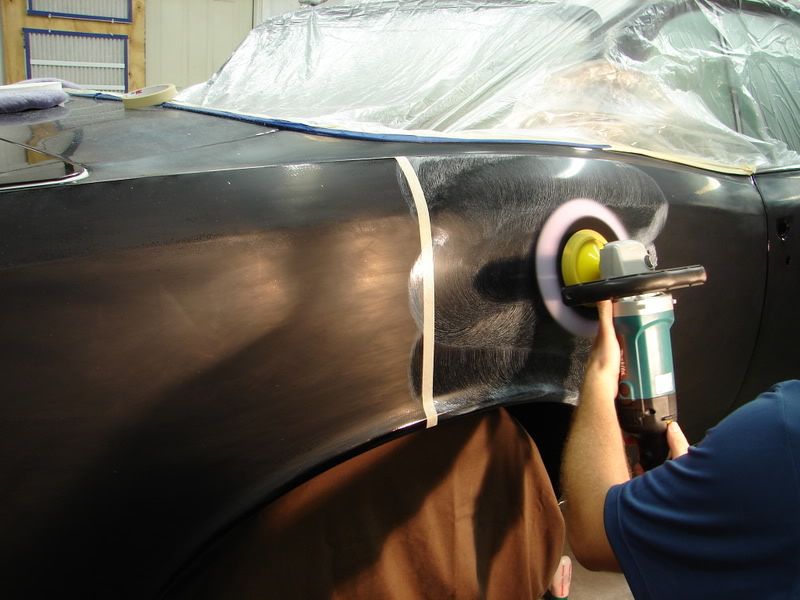
Time to work in the next step with M105 on a LC white pad at around 1500 and jeweled in for a long time (thanks to the lubes in the PG) with a near perfect finish.

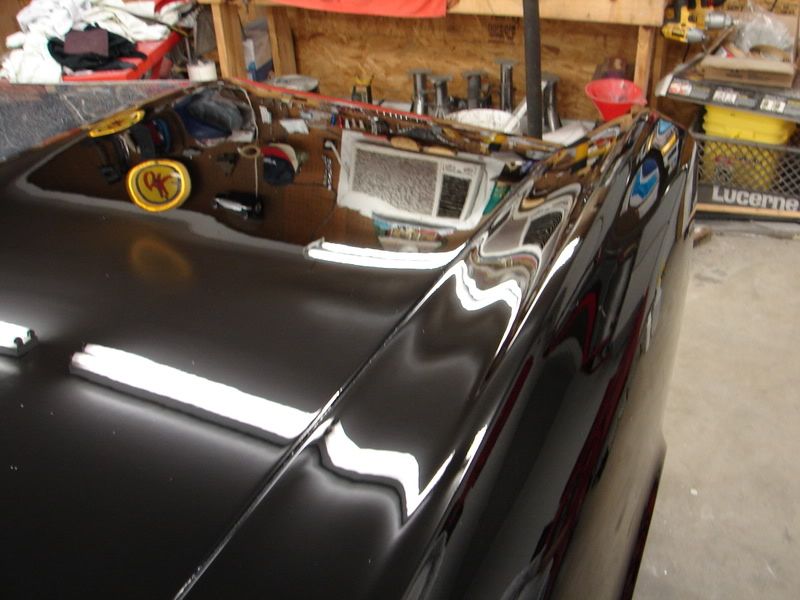
This is what a polish (M105) is supposed to look like after properly broke down and jeweled.

The results are near perfection.

I love this stuff, it is so versital. I can use it as a heavy cut compound with a wool pad or to finish down like a polish with a white pad requiring little clean up.

I am using the exact same process for the whole car only spending a little extra time on the area that need it.
To note the side panels were in way better shape then the trunk and did not require as much as they seemed to clean up much better and faster then the top surfaces for some reason.
Passenger side door almost done with the first pass of PG with foamed wool pad at 1700rpms.
Front fender about to get transformed.
Spreading the PG
Working and about to break down the PG
Broke down and now jeweling the PG
You can see the black paint starting to show through.
Panel after PG with holograms that the M105 will easily take out.
Time to work in the next step with M105 on a LC white pad at around 1500 and jeweled in for a long time (thanks to the lubes in the PG) with a near perfect finish.
This is what a polish (M105) is supposed to look like after properly broke down and jeweled.
The results are near perfection.
I love this stuff, it is so versital. I can use it as a heavy cut compound with a wool pad or to finish down like a polish with a white pad requiring little clean up.
#21
08-01-2008, 10:24 AM
Join Date: Mar 2008
Location: Dallas
Posts: 312
Rep Power: 29
These areas are very delicate and so I must polish them with very slow speeds and really be careful so I do not burn any part of the paint. Using around 1200rpms to keep things safe and then jeweling with 900rpms.

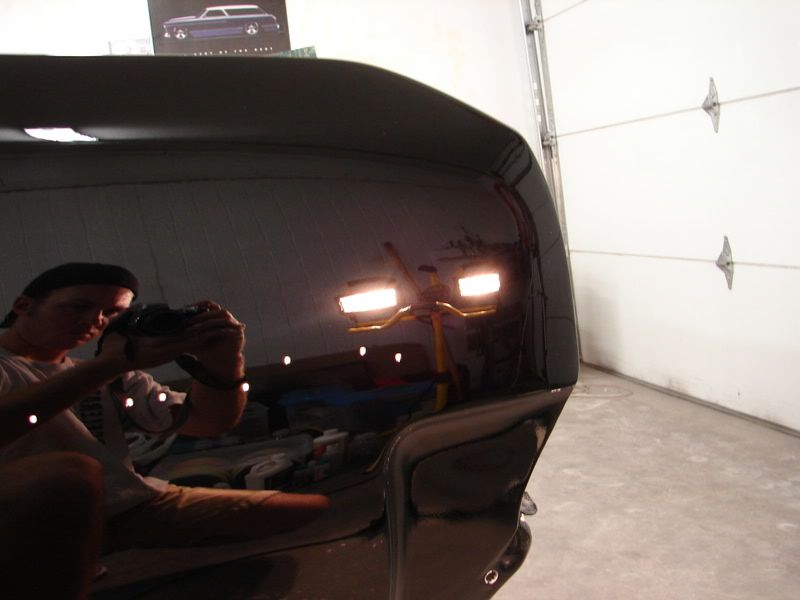
Some areas such as around the antenna where the pads cannot reach it will require me to polish out the marks by hand, for this I chose Zaino ZPC which is a water based polish that has mild cut with a fast break down time so I knew I could use it by hand for a few passes and get the results I wanted.
I will basically just squirt a little on a pad of MF towel and rub it as fast as I can for a few seconds till it looks good and the owner is happy.

Results

__________________
Some areas such as around the antenna where the pads cannot reach it will require me to polish out the marks by hand, for this I chose Zaino ZPC which is a water based polish that has mild cut with a fast break down time so I knew I could use it by hand for a few passes and get the results I wanted.
I will basically just squirt a little on a pad of MF towel and rub it as fast as I can for a few seconds till it looks good and the owner is happy.
Results
__________________
#22
08-01-2008, 10:25 AM
Join Date: Mar 2008
Location: Dallas
Posts: 312
Rep Power: 29
Okay so moving right along....
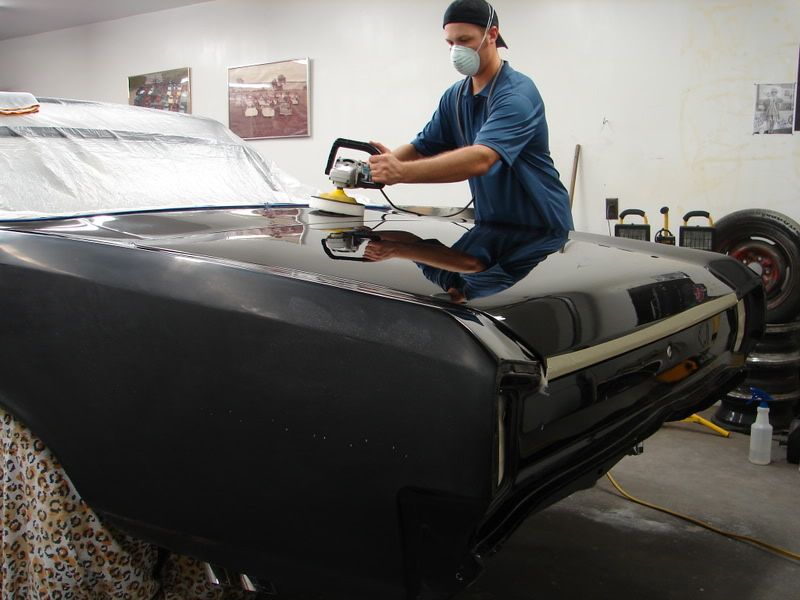
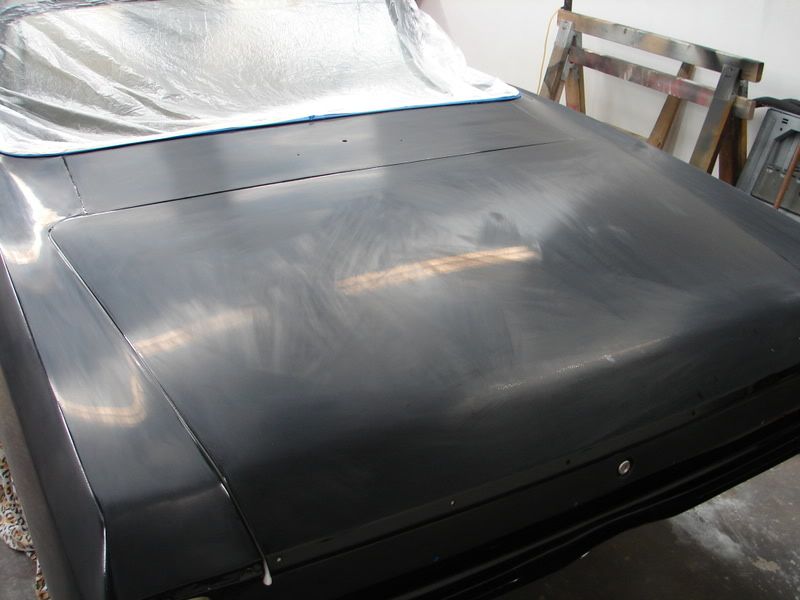
Polishing the hood for the second time....
Now almost half the car has been polished and I know the exact combos it should be smooth saling from here on out.


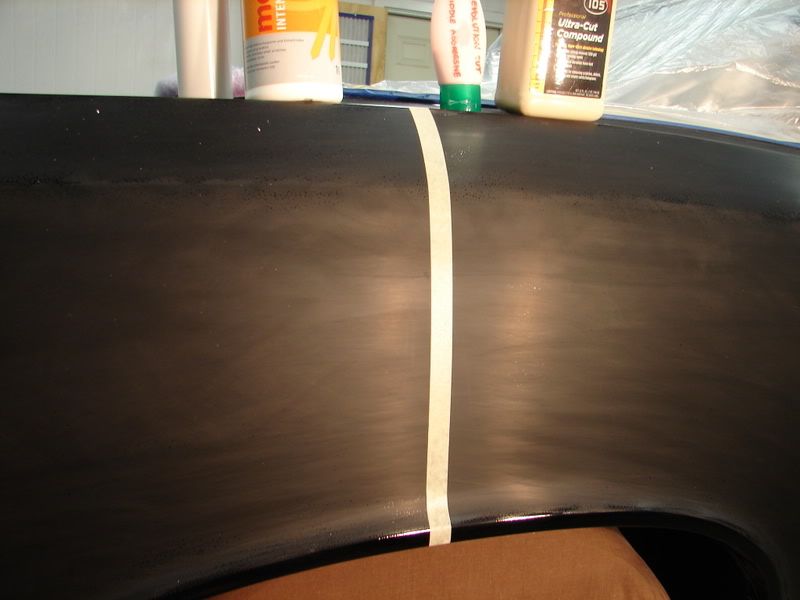
Now that the majority of the polish for day 2 is complete I go back to the trunk and other areas to reinspect the paint after the lubes from the Menz PG and the lubes from Meg's M105 have evaporated I can see whatever was being hidden.
Sure enough wouldn't you know there is still some significant holograms in the trunk lid that I could not find the day before.
So I will now use the Menz Final Polish II with a LC black pad at 1200rpms then jewel it in at 900rpms to put the final touches on it.

before FPII
after FPII
I would again inspect this at the end of the 3rd day to see if any holograms are left over.
This is the end of day two.
Polishing the hood for the second time....
Now almost half the car has been polished and I know the exact combos it should be smooth saling from here on out.
Now that the majority of the polish for day 2 is complete I go back to the trunk and other areas to reinspect the paint after the lubes from the Menz PG and the lubes from Meg's M105 have evaporated I can see whatever was being hidden.
Sure enough wouldn't you know there is still some significant holograms in the trunk lid that I could not find the day before.
So I will now use the Menz Final Polish II with a LC black pad at 1200rpms then jewel it in at 900rpms to put the final touches on it.
before FPII
after FPII
I would again inspect this at the end of the 3rd day to see if any holograms are left over.
This is the end of day two.
#23
08-01-2008, 10:27 AM
Join Date: Mar 2008
Location: Dallas
Posts: 312
Rep Power: 29
Day 3 begins with the other side of the hood and working my way to the back of the car.
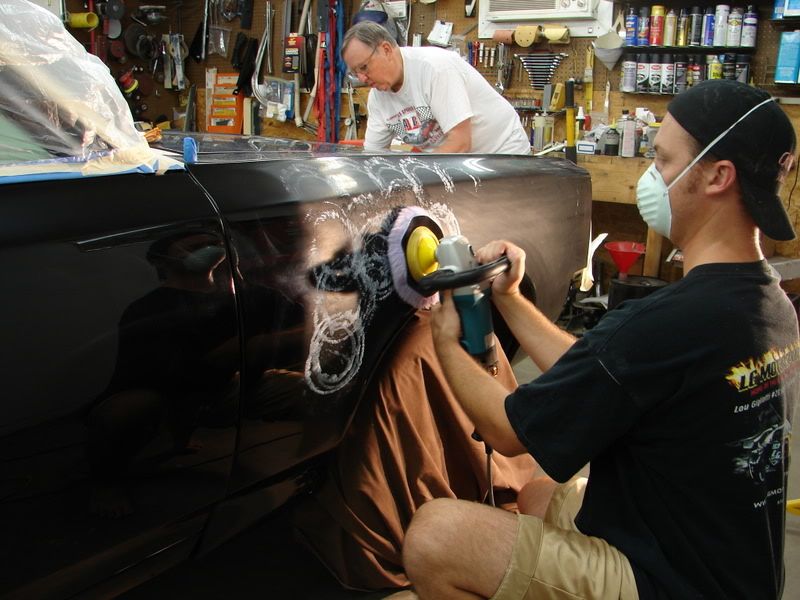
First step with PG and wool pad
Second step with M105 and white pad
dobbing

working in
perfectly broke down and jeweled
final results after two steps is near perfection. Even though the camera doesn't show it or pick it up, I can expect some light holograms as were in the trunk lid.
First step with PG and wool pad
Second step with M105 and white pad
dobbing
working in
perfectly broke down and jeweled
final results after two steps is near perfection. Even though the camera doesn't show it or pick it up, I can expect some light holograms as were in the trunk lid.
#24
08-01-2008, 10:28 AM
Join Date: Mar 2008
Location: Dallas
Posts: 312
Rep Power: 29
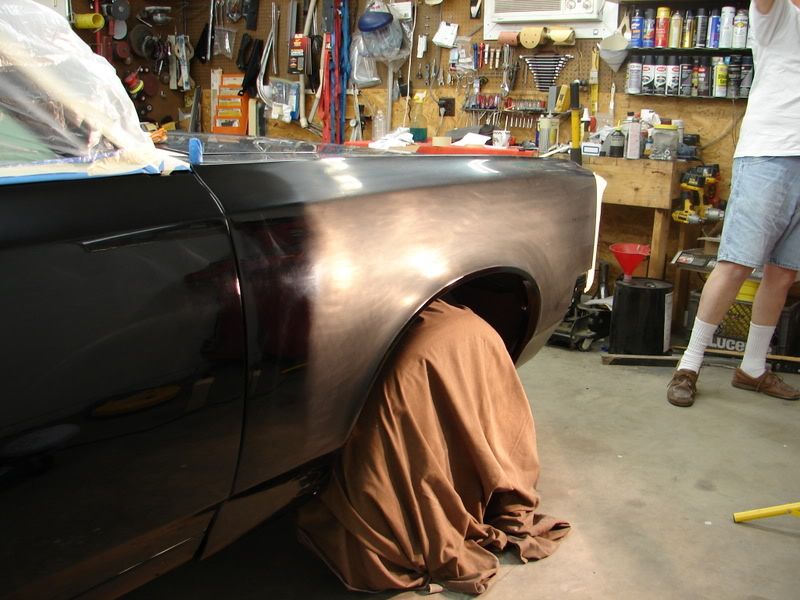
Absolutely last panel and section to correct.
This is already after the Menz PG.

Working in the M105.
I have to be very careful with all the edges in this area so I go over the edges last at a very slow speed to ensure no burning takes place.


After it's been jeweled

And now teh final results after the M105
I also went over the hood and trunk again with the Final Polish II so that I could double check them the next day after the lubes had evaporated.
Now all I have to do is go over the car again with Menz FPII and a black pad and the surface should be near perfect.
This is already after the Menz PG.
Working in the M105.
I have to be very careful with all the edges in this area so I go over the edges last at a very slow speed to ensure no burning takes place.
After it's been jeweled
And now teh final results after the M105
I also went over the hood and trunk again with the Final Polish II so that I could double check them the next day after the lubes had evaporated.
Now all I have to do is go over the car again with Menz FPII and a black pad and the surface should be near perfect.
#25
08-01-2008, 10:34 AM
Join Date: Mar 2008
Location: Dallas
Posts: 312
Rep Power: 29
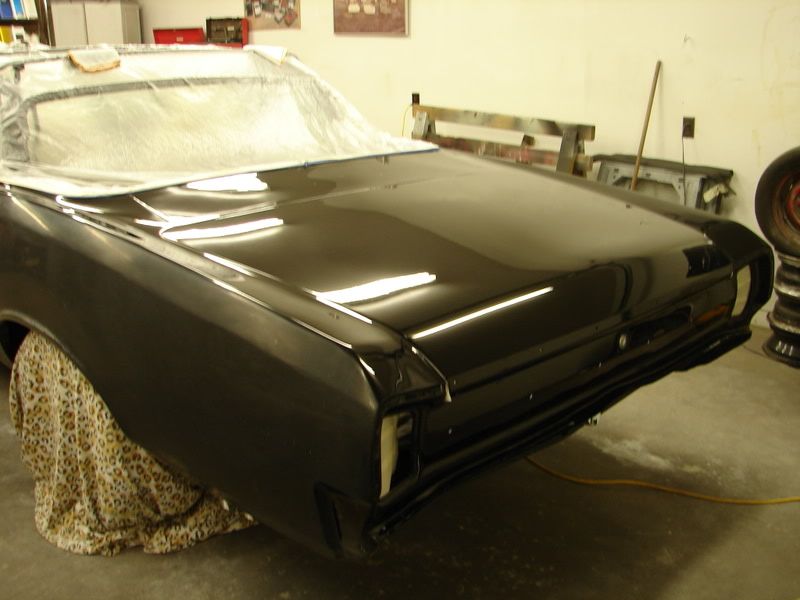
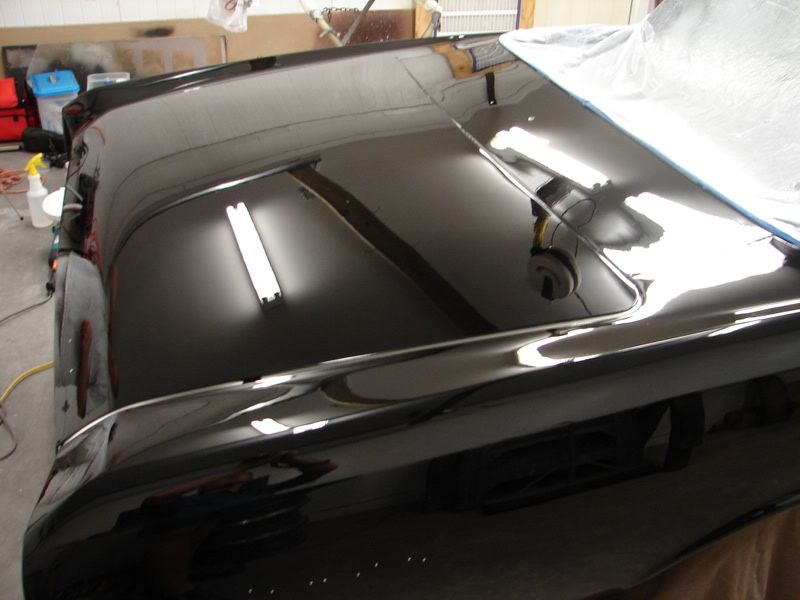
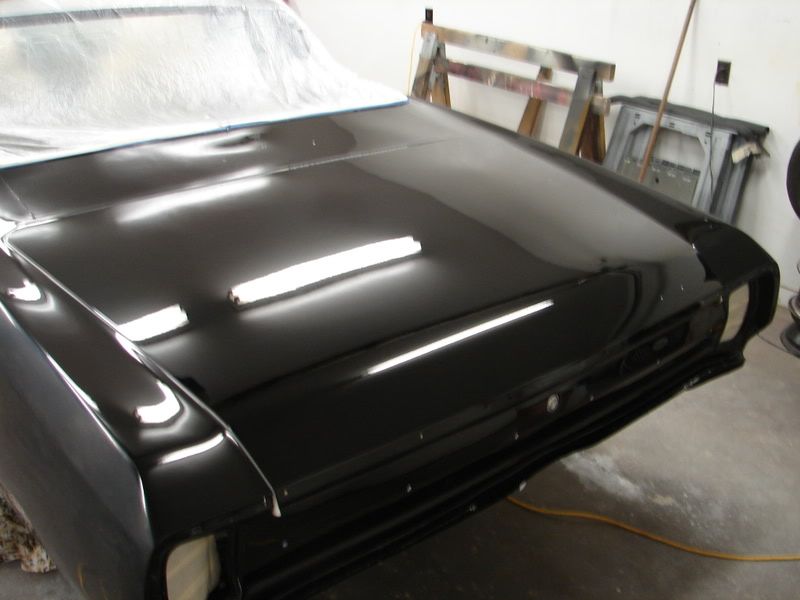
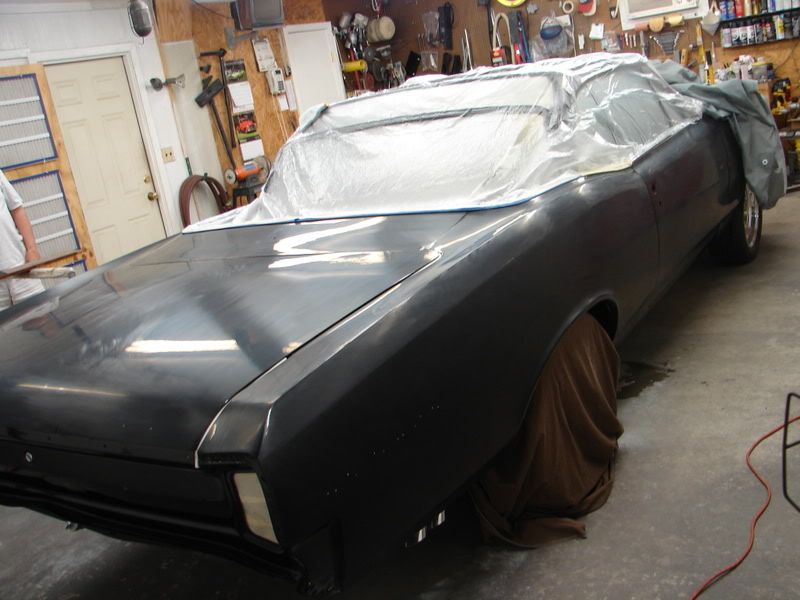
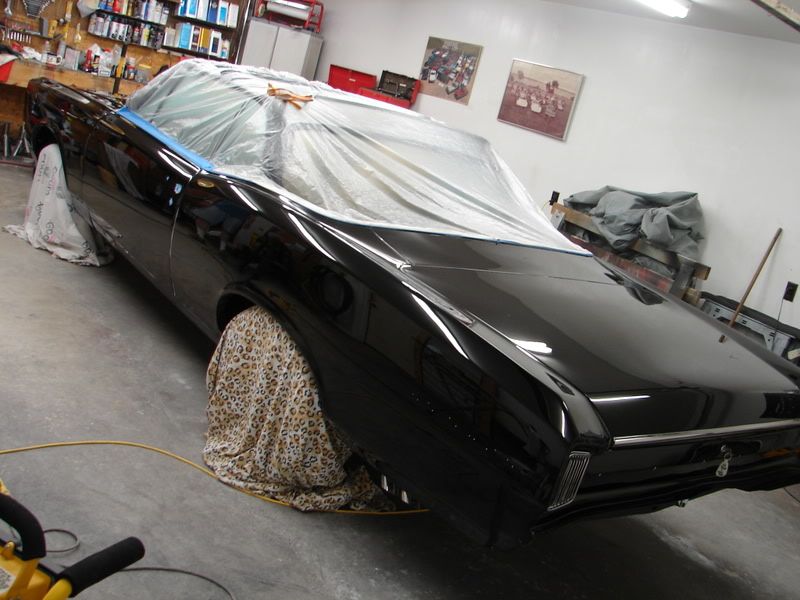
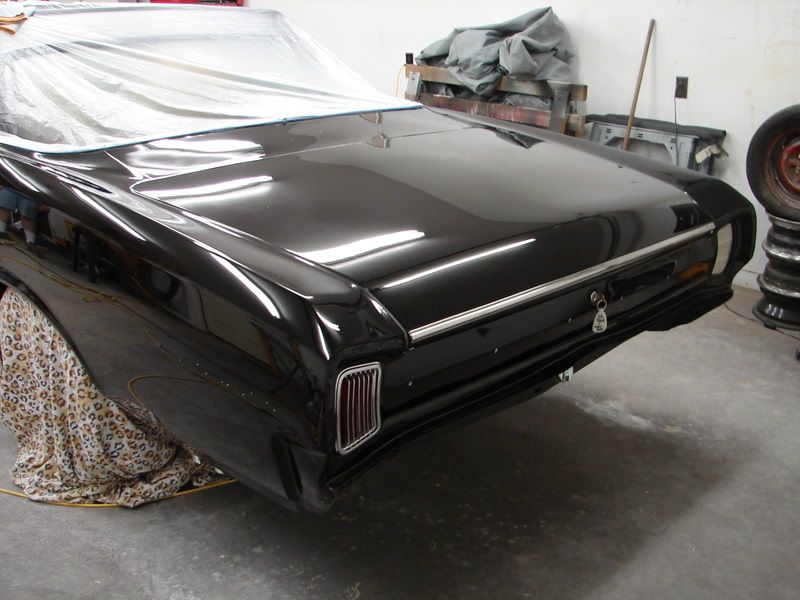
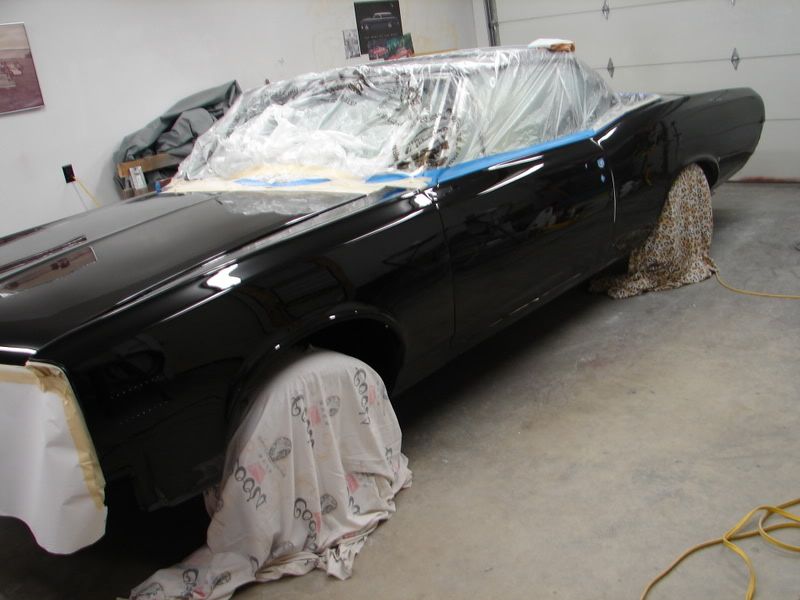
Here are some quick before and afters to remind you of what I started out with.
After all this it was so hard to believe that just a couple days before the whole car was grey.


__________________
After all this it was so hard to believe that just a couple days before the whole car was grey.
__________________
#26
08-01-2008, 10:40 AM
Join Date: Mar 2008
Location: Dallas
Posts: 312
Rep Power: 29
Sorry but I did not document the Final Polishing with Menz FPII and a LC black pad, but basically I just worked it in around 1100-1200 and jeweled it down at 900-700rpms over the entire car.
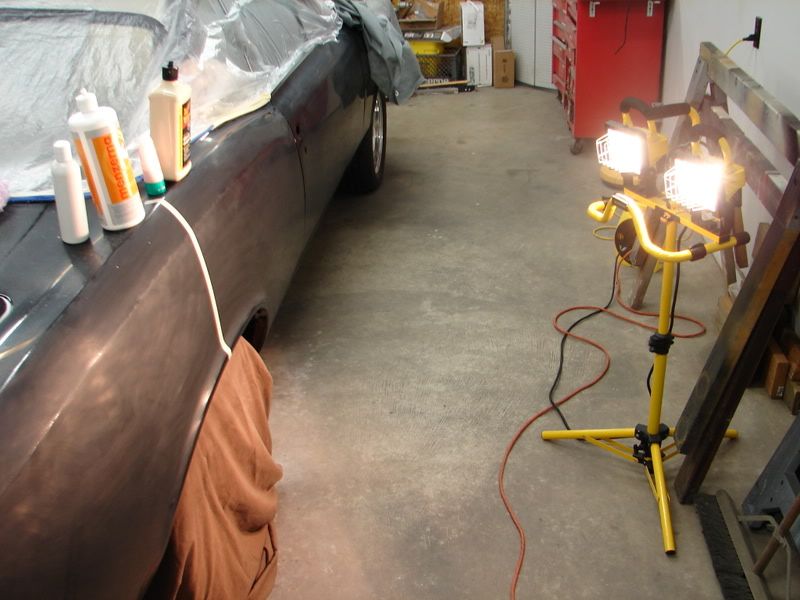
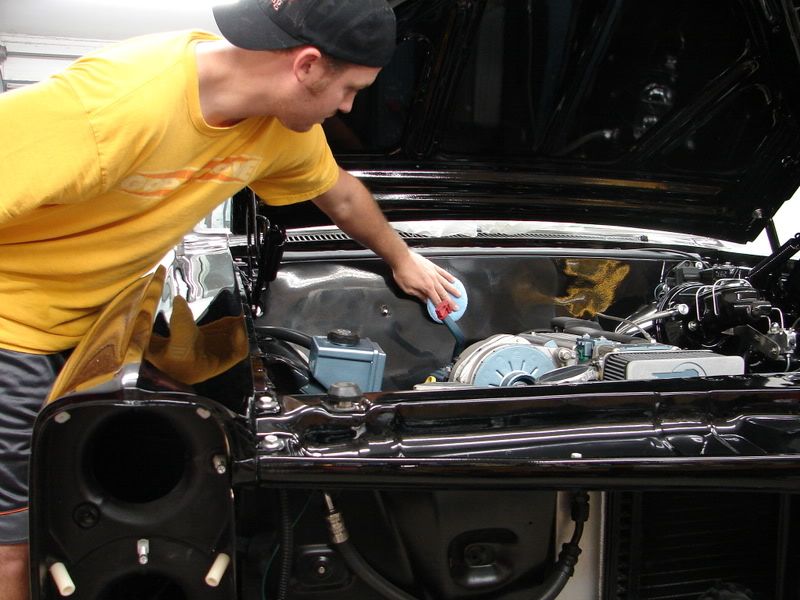
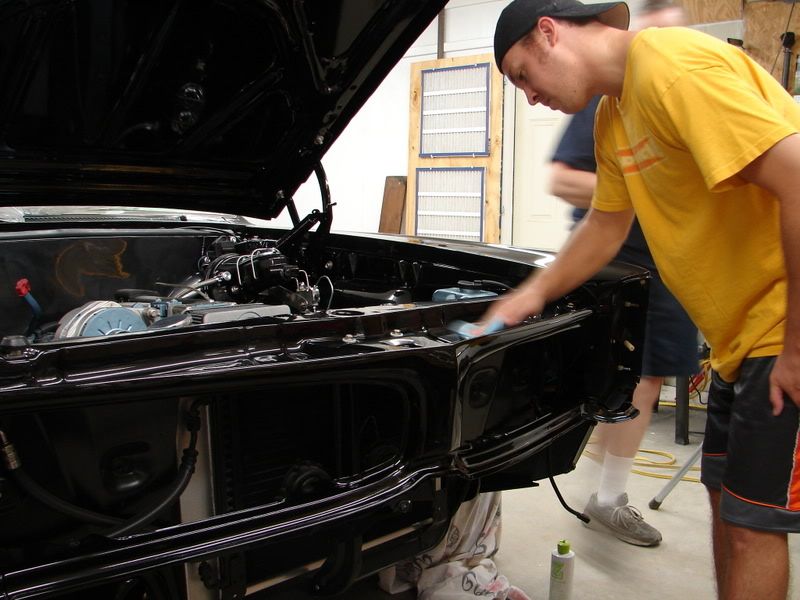
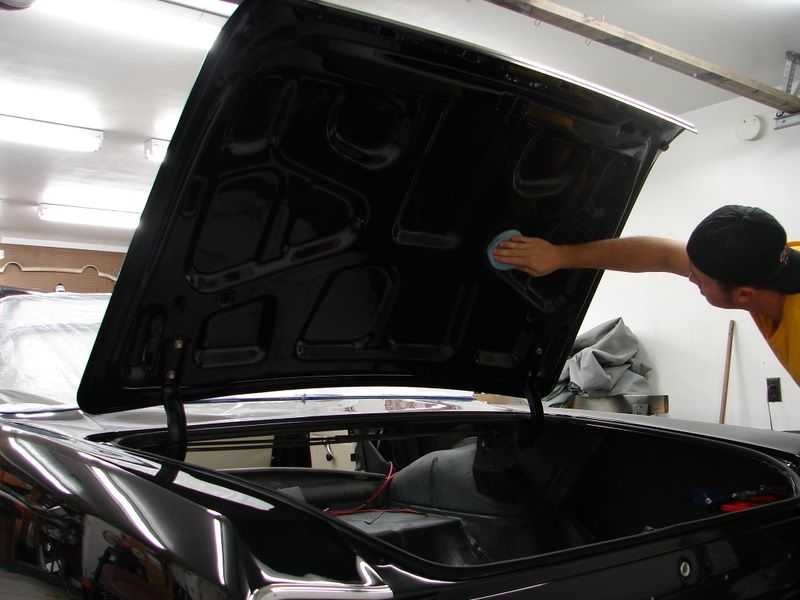
The 4th and final day I went over the entire engine bay with a damp MF towel (remember this car has been sitting in a garage for the last 2-3 years so there wasn't much to clean, just alot to polish.
Then engine bay and trunk lid roof got wiped down with a QD and then waxed with Zaino ZAIO to give it a sparkling finish.

The trunk
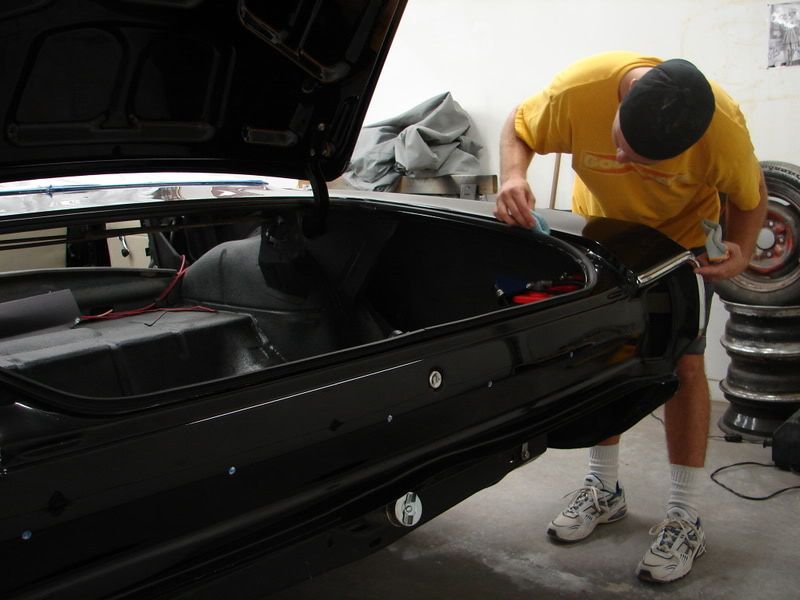
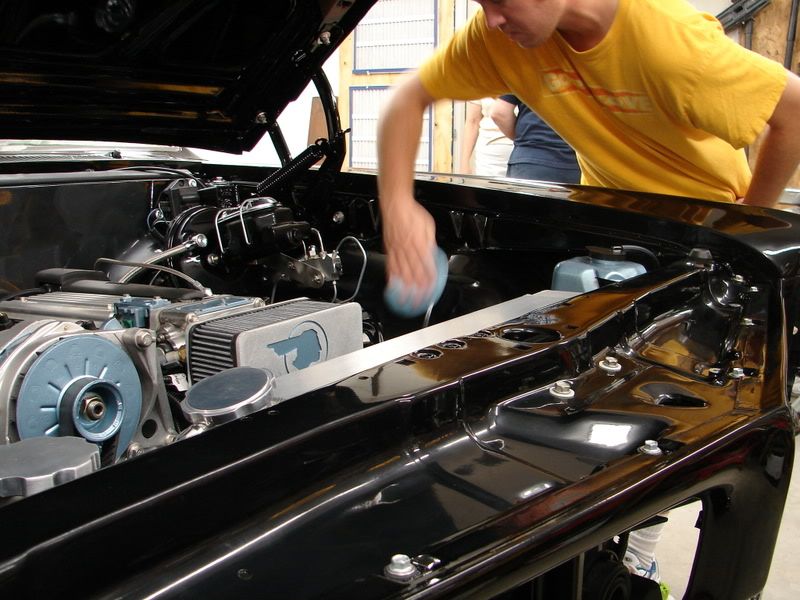
After lightly buffing off the ZAIO on all painted parts in the engine and trunk bays.

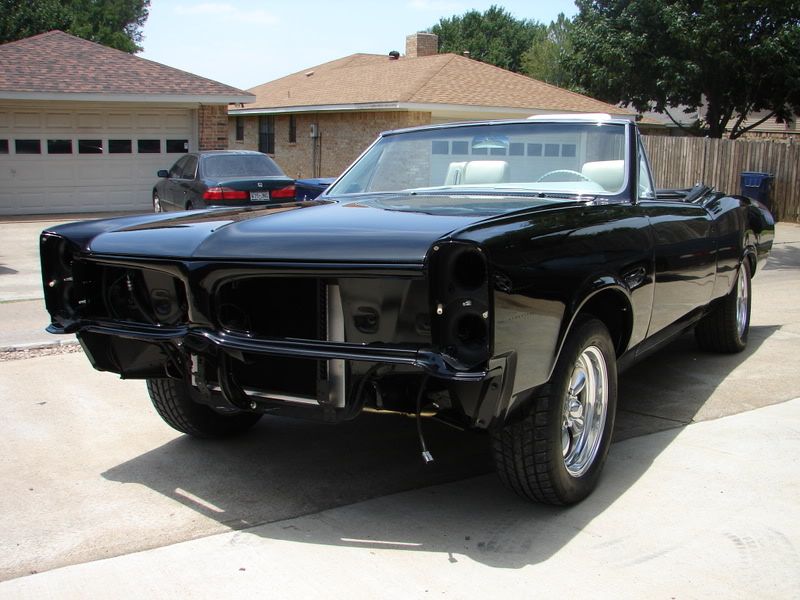
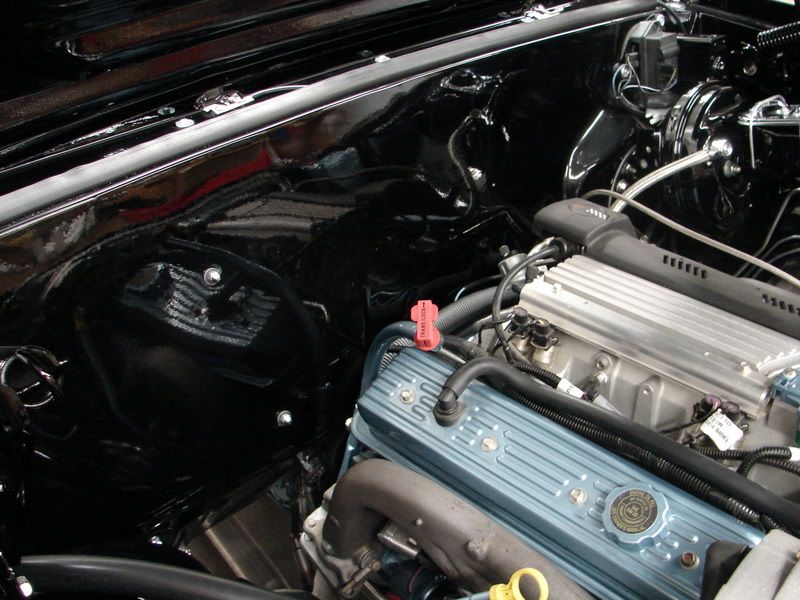
This a 1995 Corvette LT1 taken out of a Police Cruiser and put into the 66 Lemans, it roughly puts out about 370HP and sounds mean as anything I've heard.


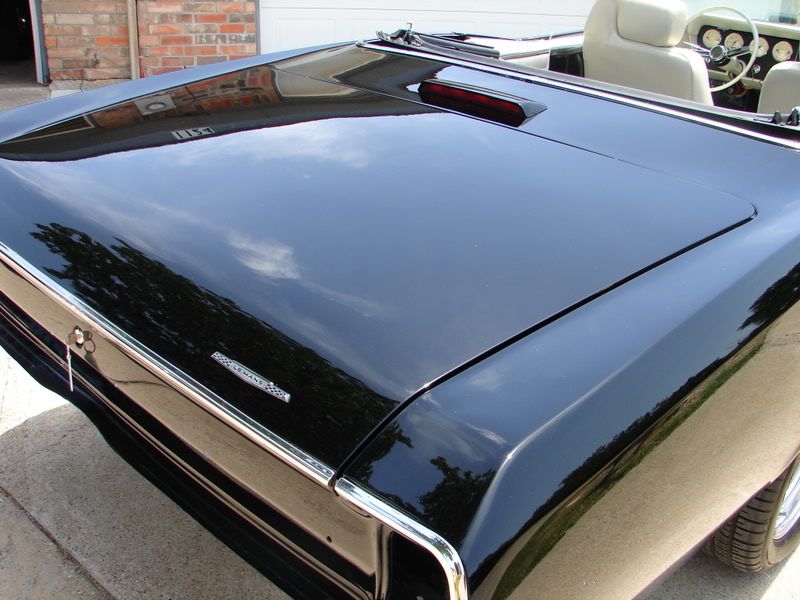
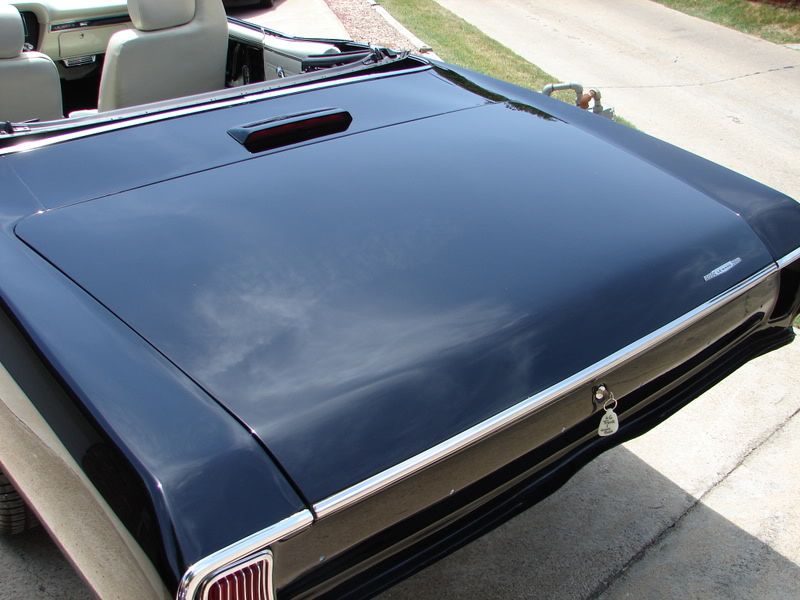
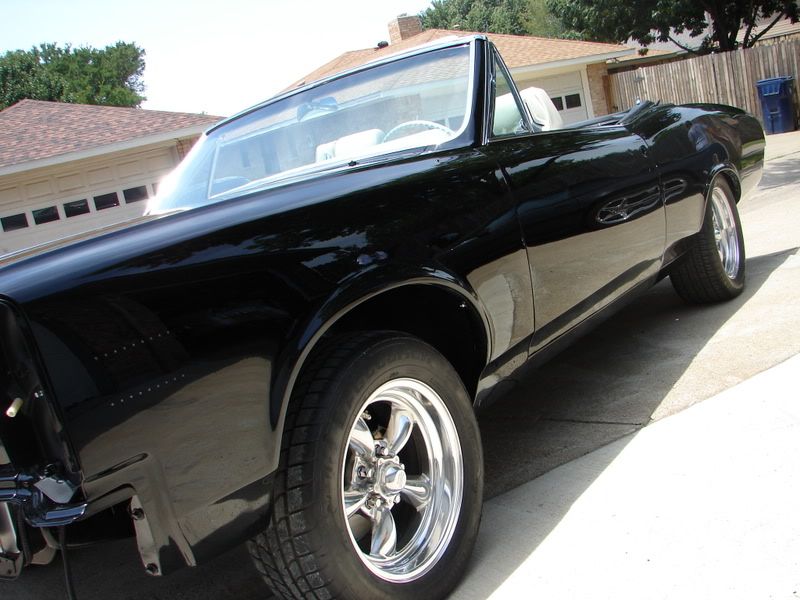
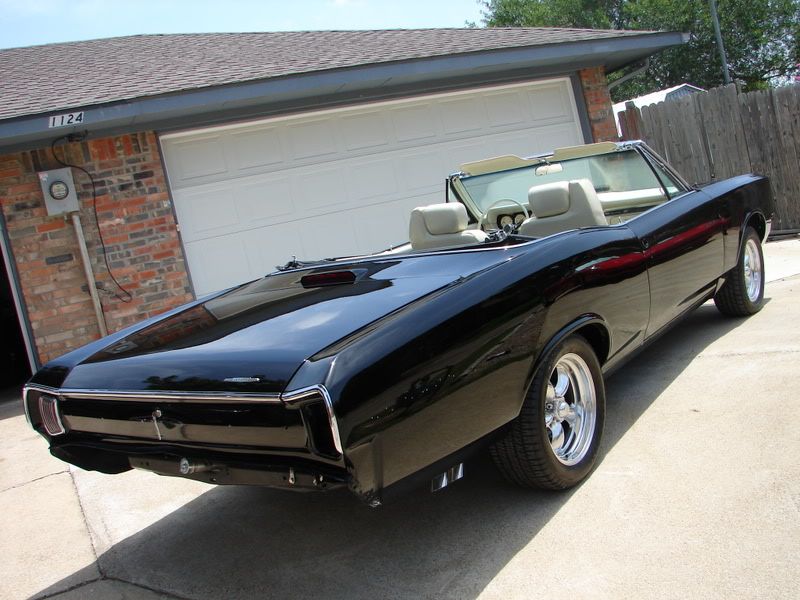
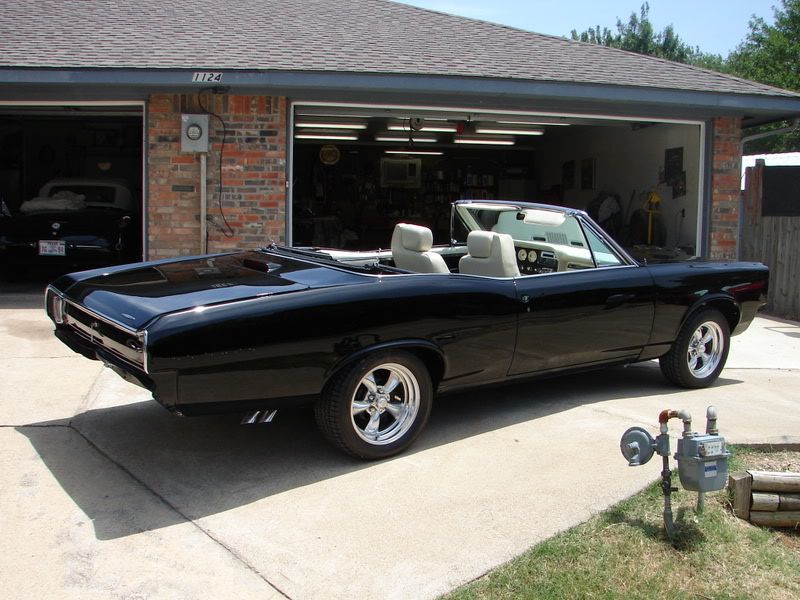
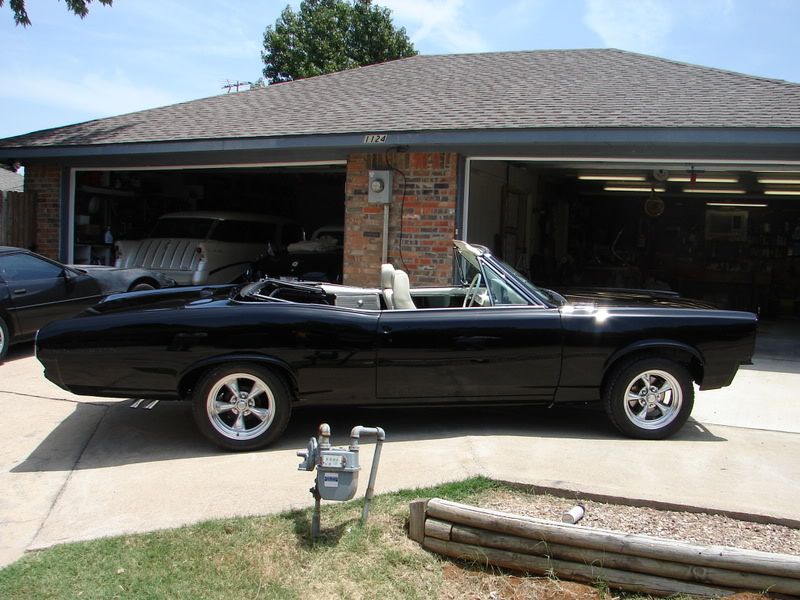
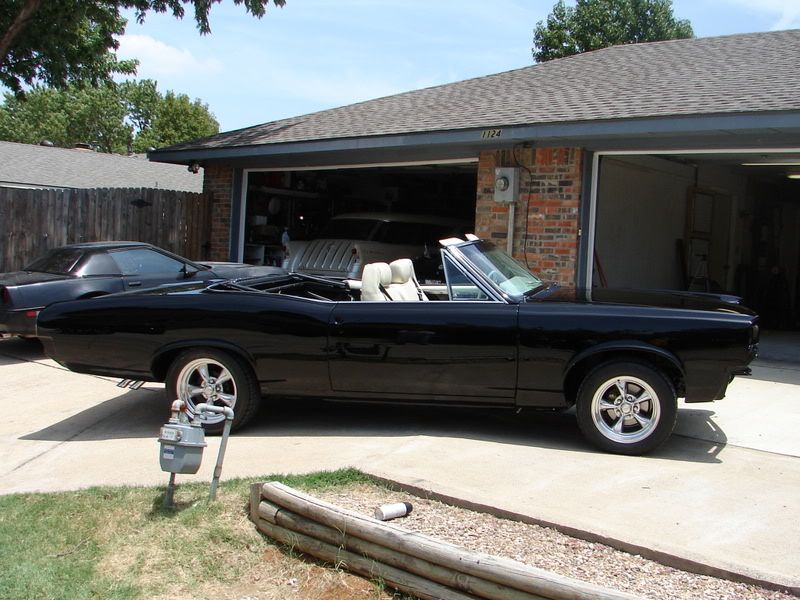
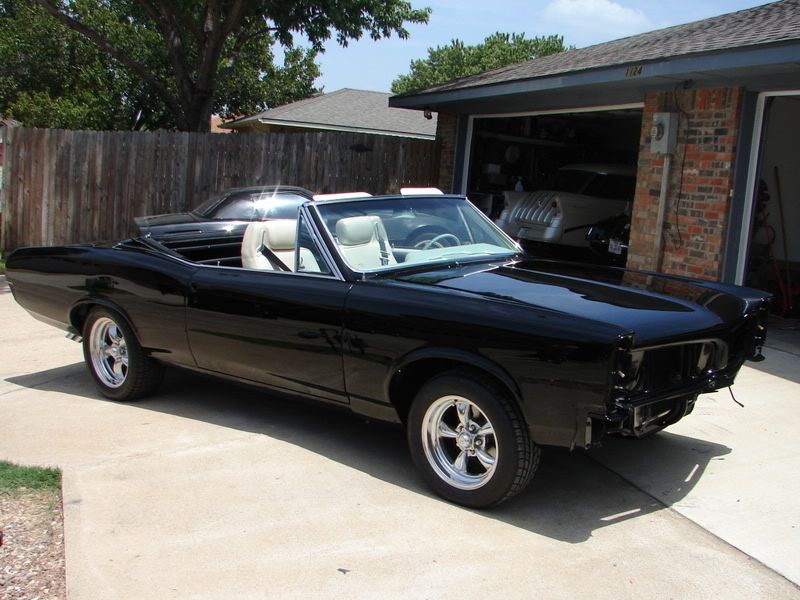
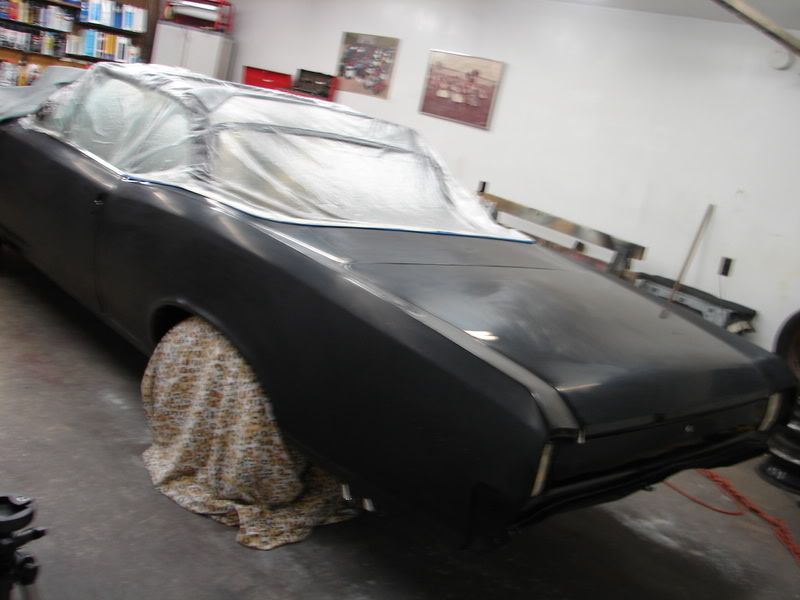
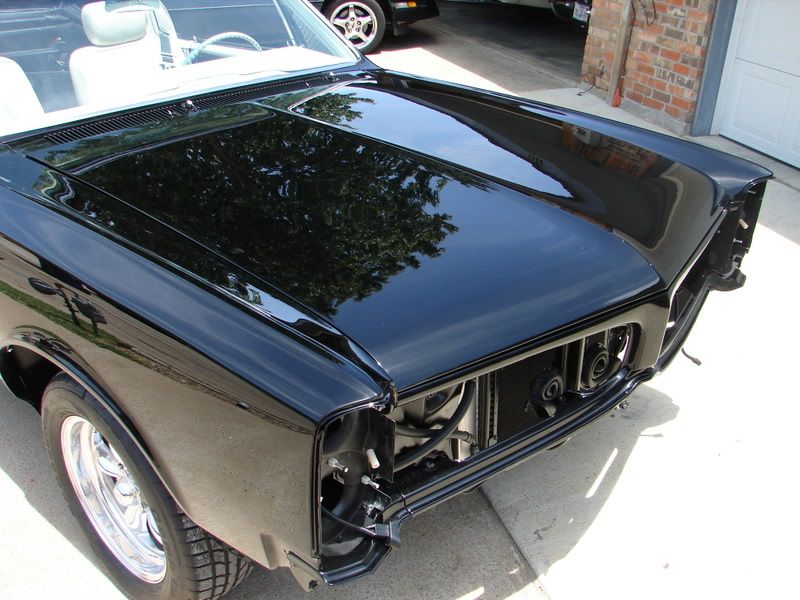
Now after all that is completed, the entire car has been polished over 3 times, it's time to take it out in the sun for inspection.
It was a little bit cloudy that day but I visually inspected it all and it was about 96% perfect.
After all the trim is put on as well as lights, grills, other emblems, the top is put in, the hood and one door realigned I will go back and touch up anything as well as seal and wax it.
So with that said, this was basically a two step correction with a 1-2 step final polish which only took me about 23-24 hours. I'm very impressed with the abilities of the polishes to be able to make such a huge process into such an efficient time saver considering the type of work needing done and the ultimate finish...... also helped being in an Air Conditioned garage.
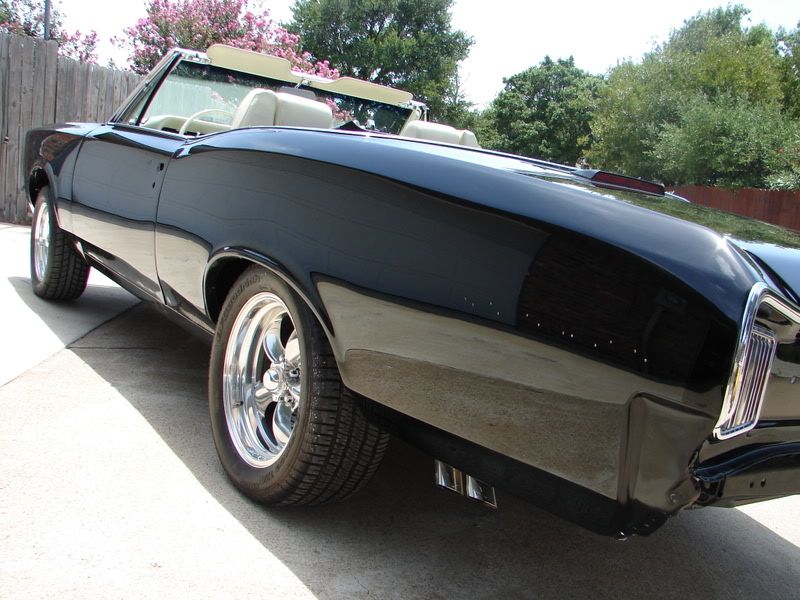
Now to back this sucker out and take some final pics of the overall results.
The 4th and final day I went over the entire engine bay with a damp MF towel (remember this car has been sitting in a garage for the last 2-3 years so there wasn't much to clean, just alot to polish.
Then engine bay and trunk lid roof got wiped down with a QD and then waxed with Zaino ZAIO to give it a sparkling finish.
The trunk
After lightly buffing off the ZAIO on all painted parts in the engine and trunk bays.
This a 1995 Corvette LT1 taken out of a Police Cruiser and put into the 66 Lemans, it roughly puts out about 370HP and sounds mean as anything I've heard.
Now after all that is completed, the entire car has been polished over 3 times, it's time to take it out in the sun for inspection.
It was a little bit cloudy that day but I visually inspected it all and it was about 96% perfect.
After all the trim is put on as well as lights, grills, other emblems, the top is put in, the hood and one door realigned I will go back and touch up anything as well as seal and wax it.
So with that said, this was basically a two step correction with a 1-2 step final polish which only took me about 23-24 hours. I'm very impressed with the abilities of the polishes to be able to make such a huge process into such an efficient time saver considering the type of work needing done and the ultimate finish...... also helped being in an Air Conditioned garage.
Now to back this sucker out and take some final pics of the overall results.
#27
08-01-2008, 10:47 AM
Join Date: Mar 2008
Location: Dallas
Posts: 312
Rep Power: 29
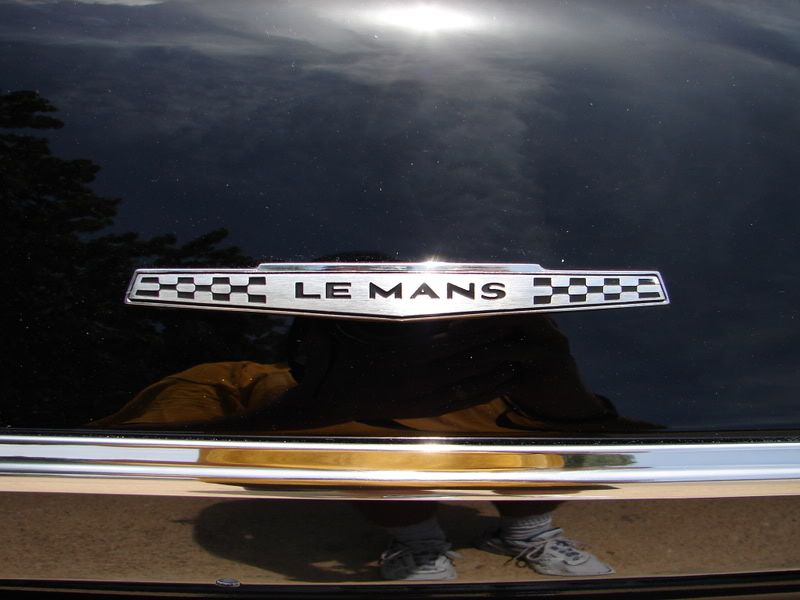
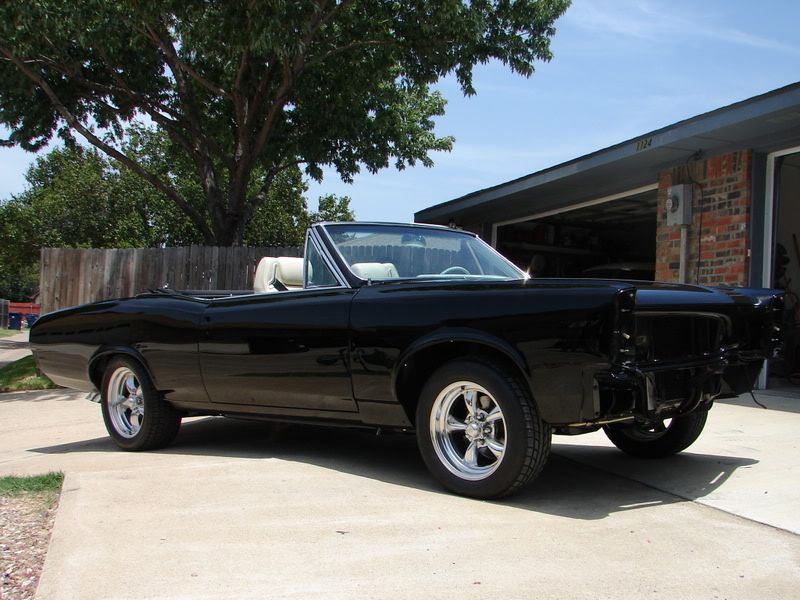
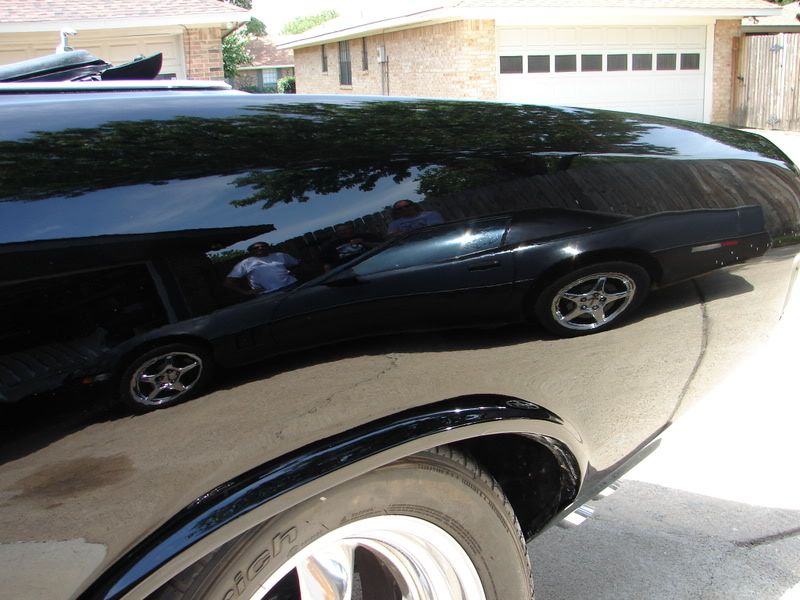
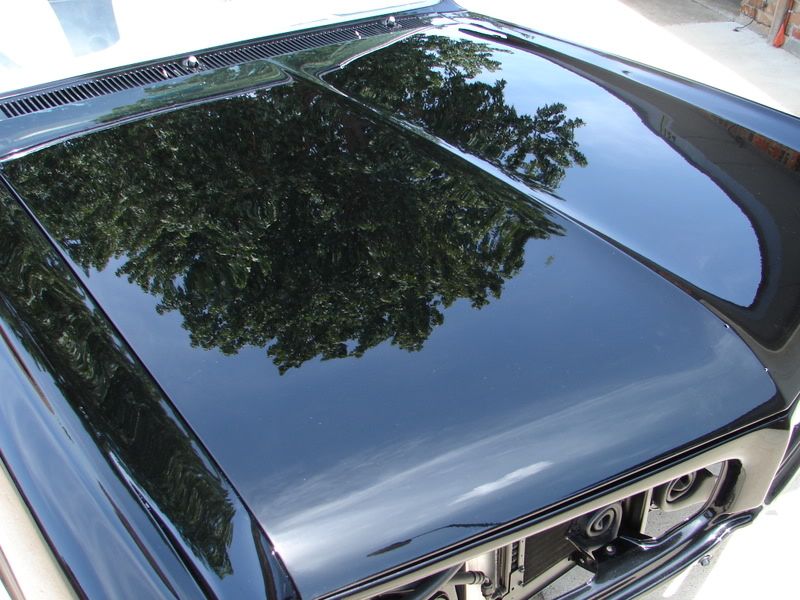
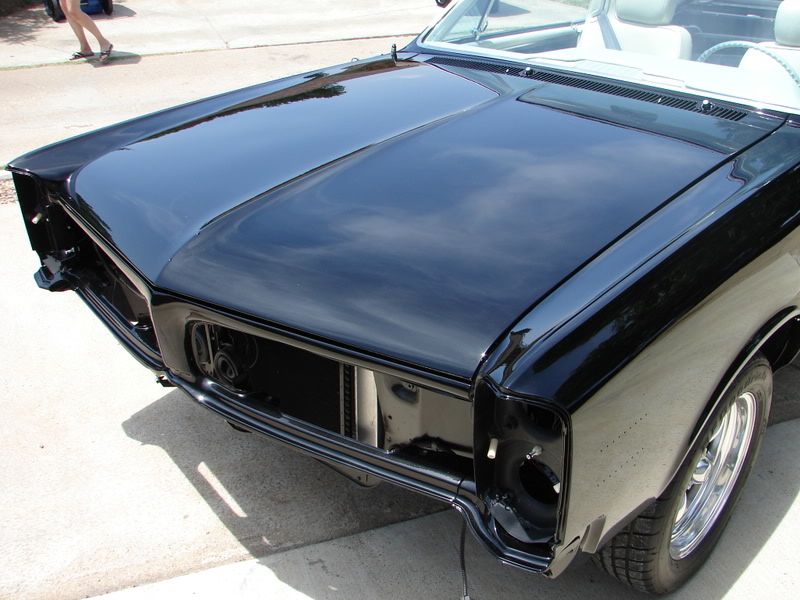
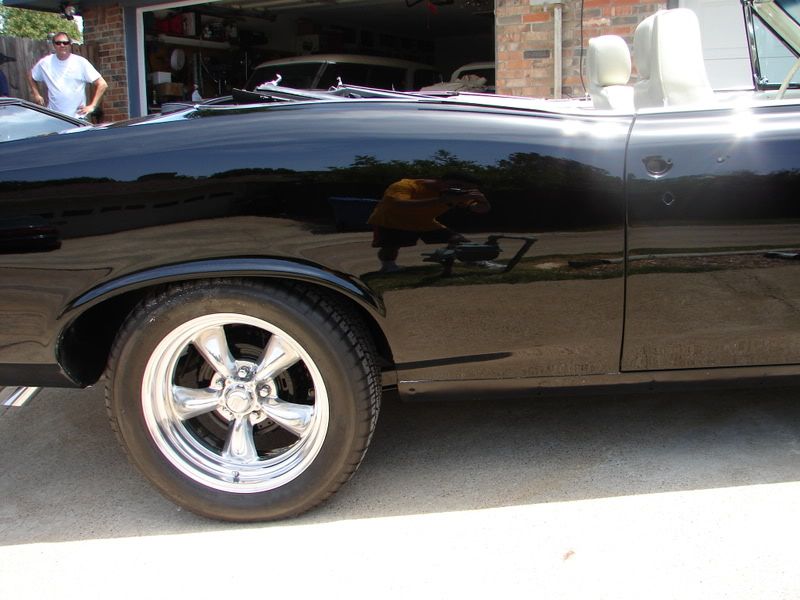
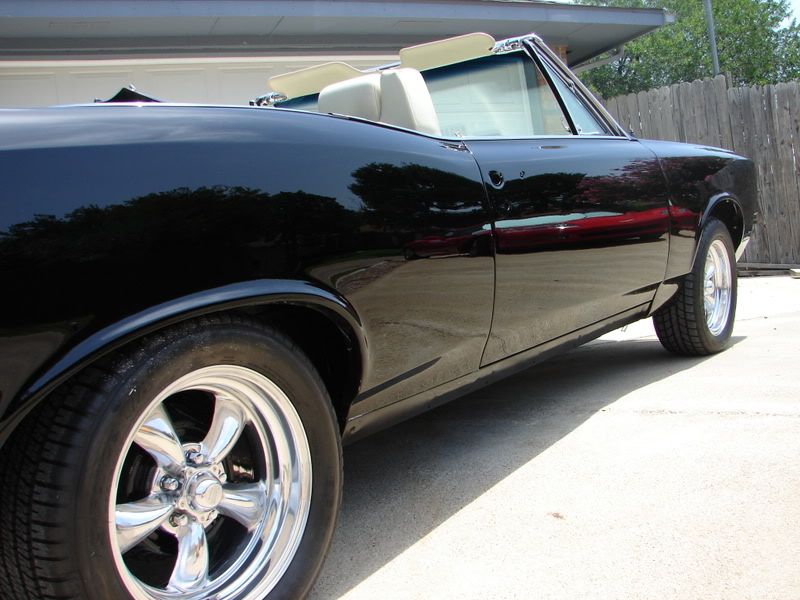
A few sun shots before I start the glamour shots.
There was barely the slightest reminant of some tracer holograms left over but not enough for anyone but myself to notice, so when I go back to touch up and wax I will take care of them.
These shots are a bit crappy but the best sun shots I could get.


There was barely the slightest reminant of some tracer holograms left over but not enough for anyone but myself to notice, so when I go back to touch up and wax I will take care of them.
These shots are a bit crappy but the best sun shots I could get.