The 12-Gauge Garage
#64
I realized last week that my camera can also shoot pretty good video. So here's an updated version of my lift video -- just a little piece of musical theater. 
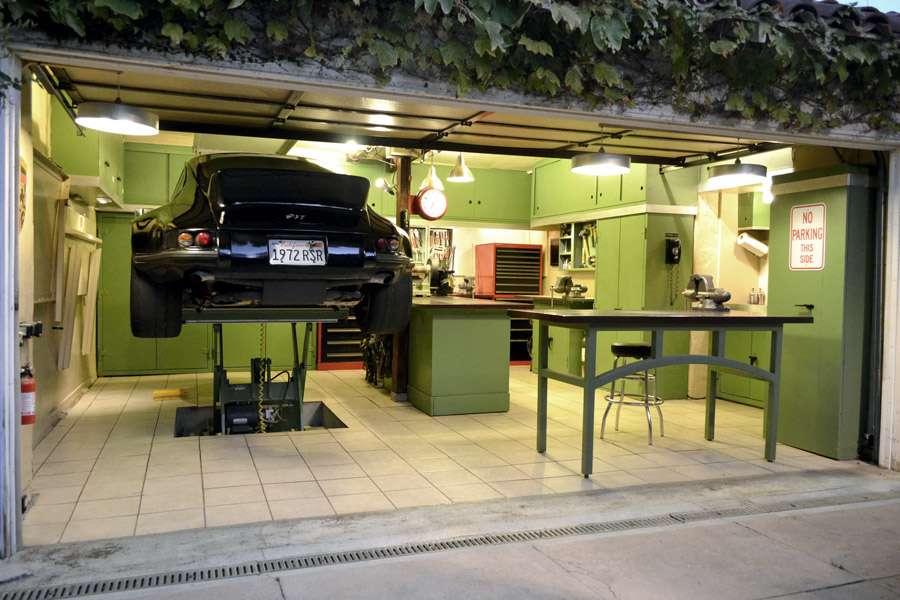
But after digging out the 2000 pounds of concrete and clay, it reflects exactly how I felt when I got the lift installed and working.
I suggest full screen and 720p, with the speakers turned up.

But after digging out the 2000 pounds of concrete and clay, it reflects exactly how I felt when I got the lift installed and working.
I suggest full screen and 720p, with the speakers turned up.
#67
The song is called 'Thousand Miles From Nowhere.' The band is Butch Cage (on the 'black string' violin), Clarence Edwards (singing, I'm pretty sure) and his brother Cornelius Edwards. There was a guy called Harry Oster who went around recording Delta blues artists in the late 1950s so that their work wouldn't disappear forever when they died. He put it all together in a collection called 'Country Negro Jam Sessions' -- which I'm sure seemed like a good idea for a title at the time. It was recorded in 1959 or 1960.
#69
Thanks.
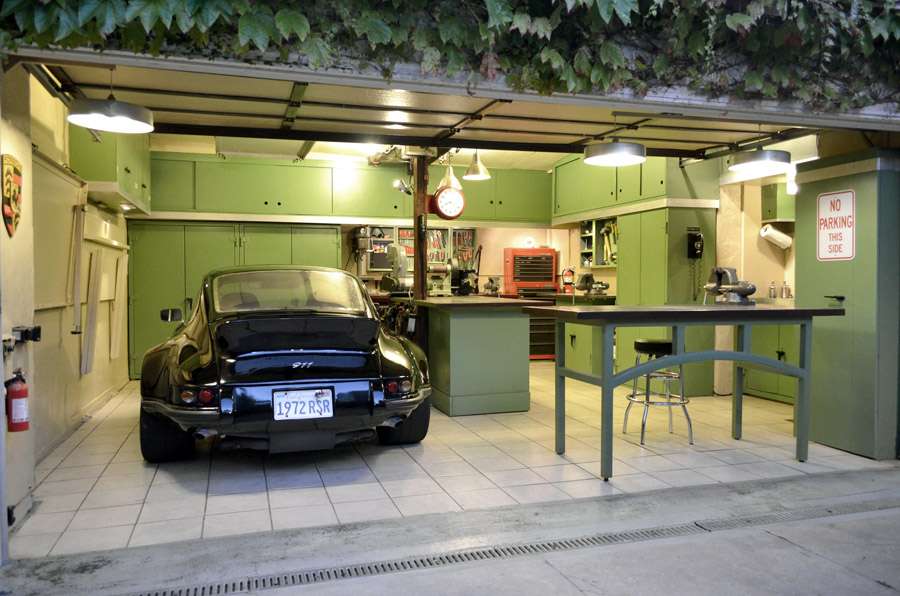
Mine was also built in the twenties, and extended out for more depth at a later date. The extension was about the distance covered by the cabinet on the right by the main door opening.
More oddly, the wall to the right in the picture is an exterior wall, covered in stucco.

In this picture, you can see a downspout int he corner, going down behind the toolbox stack, with the pegboard fitted behind it. That made sense when the wall was built, but now it has to run over, under the adjoining office, and out. The only way to fix it is to re-roof the whole structure.

Mine was also built in the twenties, and extended out for more depth at a later date. The extension was about the distance covered by the cabinet on the right by the main door opening.
More oddly, the wall to the right in the picture is an exterior wall, covered in stucco.

In this picture, you can see a downspout int he corner, going down behind the toolbox stack, with the pegboard fitted behind it. That made sense when the wall was built, but now it has to run over, under the adjoining office, and out. The only way to fix it is to re-roof the whole structure.

#70
re-roof would be a pretty big project for sure....hope the drain spout doesn't get clogged.
My son and I can't get over how smooth your car lift is.
Are there lift arms to it for specific frame points or is it a slab?
Maybe I should consult Friedrich Nietszche, as per your video title
Also sprach Zarathustra!
My son and I can't get over how smooth your car lift is.
Are there lift arms to it for specific frame points or is it a slab?
Maybe I should consult Friedrich Nietszche, as per your video title
Also sprach Zarathustra!
#71
Thanks. My son likes it, too.

Originally, I used a 48"x48" piece of padding between the belly pan of the 911 and the lift. My concern was that the tiled surface of the lift might damage the car. But I also have a large sheet of aluminum attached to the underside of the car that's there for aerodynamics -- and when I was replacing it the most-recent time, I realized I'm already bridging a space underneath it, and that it would be flatter if I added some padding right along the underbelly of the car. So now the padding is in between the floorboards of the car and the sheet that smooths everything out. So I don't need to put anything between the lift top and the car at all. It's literally as simple as hitting a button whenever I want to lift the car up (so long as it's parked in the right place). The 48"x48" top of the lift covers all six of the factory jacking points. They're the X's in this picture:

In working out whether this hydraulic lift table would work for this application, I established the balancing point of the car. I literally balanced it on a steel beam. Here's a graphic I put together beforehand to show how that balance point would shift with different amounts of weight removed from the car:


Originally, I used a 48"x48" piece of padding between the belly pan of the 911 and the lift. My concern was that the tiled surface of the lift might damage the car. But I also have a large sheet of aluminum attached to the underside of the car that's there for aerodynamics -- and when I was replacing it the most-recent time, I realized I'm already bridging a space underneath it, and that it would be flatter if I added some padding right along the underbelly of the car. So now the padding is in between the floorboards of the car and the sheet that smooths everything out. So I don't need to put anything between the lift top and the car at all. It's literally as simple as hitting a button whenever I want to lift the car up (so long as it's parked in the right place). The 48"x48" top of the lift covers all six of the factory jacking points. They're the X's in this picture:

In working out whether this hydraulic lift table would work for this application, I established the balancing point of the car. I literally balanced it on a steel beam. Here's a graphic I put together beforehand to show how that balance point would shift with different amounts of weight removed from the car:

#73
Famous last words, I know. But this is probably the last modification that I'll do to the garage.
I picked up a pair of old-and-damaged Lista cabinets. One is from 1985, and the other is considerably older, I'm told. (The older one was built like a tank, by the way.) Both were shorter than what you usually see, which is 60" or so. These were 40", and one had a gap where an incorrect drawer had been substituted in at some point in its past.
But I saw where they'd be a useful replacement for my Craftsman stack of toolboxes. The Craftsman was fine, but it was very shallow compared to the Listas. And since I didn't roll it around, there was no advantage to it being smaller and lighter.
Here's the old one, tucked into its corner:

And here are the new ones, adding about 800 pounds to my old Jeep's rolling weight.


Clearly, they'd led a long and useful life so far:

But the storage increase was going to be substantial, if I could get them to fit in my little garage:

Part of the fitting was cutting an inch off of both ends of my oak bench:

The plan was to take a 6-drawer and a 11-drawer and combine them into one 15-drawer unit. To do that, I was going to have to cut a section out of each bench.


A circular saw with a metal-cutting blade made some pretty clean cuts:

I picked up a pair of old-and-damaged Lista cabinets. One is from 1985, and the other is considerably older, I'm told. (The older one was built like a tank, by the way.) Both were shorter than what you usually see, which is 60" or so. These were 40", and one had a gap where an incorrect drawer had been substituted in at some point in its past.
But I saw where they'd be a useful replacement for my Craftsman stack of toolboxes. The Craftsman was fine, but it was very shallow compared to the Listas. And since I didn't roll it around, there was no advantage to it being smaller and lighter.
Here's the old one, tucked into its corner:

And here are the new ones, adding about 800 pounds to my old Jeep's rolling weight.


Clearly, they'd led a long and useful life so far:

But the storage increase was going to be substantial, if I could get them to fit in my little garage:

Part of the fitting was cutting an inch off of both ends of my oak bench:

The plan was to take a 6-drawer and a 11-drawer and combine them into one 15-drawer unit. To do that, I was going to have to cut a section out of each bench.


A circular saw with a metal-cutting blade made some pretty clean cuts:

#74

One of these things weighed 350 pounds. The other weighed 480. Even without their drawers, they were tricky to move around. I discovered one more use for my floor lift.

Testing the configuration:

The reason I left the top of the lower cabinet in place was that I knew they were going to open out to the edge of my fabrication table, and I wanted to work it so that one drawer opened above, and the next one down opened below it. Like this:

The top of the older unit had taken a hard hit at some point in its past. I used a couple of C-clamps and the 10-gauge base piece from the same lift as a straight edge to compress things back to normal:

I also cut out the plywood back to the studs so I could set the thing as far back as possible. That meant drilling some holes so my air line could run behind the box without getting pinched.

No pictures of the welding itself. But I filled the holes where the useless lock cylinders used to be. Then I painted it to match the neighboring cabinets. But here you can see the way it sits back right in the plywood:

I also bolted it to the stud in the wall, so that it won't ever tip forward if multiple drawers get opened.

It wasn't too long ago that I built that bench by cutting up a 60"-tall Equipto cabinet. My old bench didn't have a place to sit. Now, with the deeper cabinets, I've got a 271% increase in storage space.
The old:

The new:


