Notices
Garage Forum Share pictures of your garage with the rest of the 6speedonline members. Learn about Garage flooring, painting, art, and more in this forum.

Lift installed

Thread Tools
 
Search this Thread
 
Rate Thread
 
  #1  
Old 07-08-2012 | 07:15 PM
NikosF's Avatar
Thread Starter
|
Registered User
Joined: Feb 2012
Posts: 89
From: Chicago, IL
Rep Power: 16
NikosF is infamous around these parts
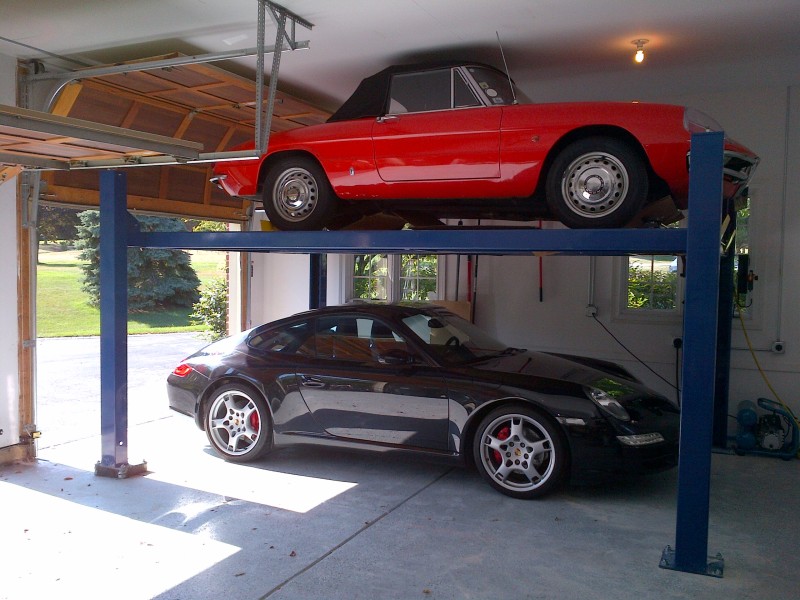
Lift installed

Bend Pak HD-9 in place.
Name:  Barrington-20120708-00043.jpg
Views: 1686
Size:  117.0 KB

Excuse the concrete dust all over the floor - was from the drilling to get the posts bolted into the floor. Notice how much the back had to be shimmed up (because floor was tilted to allow water to flow out when it was originally poured I guess.
 

Last edited by NikosF; 07-08-2012 at 07:18 PM.
  #2  
Old 07-08-2012 | 09:19 PM
Alcav5's Avatar
Registered User
Joined: Apr 2008
Posts: 255
From: Scarsdale, New York
Rep Power: 29
Alcav5 is a jewel in the roughAlcav5 is a jewel in the roughAlcav5 is a jewel in the rough
Looks good / Did you install yourself or have the supplier do it?

Curious to know what kind of spacer(s) you put under the column plate. In other words did you get steel flat plates and build up to the correct height or something else. I have same situation & right now I have nothing under the column plate(s) they are just sitting on leveling nuts.
 
  #3  
Old 07-09-2012 | 06:10 AM
thomapa1's Avatar
Registered User
Joined: Mar 2011
Posts: 315
From: Alpharetta, GA
Rep Power: 30
thomapa1 is a glorious beacon of lightthomapa1 is a glorious beacon of lightthomapa1 is a glorious beacon of lightthomapa1 is a glorious beacon of lightthomapa1 is a glorious beacon of light
How tall is your ceiling? I see you had the lift side garage door opener raised - looks great for a confined space. Breakdown of cost? adjusting the garage door / lift / installation ...
Well done!
 
  #4  
Old 07-10-2012 | 03:04 PM
NikosF's Avatar
Thread Starter
|
Registered User
Joined: Feb 2012
Posts: 89
From: Chicago, IL
Rep Power: 16
NikosF is infamous around these parts
@alcav - thanks. I paid someone to do it. Having watched two guys put it up - I think it's doable as a DIY with a helper. Biggest issue is loading it at the freight terminal onto a trailer. Spacers are steel washers - left side needed almost 3" worth, right side 2.5" worth. Garage slopes down towards the door for drainage.

@thomapa - I think ceiling is at 10'. I don't want to think how much everything cost! Just some of the costs:
1. Painting the floor with epoxy - close to $800 (excluding the cost of the power washer I bought - but that will get used for lots of other stuff)
2. Garage door - new tracks and Liftmaster jackshaft opener - just over $1000
3. 220V to garage (it can run on 220V, but it runs better on 220 and I may want a welder in the future) - $1200 (optional expense)
4. Lift - $2900
5. Installation $650
 
  #5  
Old 07-10-2012 | 03:05 PM
NikosF's Avatar
Thread Starter
|
Registered User
Joined: Feb 2012
Posts: 89
From: Chicago, IL
Rep Power: 16
NikosF is infamous around these parts
Some pictures of the install.

Lift arrived on trailer (part unpacked)
Name:  Barrington-20120708-00023.jpg
Views: 1371
Size:  182.5 KB

Name:  Barrington-20120708-00022.jpg
Views: 1348
Size:  170.4 KB
 
  #6  
Old 07-10-2012 | 03:07 PM
NikosF's Avatar
Thread Starter
|
Registered User
Joined: Feb 2012
Posts: 89
From: Chicago, IL
Rep Power: 16
NikosF is infamous around these parts
Measuring and putting chalk lines on floor. Exactly centered on door and back of ramps where garage door closes:

Name:  Barrington-20120708-00024.jpg
Views: 1294
Size:  144.5 KB
 
  #7  
Old 07-10-2012 | 03:09 PM
NikosF's Avatar
Thread Starter
|
Registered User
Joined: Feb 2012
Posts: 89
From: Chicago, IL
Rep Power: 16
NikosF is infamous around these parts
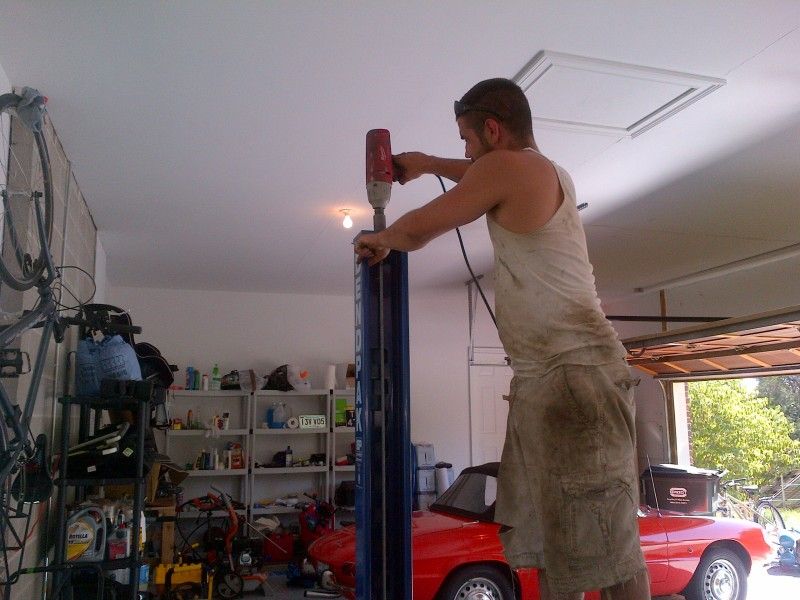
Position columns, lay down, then insert cross members:

Name:  Barrington-20120708-00025.jpg
Views: 1324
Size:  151.7 KB

Name:  Barrington-20120708-00028.jpg
Views: 1308
Size:  127.3 KB

Name:  Barrington-20120708-00029.jpg
Views: 1307
Size:  125.0 KB

Name:  Barrington-20120708-00030.jpg
Views: 1294
Size:  141.8 KB
 
  #8  
Old 07-10-2012 | 03:11 PM
NikosF's Avatar
Thread Starter
|
Registered User
Joined: Feb 2012
Posts: 89
From: Chicago, IL
Rep Power: 16
NikosF is infamous around these parts
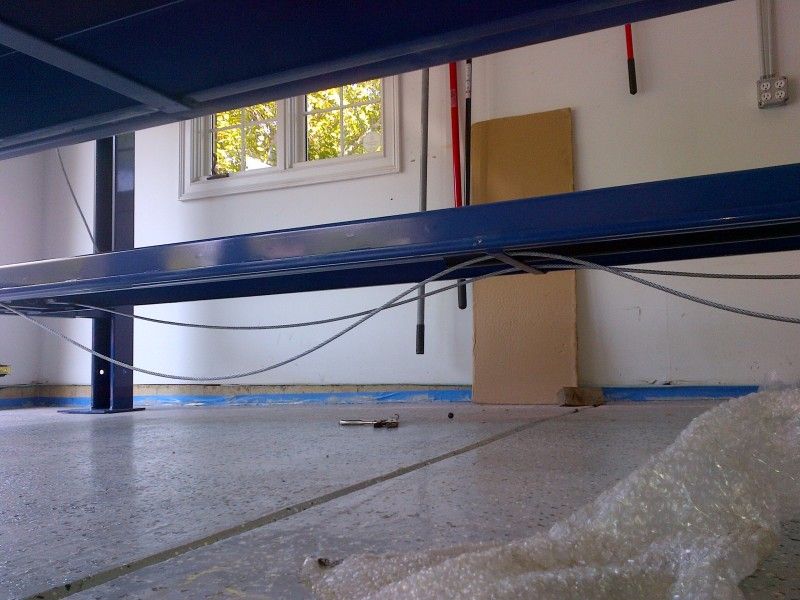
insert cables, column caps and begin tightening:
Name:  Barrington-20120708-00040.jpg
Views: 1283
Size:  106.6 KB

Name:  Barrington-20120708-00037.jpg
Views: 1292
Size:  126.9 KB

Name:  Barrington-20120708-00033.jpg
Views: 1347
Size:  66.6 KB

Name:  Barrington-20120708-00032.jpg
Views: 1282
Size:  116.1 KB

Name:  Barrington-20120708-00035.jpg
Views: 1299
Size:  88.3 KB
 
  #9  
Old 07-10-2012 | 03:12 PM
NikosF's Avatar
Thread Starter
|
Registered User
Joined: Feb 2012
Posts: 89
From: Chicago, IL
Rep Power: 16
NikosF is infamous around these parts
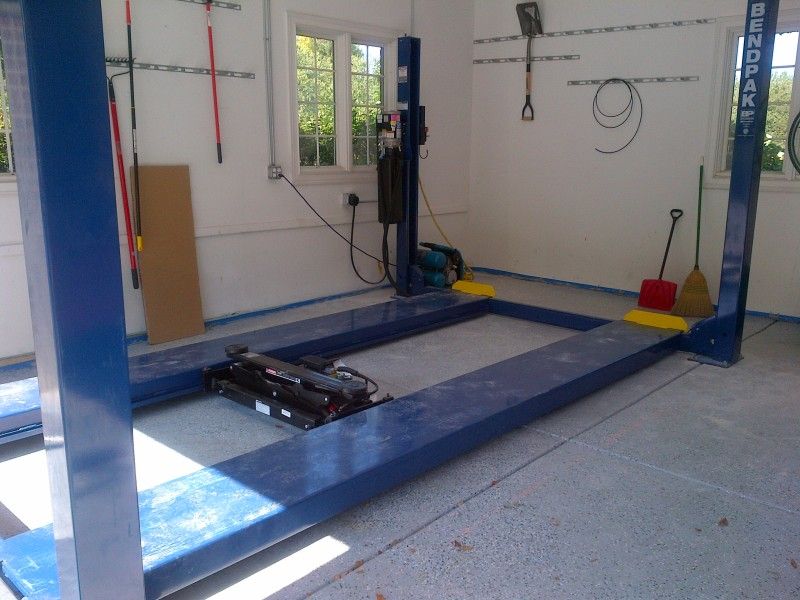
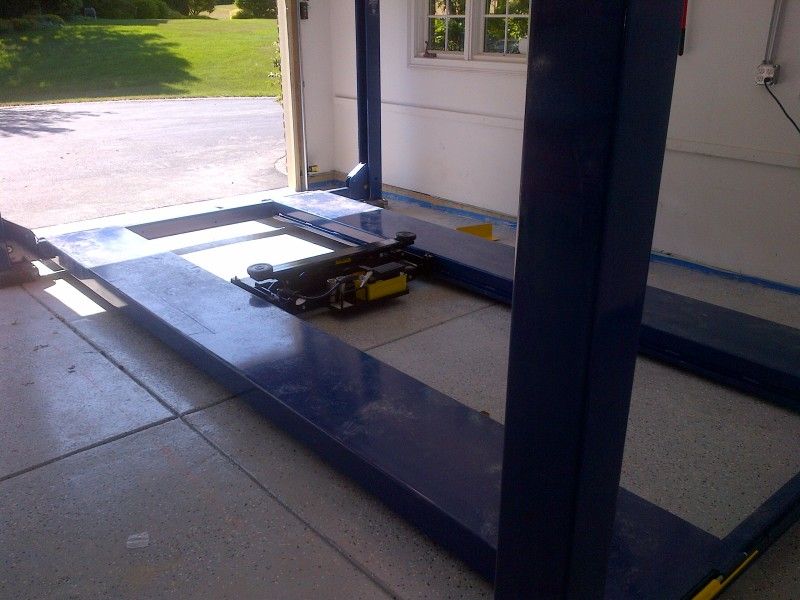
Tighten cable and complete assembly.

Name:  Barrington-20120708-00040.jpg
Views: 1288
Size:  106.6 KB


Name:  Barrington-20120708-00041.jpg
Views: 1305
Size:  110.2 KB

Name:  Barrington-20120708-00042.jpg
Views: 1287
Size:  102.9 KB
 
  #10  
Old 07-10-2012 | 03:15 PM
NikosF's Avatar
Thread Starter
|
Registered User
Joined: Feb 2012
Posts: 89
From: Chicago, IL
Rep Power: 16
NikosF is infamous around these parts
and a 3-car garage, can now fit 4 cars.

Name:  Barrington-20120708-00044-1.jpg
Views: 1906
Size:  152.6 KB
 
  #11  
Old 07-10-2012 | 05:15 PM
BrandonH's Avatar
Registered User
Joined: Apr 2012
Posts: 590
From: Sunshine State
Rep Power: 49
BrandonH has much to be proud ofBrandonH has much to be proud ofBrandonH has much to be proud ofBrandonH has much to be proud ofBrandonH has much to be proud ofBrandonH has much to be proud ofBrandonH has much to be proud ofBrandonH has much to be proud ofBrandonH has much to be proud ofBrandonH has much to be proud of
Nicely done...
 
  #12  
Old 07-11-2012 | 11:25 AM
GT3Racerich's Avatar
Registered User
Joined: Aug 2005
Posts: 153
From: L.I., NY
Rep Power: 0
GT3Racerich is infamous around these parts
Could I ask how long the the wire for the 220 is. I am building a new garage and want to have the 220 receptacle in the correct place.
Thanks, Rich
 
  #13  
Old 07-12-2012 | 03:07 PM
TXTurbo996's Avatar
Registered User
Joined: May 2008
Posts: 535
From: Dallas TX
Rep Power: 49
TXTurbo996 has much to be proud ofTXTurbo996 has much to be proud ofTXTurbo996 has much to be proud ofTXTurbo996 has much to be proud ofTXTurbo996 has much to be proud ofTXTurbo996 has much to be proud ofTXTurbo996 has much to be proud ofTXTurbo996 has much to be proud ofTXTurbo996 has much to be proud of
Looks great. I've been thinking about doing this for quite some time, as I've got a 3 car tandem garage, the front bay would be perfect for this.
 
  #14  
Old 07-12-2012 | 08:35 PM
live2boutside's Avatar
Registered User
Joined: Jul 2007
Posts: 58
From: Charles Town, WV
Rep Power: 20
live2boutside is infamous around these parts
Originally Posted by NikosF
Tighten cable and complete assembly.


The bottom two pictures show a black unit with pads .... what does this do? Is it located in it's final position? Does this enable you to lift one set of wheels up off of the ramp?

Thanks.
 
  #15  
Old 07-12-2012 | 09:43 PM
bonecrrusher's Avatar
Registered User
Joined: Oct 2010
Posts: 104
From: Charlotte NC
Rep Power: 19
bonecrrusher is infamous around these parts
That is probably an airbag jack that allows you to lift the car up off the lift to work on it.

I've seen some 4 post lifts with 2 of those installed.


You have already rated this thread Rating: Thread Rating: 0 votes,  average.

Quick Reply: Lift installed


All times are GMT -6. The time now is 10:38 AM.