Notices
Garage Forum Share pictures of your garage with the rest of the 6speedonline members. Learn about Garage flooring, painting, art, and more in this forum.

Country Home "Man Cave"...

Thread Tools
 
Search this Thread
 
Rate Thread
 
  #1  
Old 03-27-2013 | 08:05 PM
NTIMD8's Avatar
Thread Starter
|
Registered User
Joined: Oct 2012
Posts: 738
From: Canada
Rep Power: 63
NTIMD8 has a reputation beyond reputeNTIMD8 has a reputation beyond reputeNTIMD8 has a reputation beyond reputeNTIMD8 has a reputation beyond reputeNTIMD8 has a reputation beyond reputeNTIMD8 has a reputation beyond reputeNTIMD8 has a reputation beyond reputeNTIMD8 has a reputation beyond reputeNTIMD8 has a reputation beyond reputeNTIMD8 has a reputation beyond reputeNTIMD8 has a reputation beyond repute
Country Home "Man Cave"...

We have a beautiful country home on the lake which has a rather large garage. The Garage is essentially separated into 2 parts as illustrated below...


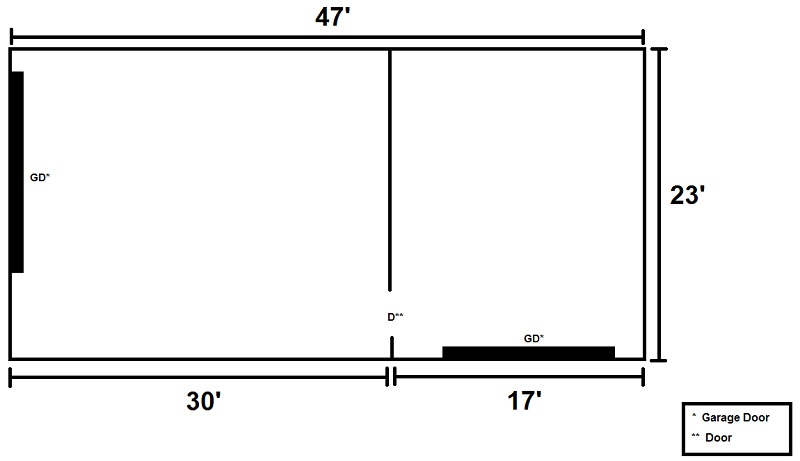
While the house itself is beautiful the garage was just that. The original owner was a wood worker and the garage was used as his work shop. Nothing fancy just function. I was thinking about taking the wall down and making the entire garage a "Man Cave" but the fact that I need a place to store the boat, snow blower, ATVs, Snow Mobiles etc made me come to the realization that I am bet to keep the large portion as is and concentrate on the smaller 17x23 portion.
 
Attached Images  
  #2  
Old 03-27-2013 | 08:20 PM
NTIMD8's Avatar
Thread Starter
|
Registered User
Joined: Oct 2012
Posts: 738
From: Canada
Rep Power: 63
NTIMD8 has a reputation beyond reputeNTIMD8 has a reputation beyond reputeNTIMD8 has a reputation beyond reputeNTIMD8 has a reputation beyond reputeNTIMD8 has a reputation beyond reputeNTIMD8 has a reputation beyond reputeNTIMD8 has a reputation beyond reputeNTIMD8 has a reputation beyond reputeNTIMD8 has a reputation beyond reputeNTIMD8 has a reputation beyond reputeNTIMD8 has a reputation beyond repute
It should be noted that this will be a modest garage (nothing too crazy) and I am doing all the work myself so I have a lot of learning to do.

Here is the entire garage...


The portion I am going to leave alone. It will be used for normal cottage use...


Here is the side that I am going to make into my man cave...


In this pic the gutting has already took place.


Here are the shelves and cupboards we took out...
Garbage...


These I am going to keep. Paint them black with new handles and will use on this side of the garage for storage.


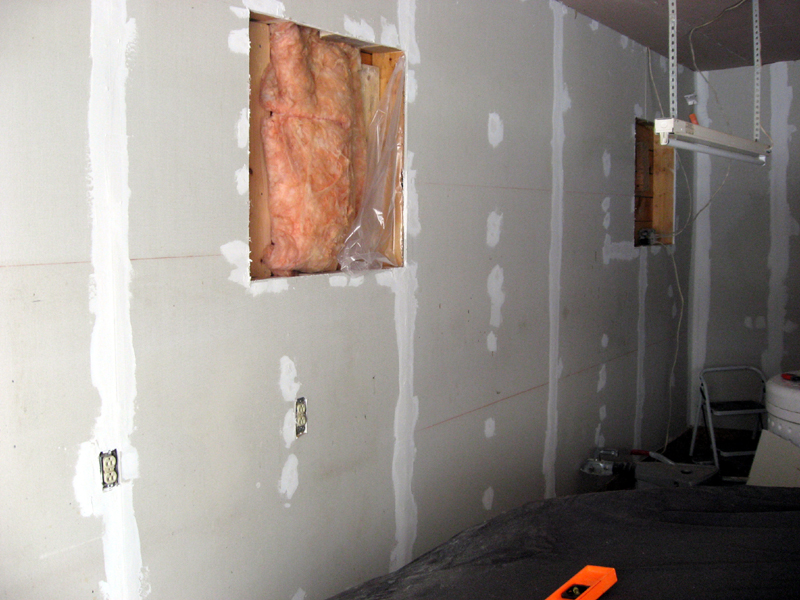
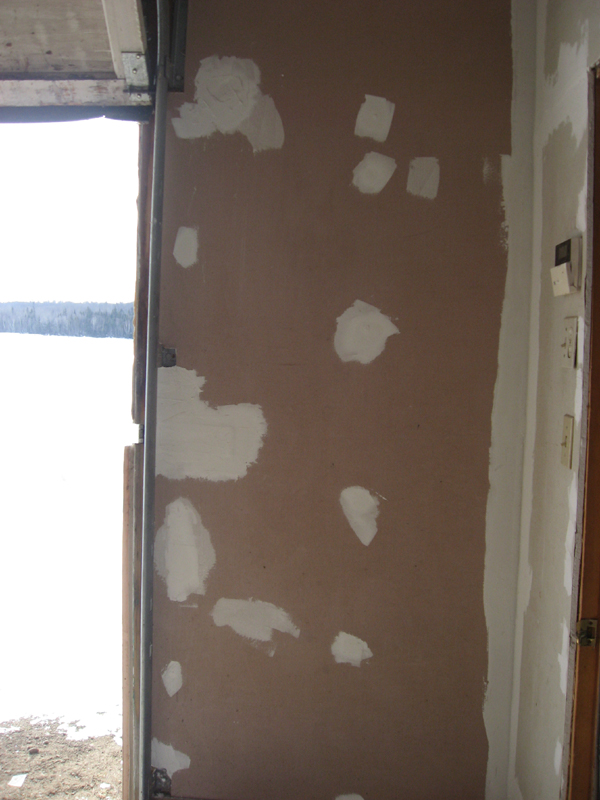
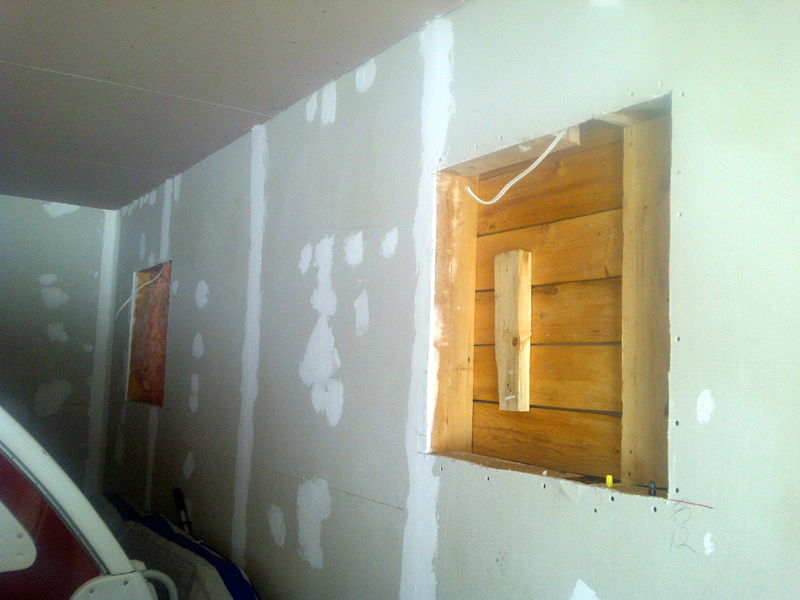
Here you can see the condition of the walls. Lots of time consuming work is going to need to happen to get it how I want it...


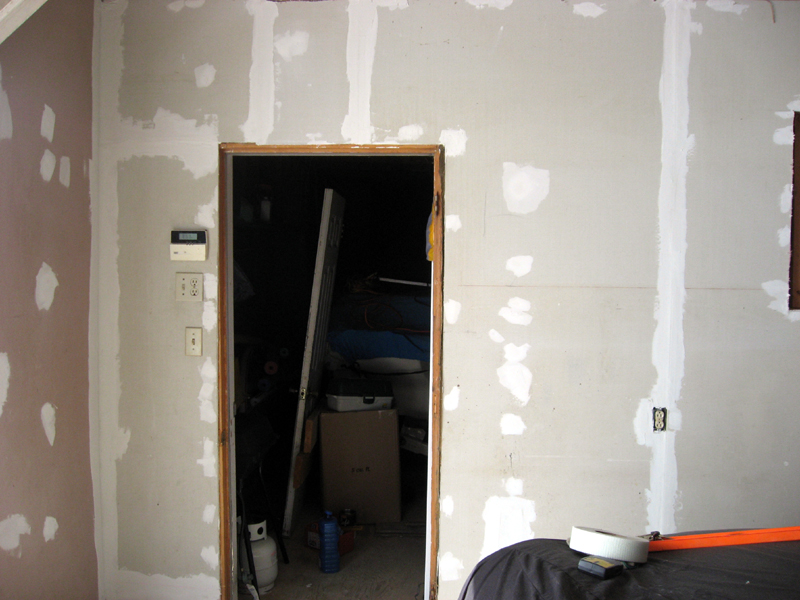
Here are some pictures of after the first tape and mud coat one one side...


Here is a before and after of the same corner....


Attached Images                        
  #3  
Old 03-27-2013 | 08:25 PM
NTIMD8's Avatar
Thread Starter
|
Registered User
Joined: Oct 2012
Posts: 738
From: Canada
Rep Power: 63
NTIMD8 has a reputation beyond reputeNTIMD8 has a reputation beyond reputeNTIMD8 has a reputation beyond reputeNTIMD8 has a reputation beyond reputeNTIMD8 has a reputation beyond reputeNTIMD8 has a reputation beyond reputeNTIMD8 has a reputation beyond reputeNTIMD8 has a reputation beyond reputeNTIMD8 has a reputation beyond reputeNTIMD8 has a reputation beyond reputeNTIMD8 has a reputation beyond repute
Niches cut out and framed that will hold some art work...


Attached Images    
  #4  
Old 03-27-2013 | 08:28 PM
NTIMD8's Avatar
Thread Starter
|
Registered User
Joined: Oct 2012
Posts: 738
From: Canada
Rep Power: 63
NTIMD8 has a reputation beyond reputeNTIMD8 has a reputation beyond reputeNTIMD8 has a reputation beyond reputeNTIMD8 has a reputation beyond reputeNTIMD8 has a reputation beyond reputeNTIMD8 has a reputation beyond reputeNTIMD8 has a reputation beyond reputeNTIMD8 has a reputation beyond reputeNTIMD8 has a reputation beyond reputeNTIMD8 has a reputation beyond reputeNTIMD8 has a reputation beyond repute
Finished the 1st coat of mud, replaced all drywall that was not fixable and patched sections that were missing drywall. Next is a light sand then a second coat of mud and then another slight sanding and final coat of mud and final sanding. The ceiling is not going to be fun.


Attached Images     
  #5  
Old 03-27-2013 | 08:36 PM
NTIMD8's Avatar
Thread Starter
|
Registered User
Joined: Oct 2012
Posts: 738
From: Canada
Rep Power: 63
NTIMD8 has a reputation beyond reputeNTIMD8 has a reputation beyond reputeNTIMD8 has a reputation beyond reputeNTIMD8 has a reputation beyond reputeNTIMD8 has a reputation beyond reputeNTIMD8 has a reputation beyond reputeNTIMD8 has a reputation beyond reputeNTIMD8 has a reputation beyond reputeNTIMD8 has a reputation beyond reputeNTIMD8 has a reputation beyond reputeNTIMD8 has a reputation beyond repute
This is the box I am going to use for the main light. It is currently 12" thick but I am going to modify it to be 6" thick and going to paint it black since the garage is going to be grey and black.


Cut the light box down to 6" and removed the backing from the portion I am not going to use...


Attached the backing to the portion I am going to use...


Affixed the light fixture into the light box...

 
Attached Images     
  #6  
Old 03-27-2013 | 08:40 PM
NTIMD8's Avatar
Thread Starter
|
Registered User
Joined: Oct 2012
Posts: 738
From: Canada
Rep Power: 63
NTIMD8 has a reputation beyond reputeNTIMD8 has a reputation beyond reputeNTIMD8 has a reputation beyond reputeNTIMD8 has a reputation beyond reputeNTIMD8 has a reputation beyond reputeNTIMD8 has a reputation beyond reputeNTIMD8 has a reputation beyond reputeNTIMD8 has a reputation beyond reputeNTIMD8 has a reputation beyond reputeNTIMD8 has a reputation beyond reputeNTIMD8 has a reputation beyond repute
The wiring is all done. All the wiring that was outside of the walls have been removed, added switches and plug boxes and wired up the main light source, the track light and the pot lights.

The main light sourece wired in. I will remove the 2 boxes and patch the drywall once the car and trailer are out of the garage.


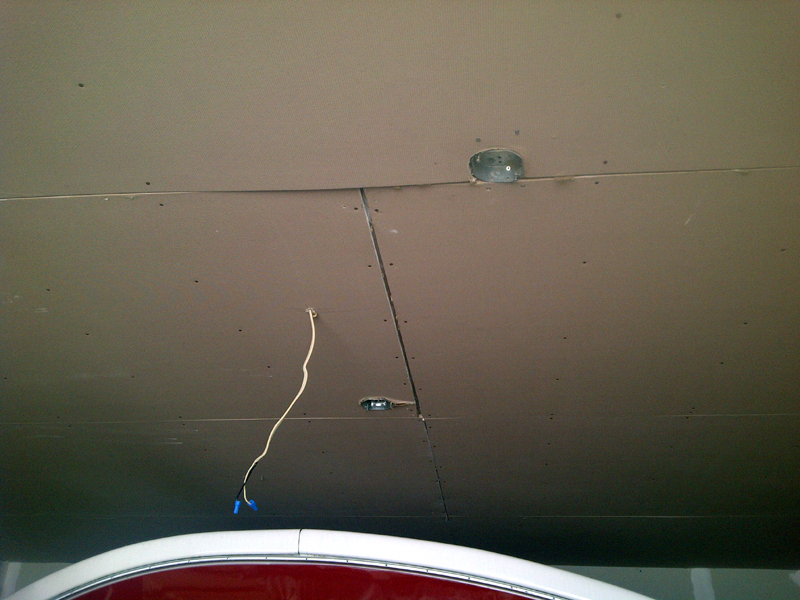
Wiring for the pot lights in the niches...


Attached Images    
  #7  
Old 03-27-2013 | 08:43 PM
NTIMD8's Avatar
Thread Starter
|
Registered User
Joined: Oct 2012
Posts: 738
From: Canada
Rep Power: 63
NTIMD8 has a reputation beyond reputeNTIMD8 has a reputation beyond reputeNTIMD8 has a reputation beyond reputeNTIMD8 has a reputation beyond reputeNTIMD8 has a reputation beyond reputeNTIMD8 has a reputation beyond reputeNTIMD8 has a reputation beyond reputeNTIMD8 has a reputation beyond reputeNTIMD8 has a reputation beyond reputeNTIMD8 has a reputation beyond reputeNTIMD8 has a reputation beyond repute
With any luck enough snow has melted so that I can move the Porsche to the other side of the garage and take the trailer out so I can work on the ceiling.
 
  #8  
Old 03-30-2013 | 05:48 PM
NTIMD8's Avatar
Thread Starter
|
Registered User
Joined: Oct 2012
Posts: 738
From: Canada
Rep Power: 63
NTIMD8 has a reputation beyond reputeNTIMD8 has a reputation beyond reputeNTIMD8 has a reputation beyond reputeNTIMD8 has a reputation beyond reputeNTIMD8 has a reputation beyond reputeNTIMD8 has a reputation beyond reputeNTIMD8 has a reputation beyond reputeNTIMD8 has a reputation beyond reputeNTIMD8 has a reputation beyond reputeNTIMD8 has a reputation beyond reputeNTIMD8 has a reputation beyond repute
Drywalled the niches and got the second coat of mud on. Also got rid of the ugly wood that was around the bottome of the walls.


Attached Images    
  #9  
Old 04-06-2013 | 07:45 PM
NTIMD8's Avatar
Thread Starter
|
Registered User
Joined: Oct 2012
Posts: 738
From: Canada
Rep Power: 63
NTIMD8 has a reputation beyond reputeNTIMD8 has a reputation beyond reputeNTIMD8 has a reputation beyond reputeNTIMD8 has a reputation beyond reputeNTIMD8 has a reputation beyond reputeNTIMD8 has a reputation beyond reputeNTIMD8 has a reputation beyond reputeNTIMD8 has a reputation beyond reputeNTIMD8 has a reputation beyond reputeNTIMD8 has a reputation beyond reputeNTIMD8 has a reputation beyond repute
First coat of mud/tape on the niches. Used plastic corner pieces for the outside corners. What a pain...


Attached Images   
  #10  
Old 04-07-2013 | 05:28 PM
NTIMD8's Avatar
Thread Starter
|
Registered User
Joined: Oct 2012
Posts: 738
From: Canada
Rep Power: 63
NTIMD8 has a reputation beyond reputeNTIMD8 has a reputation beyond reputeNTIMD8 has a reputation beyond reputeNTIMD8 has a reputation beyond reputeNTIMD8 has a reputation beyond reputeNTIMD8 has a reputation beyond reputeNTIMD8 has a reputation beyond reputeNTIMD8 has a reputation beyond reputeNTIMD8 has a reputation beyond reputeNTIMD8 has a reputation beyond reputeNTIMD8 has a reputation beyond repute
Second coat of mud on the niches. Man this part is not fun.


Attached Images   
  #11  
Old 04-20-2013 | 02:52 PM
NTIMD8's Avatar
Thread Starter
|
Registered User
Joined: Oct 2012
Posts: 738
From: Canada
Rep Power: 63
NTIMD8 has a reputation beyond reputeNTIMD8 has a reputation beyond reputeNTIMD8 has a reputation beyond reputeNTIMD8 has a reputation beyond reputeNTIMD8 has a reputation beyond reputeNTIMD8 has a reputation beyond reputeNTIMD8 has a reputation beyond reputeNTIMD8 has a reputation beyond reputeNTIMD8 has a reputation beyond reputeNTIMD8 has a reputation beyond reputeNTIMD8 has a reputation beyond repute
Coat number one billion on the niches. Kill me! lol


Attached Images    
  #12  
Old 04-28-2013 | 07:07 PM
NTIMD8's Avatar
Thread Starter
|
Registered User
Joined: Oct 2012
Posts: 738
From: Canada
Rep Power: 63
NTIMD8 has a reputation beyond reputeNTIMD8 has a reputation beyond reputeNTIMD8 has a reputation beyond reputeNTIMD8 has a reputation beyond reputeNTIMD8 has a reputation beyond reputeNTIMD8 has a reputation beyond reputeNTIMD8 has a reputation beyond reputeNTIMD8 has a reputation beyond reputeNTIMD8 has a reputation beyond reputeNTIMD8 has a reputation beyond reputeNTIMD8 has a reputation beyond repute
Last coat of mud before sanding. The the cieling and then primer and more mud. Way more work than I thought it would be...


Pot lights in...


Attached Images        
  #13  
Old 06-09-2013 | 10:44 AM
NTIMD8's Avatar
Thread Starter
|
Registered User
Joined: Oct 2012
Posts: 738
From: Canada
Rep Power: 63
NTIMD8 has a reputation beyond reputeNTIMD8 has a reputation beyond reputeNTIMD8 has a reputation beyond reputeNTIMD8 has a reputation beyond reputeNTIMD8 has a reputation beyond reputeNTIMD8 has a reputation beyond reputeNTIMD8 has a reputation beyond reputeNTIMD8 has a reputation beyond reputeNTIMD8 has a reputation beyond reputeNTIMD8 has a reputation beyond reputeNTIMD8 has a reputation beyond repute
Ceiling almost done. I can see the light at the end of the tunnel.

 
Attached Images  
  #14  
Old 06-09-2013 | 10:51 AM
0-60freak's Avatar
Registered User
Joined: Jun 2013
Posts: 99
From: Montgomery Tx
Rep Power: 19
0-60freak is a glorious beacon of light0-60freak is a glorious beacon of light0-60freak is a glorious beacon of light0-60freak is a glorious beacon of light0-60freak is a glorious beacon of light
You better put some very heavy texture to cover up the tape and float job
 
  #15  
Old 06-09-2013 | 07:17 PM
NTIMD8's Avatar
Thread Starter
|
Registered User
Joined: Oct 2012
Posts: 738
From: Canada
Rep Power: 63
NTIMD8 has a reputation beyond reputeNTIMD8 has a reputation beyond reputeNTIMD8 has a reputation beyond reputeNTIMD8 has a reputation beyond reputeNTIMD8 has a reputation beyond reputeNTIMD8 has a reputation beyond reputeNTIMD8 has a reputation beyond reputeNTIMD8 has a reputation beyond reputeNTIMD8 has a reputation beyond reputeNTIMD8 has a reputation beyond reputeNTIMD8 has a reputation beyond repute
Ya for sure. There are a couple of first coat products that smoothen out the imperfections. Im going to use a couple of coats of that stuff first.


You have already rated this thread Rating: Thread Rating: 0 votes,  average.

Quick Reply: Country Home "Man Cave"...


All times are GMT -6. The time now is 03:41 PM.