When you click on links to various merchants on this site and make a purchase, this can result in this site earning a commission. Affiliate programs and affiliations include, but are not limited to, the eBay Partner Network.
Starting a thread to document the Installation of a front and back camera design for my 991 C2S. I plan to address the design, installation and issues associated with the project.
I also want to give credit to the numerous other threads that have been helpful so far in planning this. Jawells especially since his threads on various dis-assembly of the front bumper cover and PCM removal have proved invaluable. Where applicable I'm going to provide links to the original authors so as to minimize repeating.
I'm doing a little more than simply installing a backup camera as I'm also going to install a front facing camera to help out with the curbs etc.
I purchased the NAV-TV PCM 3.1XG package which apparently has been updated recently and claims to handle a front camera. I plan to provide a summary of my experiences (some good and some bad so far) with NAV-TV.
Along with the NAV-TV PCM 3.1XG I also purchased the CAM06 which is the recommended backup camera.
Also purchased are the Alpine Front/Rear Camera system which consists of the HCE-212F and HCD-210RD. More on this to come.
The Design
Originally I intended to just install the NAV-TV package, but when I started investigating the solution for the front camera I came across some interesting equipment. I found that Alpine makes a front and rear camera solution that provides multiple viewing modes of operation: Wideview, Look down and Corner View. It uses an additional integration box that I suspect does the image processing and control of the cameras to get these additional viewing modes.
The "look down" is obviously of interest for a front cam that is intended to avoid curbs etc.
The "corner view" is interesting as well for both front and back. It provides a split view at the far left and right sides of the camera view. When positioned properly, it gives you the ability to see around the corner (sorta).. Very helpful if you park in places where your exit visibility is low. For example I often park where I get a couple of SUV's on either side and just backing out you have to poke your butt out a little just to see on coming traffic. Same goes for front view when exiting a driveway where your view is obstructed.
So my first goal is to determine if I can use just the Alpine equipment as front and back (possibly not using the CAM06). Or because of the way the system is integrated I may need to install all three cameras to get automatic backup camera showing on the PCM display. I'll go into those issues in more detail.
My goal is to document and provide a reference for others in the future, since the actual documentation and examples for installation on any Porsche seems to be lacking.
The Equipment
Over the weekend I received my NAV TV PCM 3.1XG and CAM 06 equipment. (pictures attached).
I also purchased the Alpine HCE-212F (front camera) and Alpine HCE-210RD (rear camera). The front camera is sold with an additional Integration box that the camera plugs into. The Rear camera is also plugged into the integration box. Note the cameras themselves don't have an NTSC out. The integration box provides a single video out.
Also provided with the Front Camera and Integration box is a control switch that selects the viewing mode for each camera. This will need to be mounted somewhere. I plan to install either in my center console box, or in the change cup in the center console. I haven't decided yet.
In a separate post I'll post my schematics to make this a bit easier to follow.
The first picture is of the PCM 3.1-XG equipment. It consists of the following equipment out of the box. Later I will explain how it all works together in terms of operating theory, features and limitations.
1) PCM 3.1 Breakout Integration Harness - THis harness is inserted between the original Porsche harness and the PCM unit. THis contains a connection to the PCM 3.1XG Sub harness and a number of other connections such as Video IN/Out and various signals. Some needed and some not.
2) PCM 3.1XG Module harness - This Connects the PCM 3.1-XG module to the Main PCM Breakout Harness.
3) PCM 3.1-XG Module - This unit is labeled NTV-ASY166. If you search NAV-TV documentation you will find this same module referenced in different kits for different cars. My guess is that this is a common module and contains different software depending on the target car.
4) USB Cable - Presumably to update the NTV-ASY166 if required.
5) Instruction Sheet -. I couple of photocopy pages. Presumably the instructions for installation. This official documentation is rather thin and vague. Even the picture on the front isn't for a 911, it is I think a Cayanne. More on my experience and perceptions of NAV-TV to follow. Let's just say in terms of completeness they leave a lot to be desired.
The second picture is of what comes out of the box for the CAM 06
1) Rear camera module - My understanding is that this is a Sony Camera.
2) Extension cable - One end connects to the camera, the other has a standard RCA connector for the Video and another breakout connector for the power. Looks to be about 10 or 15 feet long.
3) Package of templates - I think these are templates for the camera cutout required.
Ahh, a race to the finish, see who can run wire through the cabin more elegantly??
Thank you for the post. Seems we are on the same mission -- however I've decided to stick with the rear camera only at this point. I do want to eventually tie-in a front, but need to work-out a design which includes recording and archiving drives. Maybe over the winter!
Not sure if you received same, but here is a pic of a 991 CAB that NAV-TV installed some front gear not long ago. Yes, they did it in their own shop. Actually looks pretty cool. Ward (NAV-TV rep) sent this to me.
Good luck on your project! I'll avoid being redundant and document only those steps in my own project that I feel may differ from yours.
Well I wasn't intending it to be a competition. But I figure if nothing else we can share some info along the way and help each other out.. I wouldn't worry about redundancy, I've found that there are multiple ways to do anything.. so often just another perspective on something can be helpful to people. And worst case a little redundancy isn't terrible.. it isn't like there isn't already 50 threads the same on things like wheels, spoilers and exhausts. A couple on cameras certainly isn't going to hurt.
I suspect you will be much more detailed and professional than I. But since I'm mine is going to work out to be a little more complicated with the addition of the Multimode camera it might be useful to someone in the future..
No I haven't seen that pic. Interesting... Not sure exactly what the mounting around the camera is. Do you know what kind of camera that is?
As for cable routing.. I spent some time on sunday poking around and looking at various photos. It looks like there is a channel of some type that feeds the OEM harness back on each side to the tail lights. And I think (haven't verified) that between the tail lights and the rear speakers there is probably a channel since the OEM harness already runs the same route. Also it is nice because it avoids any issues with heat near the engine.
I'm pretty sure from tail light area it is easy to get the cable down to where the camera needs to go on the bumper. And it looks like it would be relatively easy to get the cable into that rear speaker area from the center tunnel (with the seat out I think just drilling a hole at the base of that panel will get me into the same cavity.
If that doesn't work out it will be to drill a hole as high as I can on the rear bulkhead behind the seats which will enter the engine compartment.
I'll let you know what I find out if you don't beat me to it
May I suggest maybe find a way to add dash cam feature to your front camera? Really useful if some one back into you or in case of accident.
I look forward to your install thread.
Yeah, Interesting question that I've been thinking about this one for a while..
The way I'm approaching this is that I'm not sure I necessarily need to integrate a dash cam into the PCM. I think the primary reason to integrate the front/rear is to be able to view the video live during parking or a few other situations.
Anything that doesn't need to be viewed live can be handled with a setup that is stand alone and it's media can be accessed off line when necessary. In fact I was contemplating splitting the video and running it to some kind of solid state DVR, then I realized that in general the Front/Rear cams are only powered/energized when selected or backing up. Which kind of makes recording via them useless. I suppose I could see if I could force the front camera to be powered on anytime the ignition is on, and then feed the video to a DVR.
So I think the simplistic approach is some kind of separate or and self contained camera/DVR combination. The simple solution of course is some kind of stick on GoPro.. But that would be an ugly and unacceptable solution to me unless I could find something that was sleek and fit on the side of the dash. Something small, obscure and self contained that was on the back of the Rear view mirror. But I'm not one who likes cluttering up my dash with stuff. (I don't even stick my Toll/Fasttrack transponder to the front window, as I leave it in the console and pull it out when necessary).
I'm going to think about this a bit, possibly I could always power the front camera and find a simple little DVR solution that takes in video and stores to a SD card. Maybe make it accessible in glove box.
I agree. As a separate unit, maybe another camera next to the front camera with SD card unit/DVR in glove box or frunk. No need to access it unless something bad happens.
Well I wasn't intending it to be a competition. But I figure if nothing else we can share some info along the way and help each other out.. I wouldn't worry about redundancy, I've found that there are multiple ways to do anything.. so often just another perspective on something can be helpful to people. And worst case a little redundancy isn't terrible.. it isn't like there isn't already 50 threads the same on things like wheels, spoilers and exhausts. A couple on cameras certainly isn't going to hurt.
I suspect you will be much more detailed and professional than I. But since I'm mine is going to work out to be a little more complicated with the addition of the Multimode camera it might be useful to someone in the future..
No I haven't seen that pic. Interesting... Not sure exactly what the mounting around the camera is. Do you know what kind of camera that is?
As for cable routing.. I spent some time on sunday poking around and looking at various photos. It looks like there is a channel of some type that feeds the OEM harness back on each side to the tail lights. And I think (haven't verified) that between the tail lights and the rear speakers there is probably a channel since the OEM harness already runs the same route. Also it is nice because it avoids any issues with heat near the engine.
I'm pretty sure from tail light area it is easy to get the cable down to where the camera needs to go on the bumper. And it looks like it would be relatively easy to get the cable into that rear speaker area from the center tunnel (with the seat out I think just drilling a hole at the base of that panel will get me into the same cavity.
If that doesn't work out it will be to drill a hole as high as I can on the rear bulkhead behind the seats which will enter the engine compartment.
I'll let you know what I find out if you don't beat me to it
I was kidding, of course! Geez.
Well, I should know tonight if the theory that we can go through the interior into the taillight space pans out. that is my preferred method, and on the 997's that was the way to go. The 997 has a rubber grommet where wires to the taillight harness go through, and you could ride that. Del-Ray Customs did one like this and there is a video of the install on YouHoob. Once into the taillight area, there is plenty of space to get down into the bumber cover to the middle, without going near the hotter areas of the rear. We'll see!
I've been looking at NAV-TV and their solutions for about a year now. And I thought I'd provide my observations so far as it relates to my experiences so far (prior to installation). I'll update it once I complete the installation to address issues and support if necessary. I will start by stating I have no desire to trash anyone, just providing my opinion as a consumer. So should someone from the mentioned companies read, consider it as constructive criticism.
I'll start by saying that I'm an Engineer, so just by nature I want to figure out how it is going to work, even if I decided I was going to be lazy and have someone else do the installation. So the concept of going to an installer and asking them for their recommendation and then taking what they have is not something I would ever do.
With that premise, I find I struggle with almost everyone in the entire aftermarket electronics industry. I looked at outfits like Tadi bros and it was so difficult to even figure out what it was they offered that I decided not to waste my time on them. Yeah I could call them but honestly I use websites to decide if I even want to waste my time.
NAV-TV had credibility with me because there are lots of people (mostly non Porsche) who have their equipment. So from a technical standpoint I believed their stuff would work. The major issue I had with NAV-TV is that their website is a mess, and unless you have some idea what you want it is something of an Easter egg hunt.
Worse yet with NAV-TV even when you find the information you want, you are never quite sure if it is correct or not. For example with the PCM 3.1-XG most of the documentation and references are to non-911's. But in this case I've read the press releases and it was clear the PCM 3.1-XG equipment (which seems to be a decedent of the PCM 3.1 equipment) was the correct equipment.
That said, it is a bit bewildering as there are several different PCM 3.1 related products. Eventually I found out that some were not really backup camera solutions, but video integration units if you are so inclined to feed multiple video sources. Seems like they were more about getting TV or DVD on your PCM display which isn't my interest. Looks like they could half be made to half *** work, but not automatically. Others were partially compatible and to be made to work you had to tear open (voiding the warranty on the PCM) and insert internal cables/circuit boards to make it work. No thanks I'm reasonably confident the PCM will fail before my extended warranty is up. Not going that route.
Bottom line, if they cleaned up their websites and put in a simple selection guide (i.e. if you want this, then this is the product) it would help out.
Quality of documentation - This is something of a joke. It supplies about 1/2 of what you need to know, and even at that you are left wondering if it is correct. You go back to the website hoping that there is more information somewhere, but it doesn't exist. Yeah I could call tech support, but for me that is usually a last resort. So for me, I sorta know enough and then I'll experiment once I get it hooked up to understand exactly how the unit will behave.
Sales Process - I did ask a couple of questions by email when I was trying to figure out what equipment I wanted. The responses I got answered generally about 2/3 of what I asked. And when I asked for the additional information which was rather simple, there was always a "call me" instead of just answering the simple question. So my judgement was it was ok but not stellar.
Ordering - I ordered equipment on line from their website. First thing which kinda pissed me off was that when I created an account and then added the equipment to my cart. The prices were more expensive than were shown on the website. So if you log out you got prices that were lower. So I had to add the equipment to my cart, then log in to make the purchases. Otherwise the Kit + Camera would have cost me about $150.. I won't say that I think they do it on purpose to fool you, but it looked a little shady.
Once I placed the order I got an invoice via email. Checked it over and was fine. Got another email when the equipment shipped. Oh oh, looked at it and my address was wrong. Good thing I checked otherwise I would have never gotten my equipment. The cust svc people were helpful and since it had already been shipped were able to route correctly via UPS.
Summary of Initial Impression - Look like they have decent products. But a little amateurish in many ways. Kinda reminds me of buying something from china, not in Florida. I suspect the entire company probably consists of a couple of guys and their families. So they could probably use some professional help in upgrading their customer experience so it doesn't seem so much like a garage shop.
But if the products work, I will forget about all of this pretty quickly.
Well, I should know tonight if the theory that we can go through the interior into the taillight space pans out. that is my preferred method, and on the 997's that was the way to go. The 997 has a rubber grommet where wires to the taillight harness go through, and you could ride that. Del-Ray Customs did one like this and there is a video of the install on YouHoob. Once into the taillight area, there is plenty of space to get down into the bumber cover to the middle, without going near the hotter areas of the rear. We'll see!
Yeah I spent the evening last night searching for pics. From everything I could see, it looks like the 991 routes the harness fairly similarly to the 997 (and 996's) right over the rear wheel and back to the tail light grommet you referred to. At least with Coupe's.. (With a Cab I'm not sure as the entire roof mechanism occupies that space.)
I'm fairly confident now this route is the best approach.
From the grommet at the tail light to the rear speaker area looks to be fairly short run to the rear speaker area (as the rat crawls..). First thing I'm going to do is run a fish tape from the tail light into that speaker cavity to see if there are any obstructions. Looks like it may be kind of an arc path over the wheel well.
Any idea how to get the rear speaker out? I suspect it is just pops out by prying with a small interior panel tool.
I did my own exploration last night, and yes, running the wire to the passenger rear taillight from rear of cabin is the way to go. I took some pics as i explored, and will post those when I get some time later today....
Ahh, a race to the finish, see who can run wire through the cabin more elegantly?? Thank you for the post. Seems we are on the same mission -- however I've decided to stick with the rear camera only at this point. I do want to eventually tie-in a front, but need to work-out a design which includes recording and archiving drives. Maybe over the winter! Not sure if you received same, but here is a pic of a 991 CAB that NAV-TV installed some front gear not long ago. Yes, they did it in their own shop. Actually looks pretty cool. Ward (NAV-TV rep) sent this to me. Good luck on your project! I'll avoid being redundant and document only those steps in my own project that I feel may differ from yours.
I did my own exploration last night, and yes, running the wire to the passenger rear taillight from rear of cabin is the way to go. I took some pics as i explored, and will post those when I get some time later today....
Cool, looking forward to seeing them... just in time, as I'm going to start my install on Saturday...
As promised, I poked-around recently looking to identify the best routing for wiring-up the NAV-TV back-up camera, CAM06, and I took some pics while exploring. (sorry for the quality, as I am just using my iPhone!)
Anyways, these might help you out, maybe not.... What I haven't done yet is actually route a cable through, so if I don't get to that today perhaps you will be able to show us how it's done on Saturday. I may not get back to this project due to traveling the entire next week.
So, first pic is the location on the passenger side of my C4S back shelf where I am focusing. I intend to run the camera power cablling from the PCM XG interface to the passenger fuse-box (for power) and then down passenger side to this location.
Looking a bit more closely at this area, you'll notice a void behind where the interior trim pieces "meet" under the window. Don't let the pictures deceive you! This space is "tiny" and me having big hands I had a really hard time moving my hand around in this space. What you want to do is push your hand back there, bending the trim pieces out of the way with your arm.... Here's a pic of my target....
I figured I would just push my hand back in there and magically a rubber grommet running wires into the rear light / engine bay area would just fall right into my hand! But honestly, I moved my hand all around back there, and I never found anything other than a rubber clip that was just laying back there, and a bunch of sharp edges that nicked my hand up pretty good!
So, thinking it would help to have some eyes in there, I stuck my iPhone back there and snapped the following pic....
I just couldn't get my hand / iPhone any further back there for a better look! But again, I think this is the right area to be focusing on. I indicate a plug that might be the ticket, but it is a hard-plastic and not rubber, so we may not want to break it out of there....
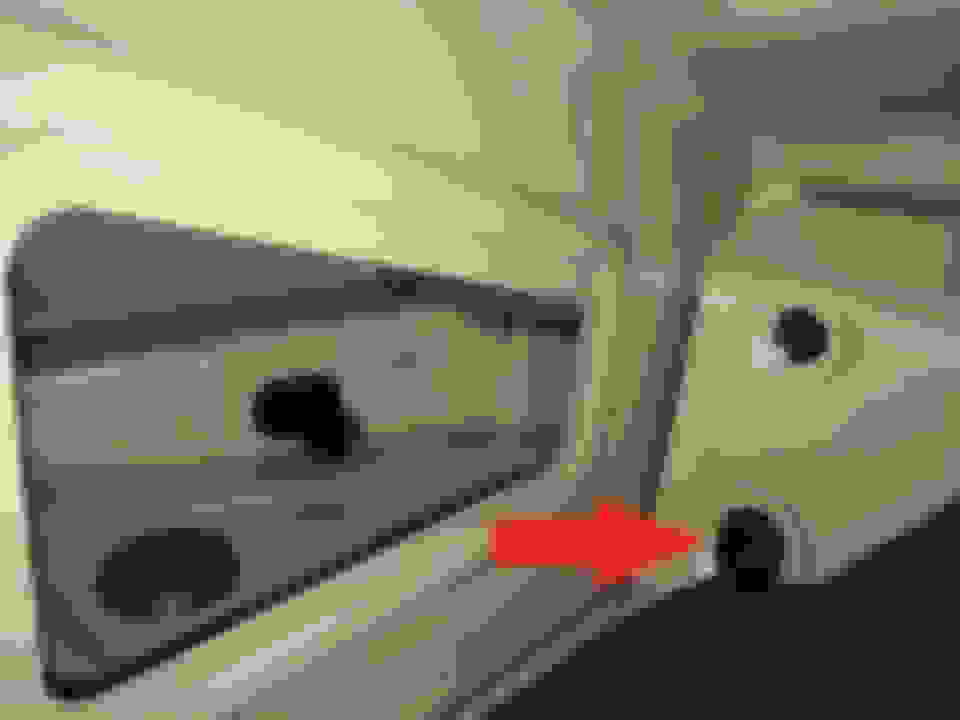
From the other end of business, I thought maybe I could identify the location by snapping a few pics from the taillight area. I literally just stuck my iPhone up against the hole where the taillight rubber grommet connects, and tried to get a good shot.
First pic i took is where I was pushing a white coat-hanger back into the space to see what might be behind the foam... (circled).
Then I put the iPhone up closer and took a better shot of the space. I note the first area I was poking-at to the upper-left, and then on the right a hard-plastic plug of some sort that maybe is what I was seeing from the other side. Not sure.
If I have any time later today, I'll poke around a bit more... I would really like to get this resolved as soon as possible. So far I am estimating that the actual install will take an hour or less. Getting the cabling through this little space gracefully will take longer....

 09-09-2014, 01:59 PM


 But honestly, I moved my hand all around back there, and I never found anything other than a rubber clip that was just laying back there, and a bunch of sharp edges that nicked my hand up pretty good!